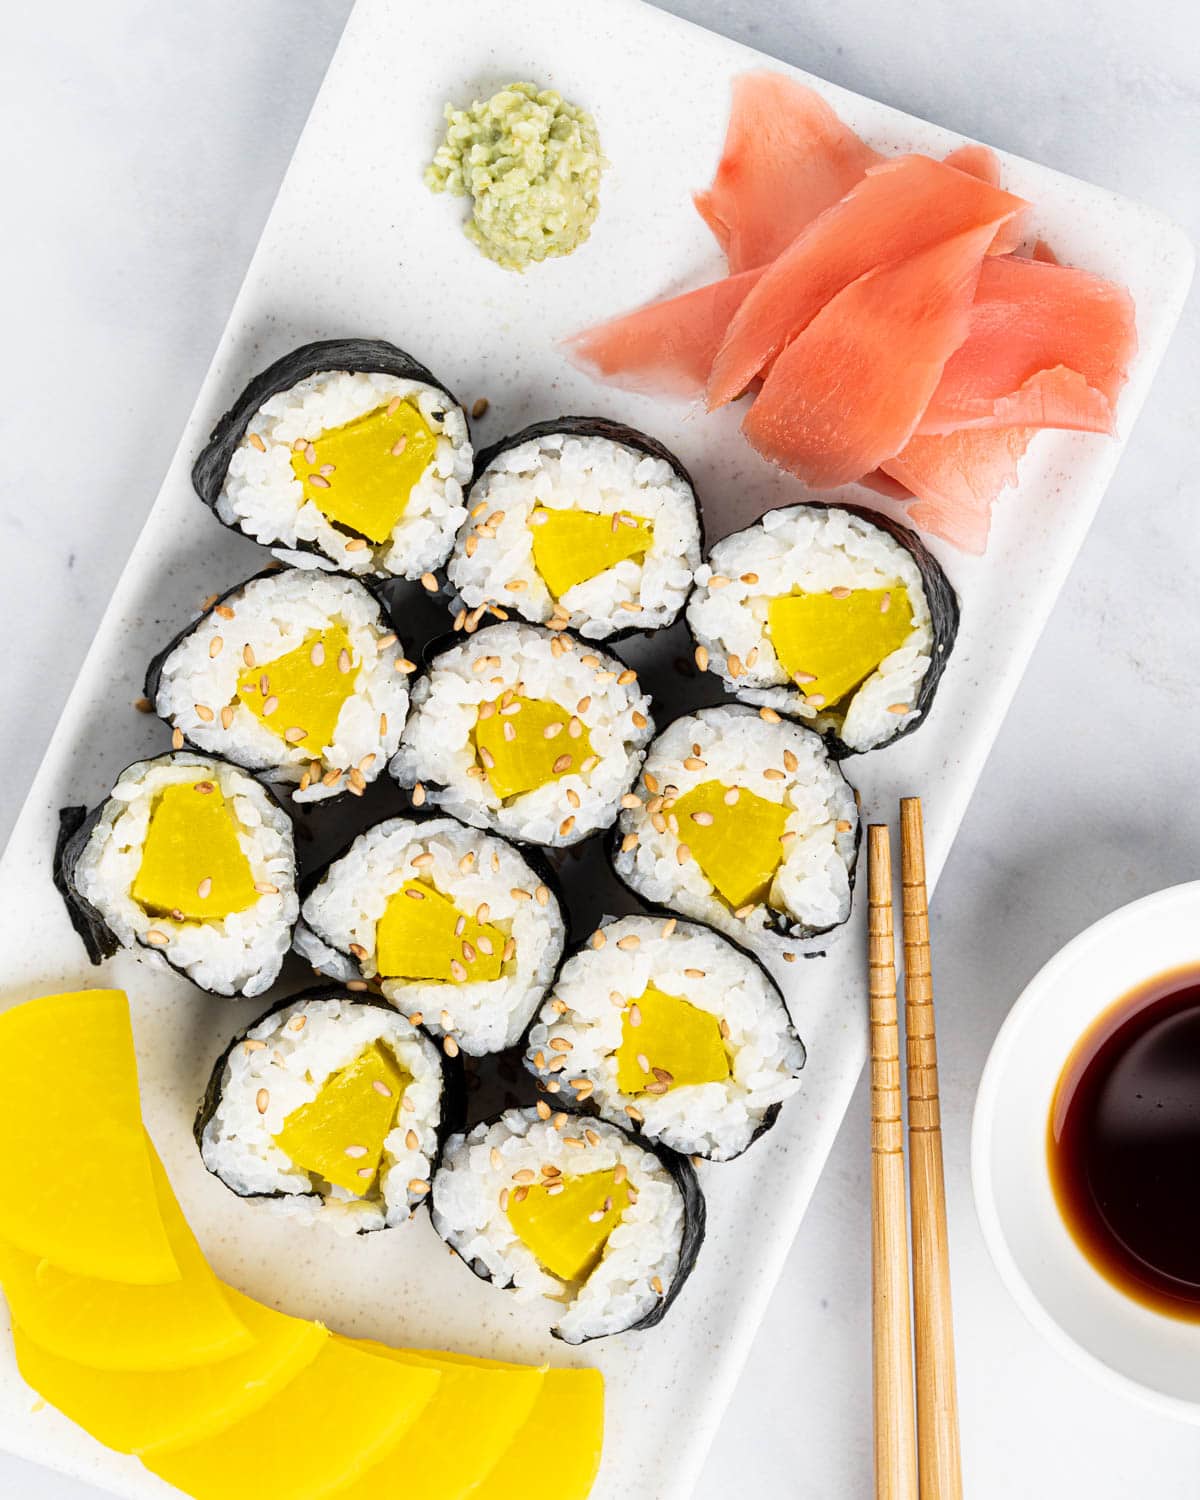
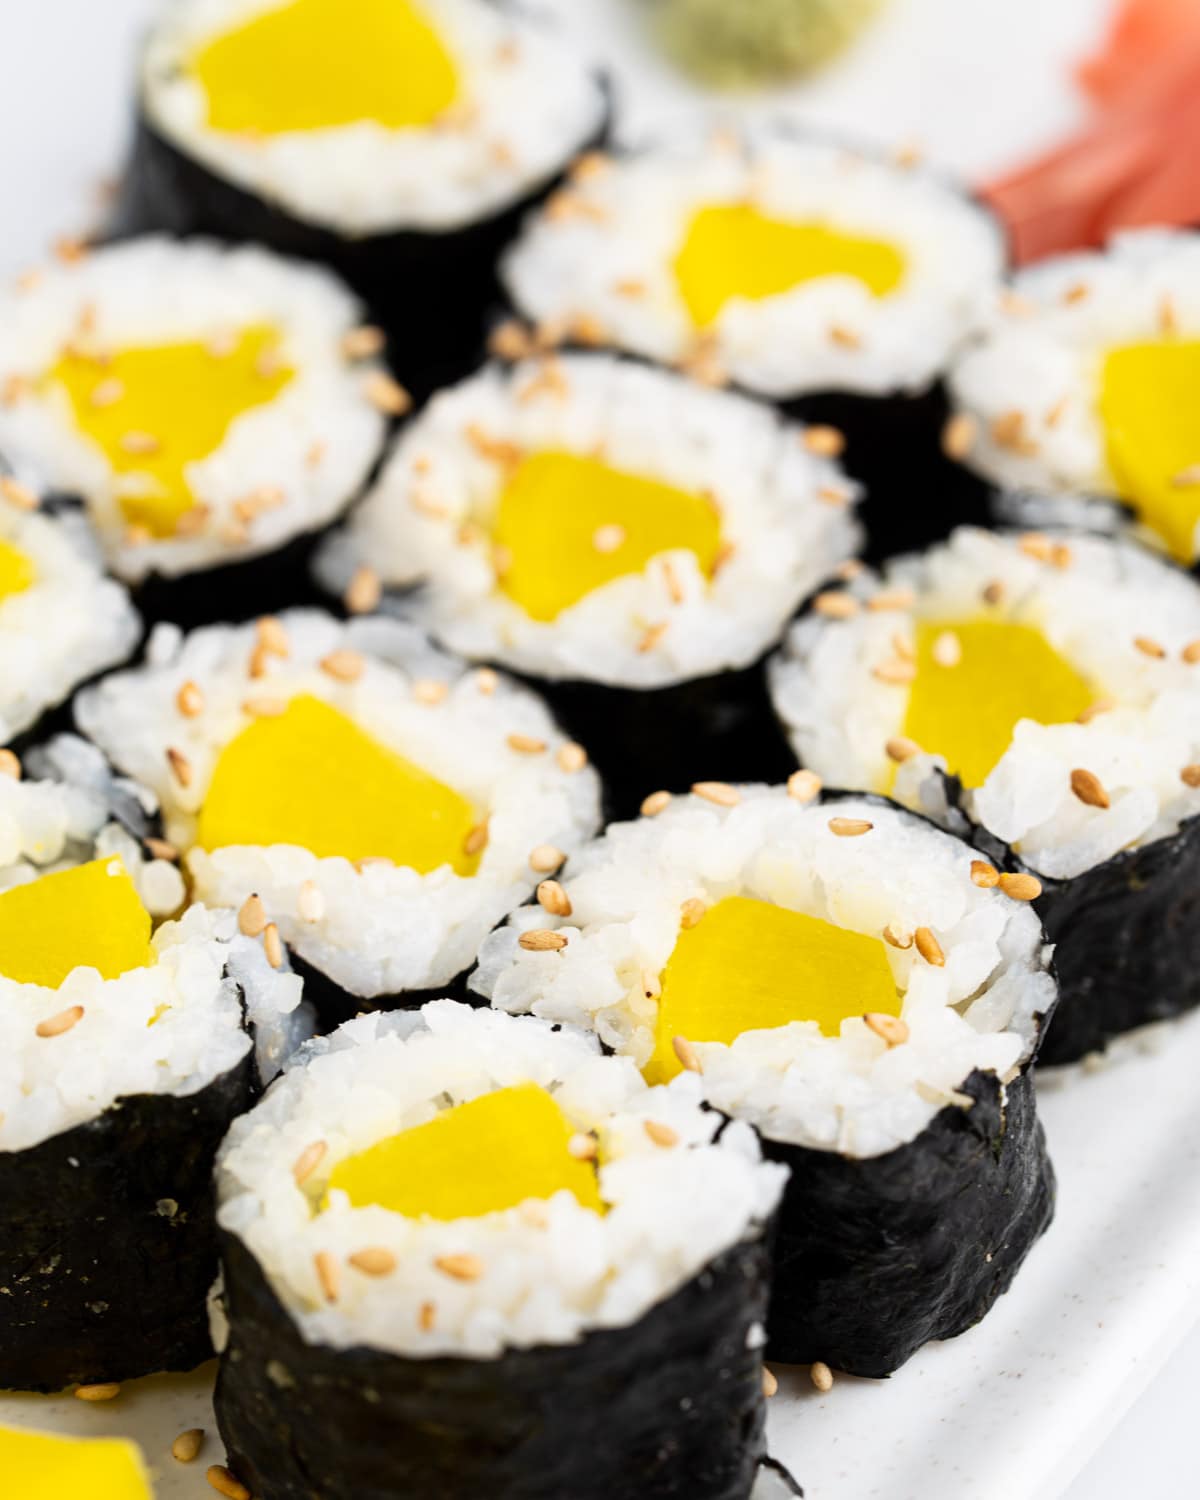
Oshinko Roll

If you’re new to making sushi at home, an oshinko roll is the perfect place to start. It’s light, crunchy, slightly sweet, and seriously underrated. The star of the show? Pickled daikon radish—bright yellow, crisp, and packed with flavor. Wrapped in seasoned rice and nori, this vegetarian sushi roll is simple but never boring.
I love serving oshinko rolls as part of a homemade sushi night spread. They’re quick to prep, easy to roll, and make a great contrast to heavier rolls like my kani nigiri or Boston roll. And if you’re a fan of pickled, salty-sweet flavors, you’ll be hooked after the first bite.
What is Oshinko Roll?
Oshinko (or “oshinka”) refers to a Japanese-style pickle, usually made from daikon radish. In this roll, you’ll find strips of bright yellow pickled daikon (called takuan) tucked into sushi rice and wrapped in nori. It’s a classic veggie roll with a satisfying crunch and a subtle tangy-sweet bite.
This roll is typically served maki-style—simple, clean, and rolled tight with just one main filling. It’s often found at Japanese restaurants as a vegetarian option or a palate cleanser in between bites of richer sushi.
Why You’ll Love This Roll
- Vegetarian-friendly and super flavorful
- Only a few ingredients needed
- Quick to assemble—perfect for sushi night at home
- Great contrast to heavier, protein-packed rolls
Kitchen Tools You’ll Need
- Bamboo sushi mat (wrapped in plastic wrap)
- Sharp knife (non-serrated works best)
- Cutting board
- Small bowl of water + rice vinegar (for wetting hands)
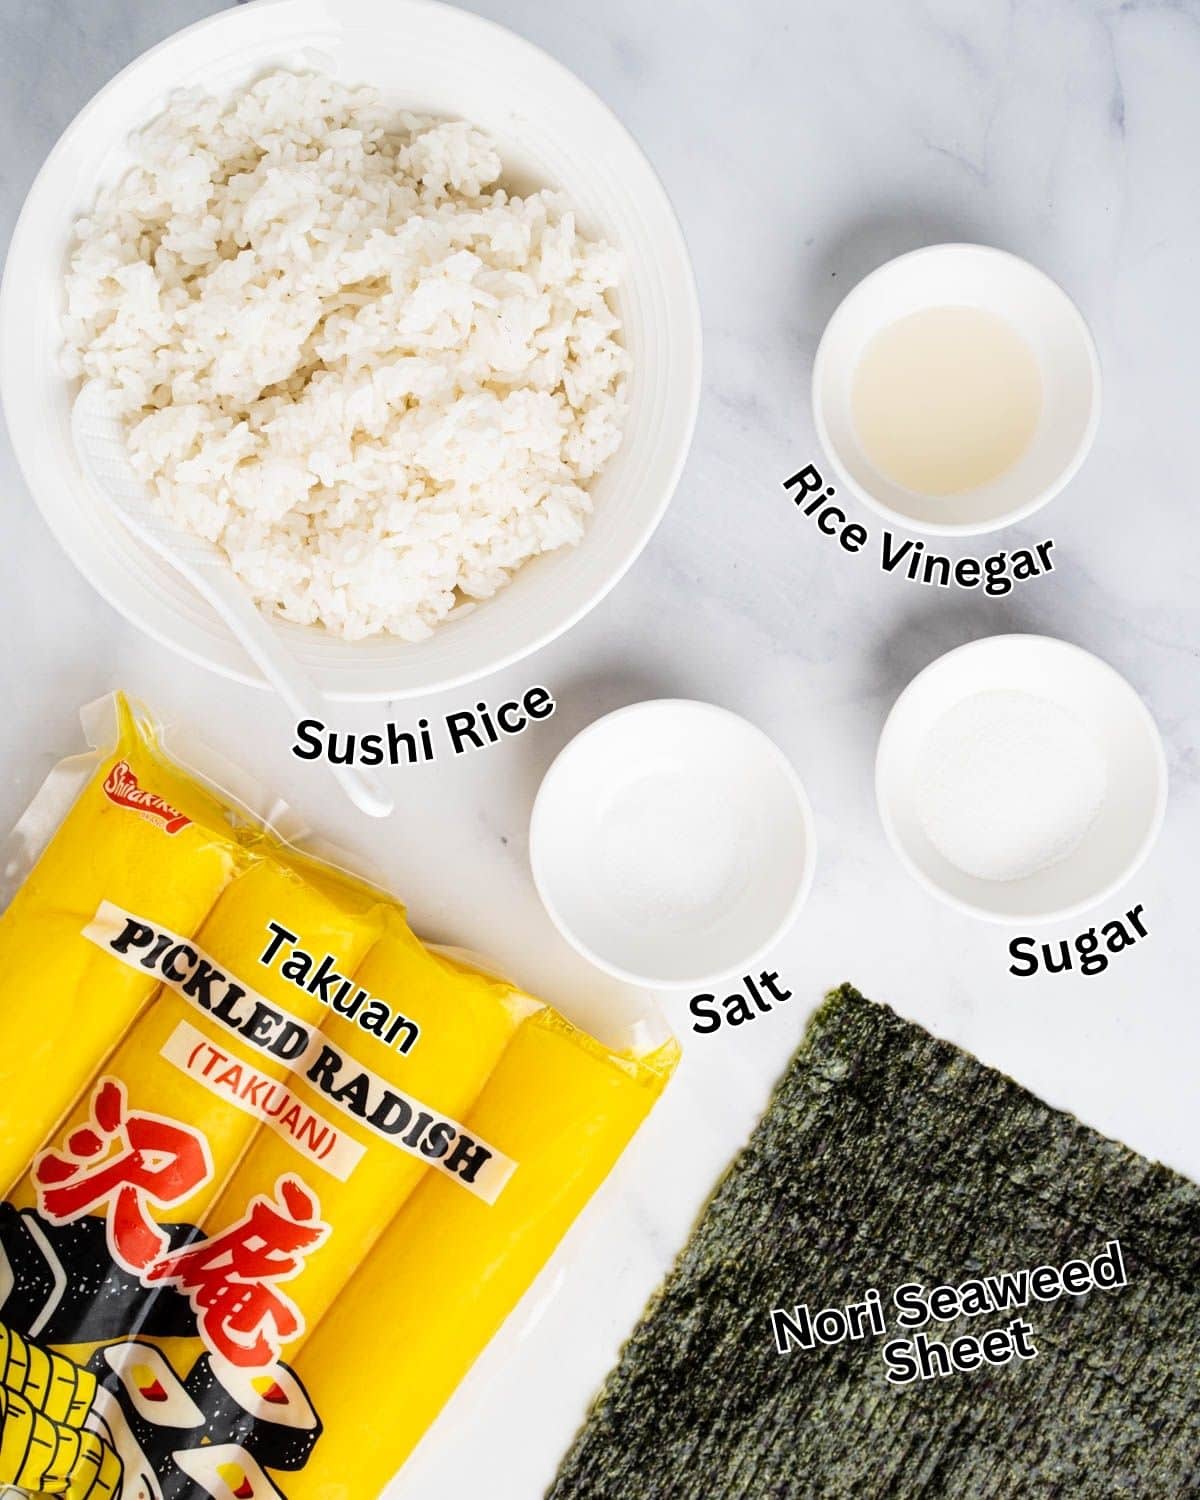
What You’ll Need
Please scroll ⬇️ to the recipe card for the full ingredient amounts and instructions.
- Sushi rice – Use short-grain Japanese rice and season it with rice vinegar, sugar, and salt.
- Nori – Toasted seaweed sheets that hold everything together.
- Takuan (pickled daikon radish) – You can find this pre-cut or whole at most Asian markets or in the refrigerated section.
- Optional fillings – Add cucumber, avocado, or even cream cheese if you want to get creative.
- Soy sauce, wasabi, pickled ginger – For serving on the side.
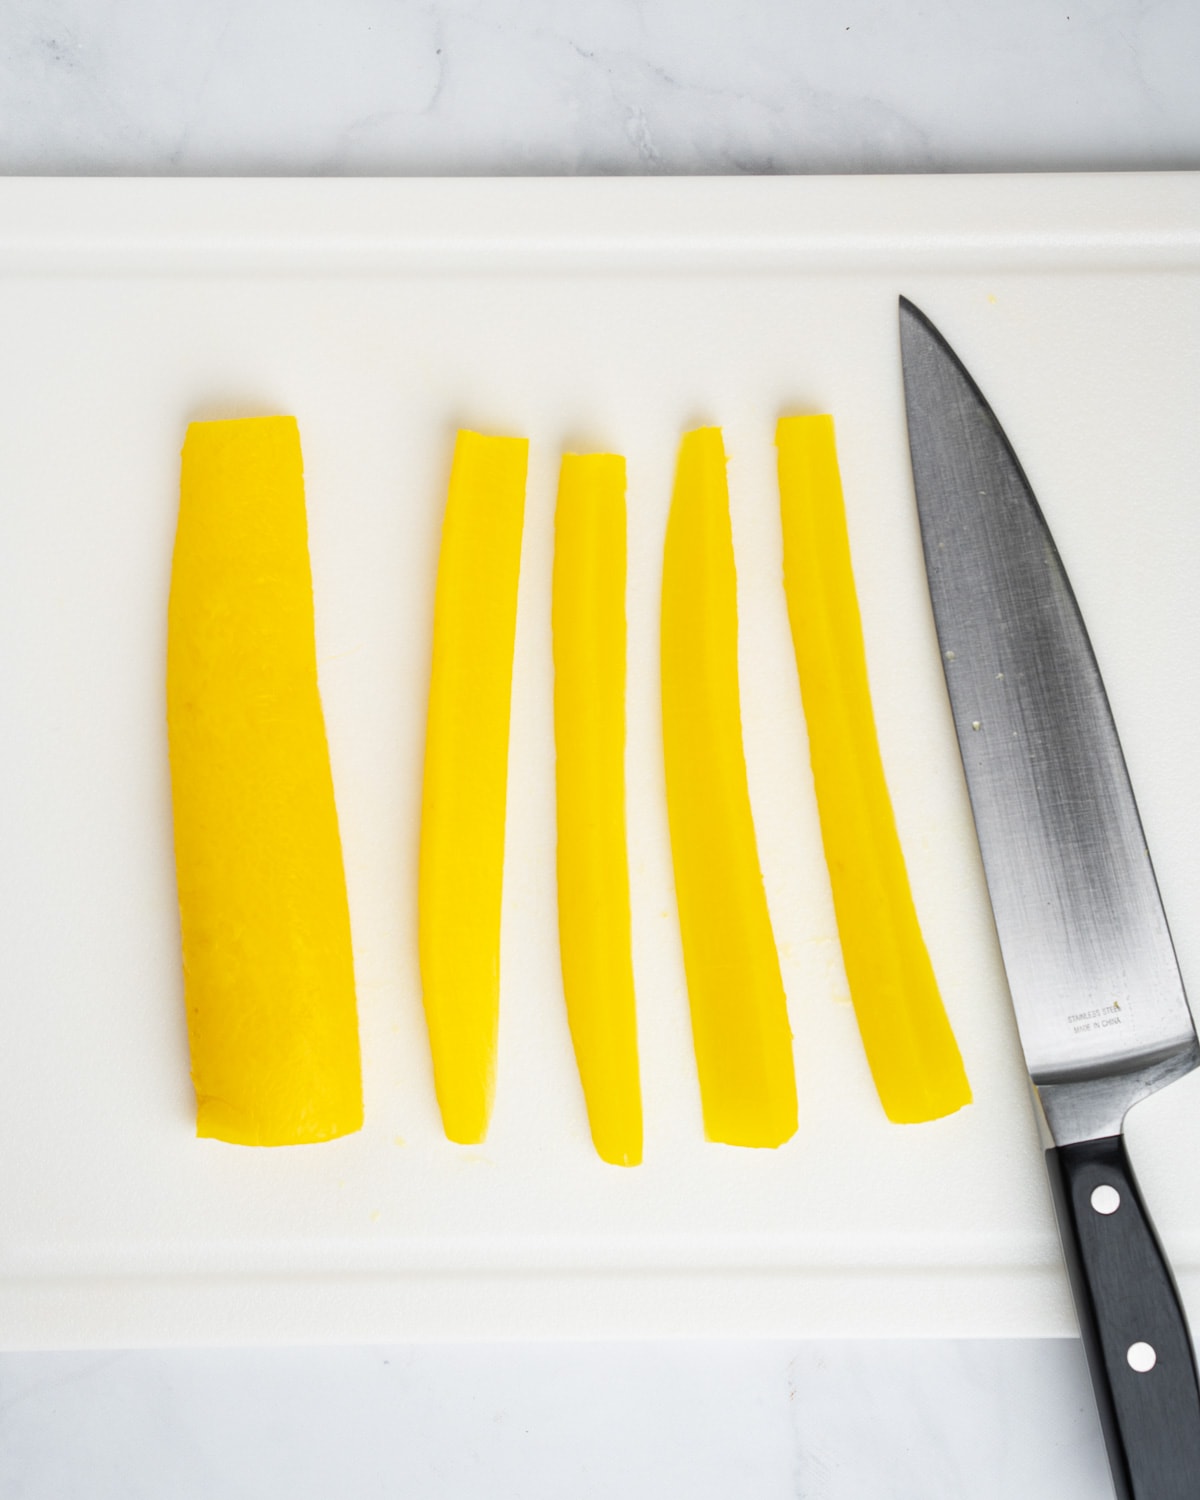
Tip: If you buy a whole takuan log, cut it into matchstick-sized strips for easier rolling.
How to Make Oshinko Rolls (Step-by-Step)
- Prep the rice: Cook sushi rice and season with a mixture of rice vinegar, sugar, and salt. Let it cool to room temperature.
- Cut the oshinko: Slice the pickled daikon into long, thin strips.
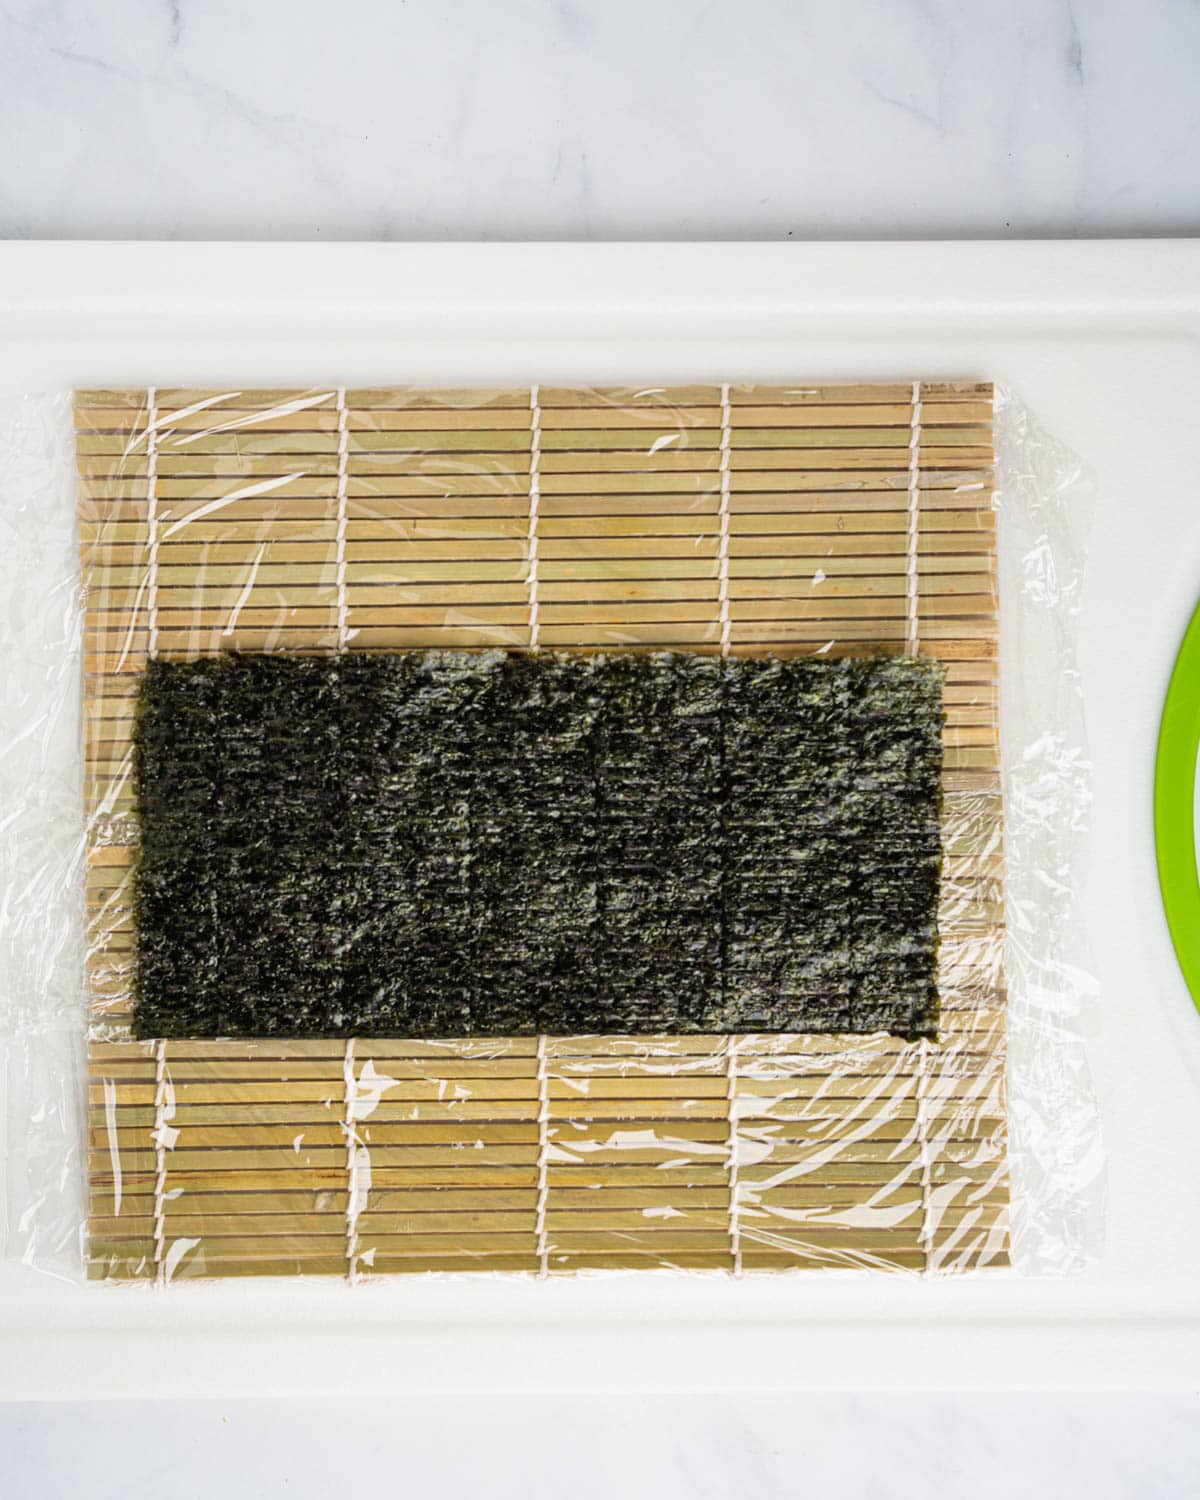
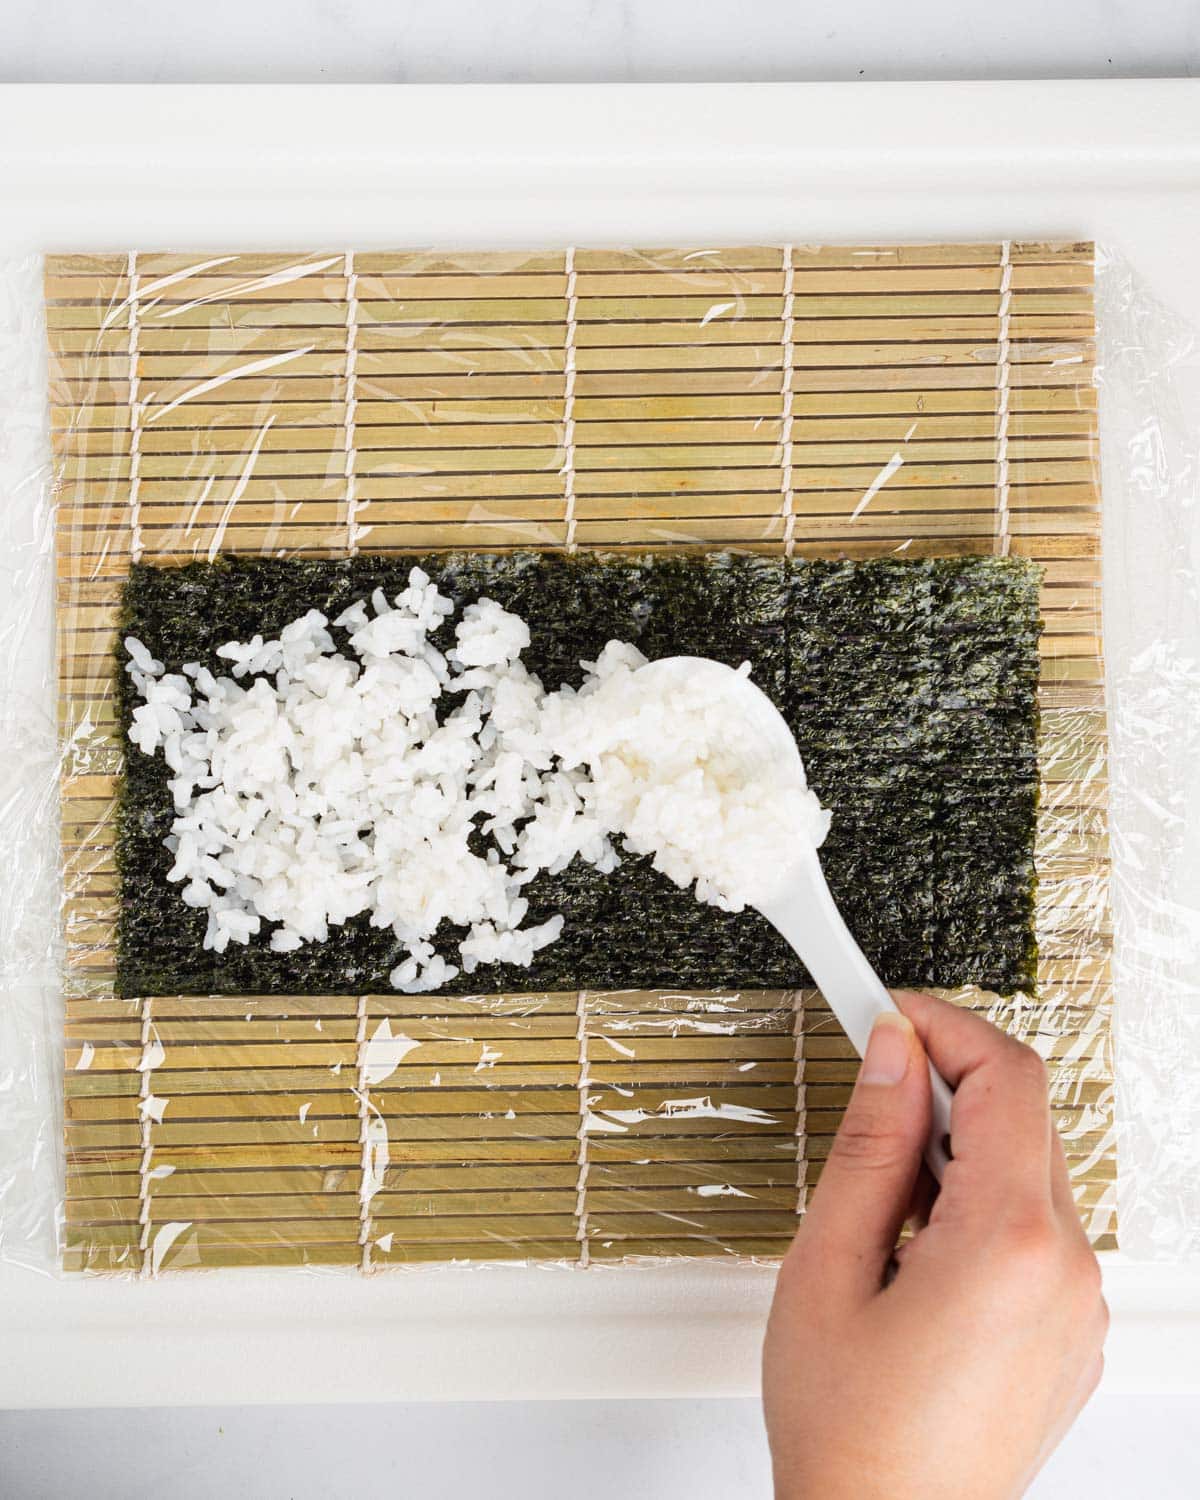
- Set up your mat: Place a sheet of nori shiny-side down on the bamboo mat.
- Add the rice: Wet your fingers, then spread a thin, even layer of rice over the nori, leaving a ½-inch gap at the top.
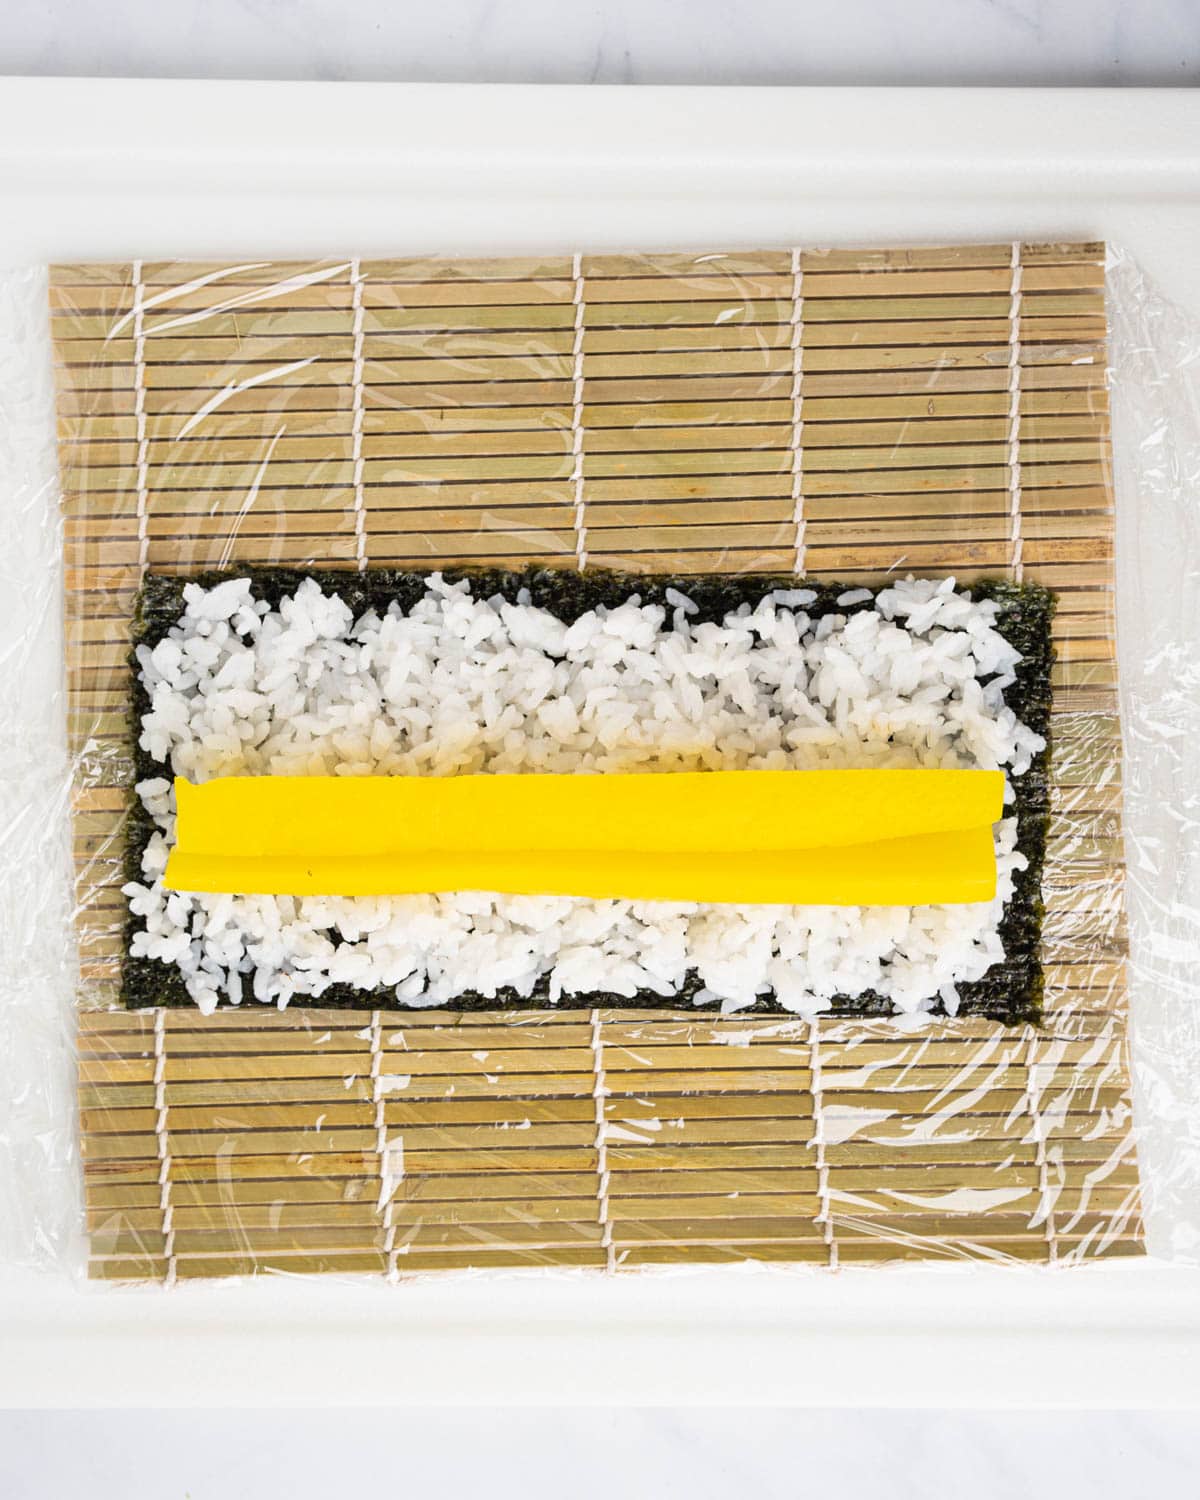
- Add the filling: Lay a couple strips of oshinko across the center.
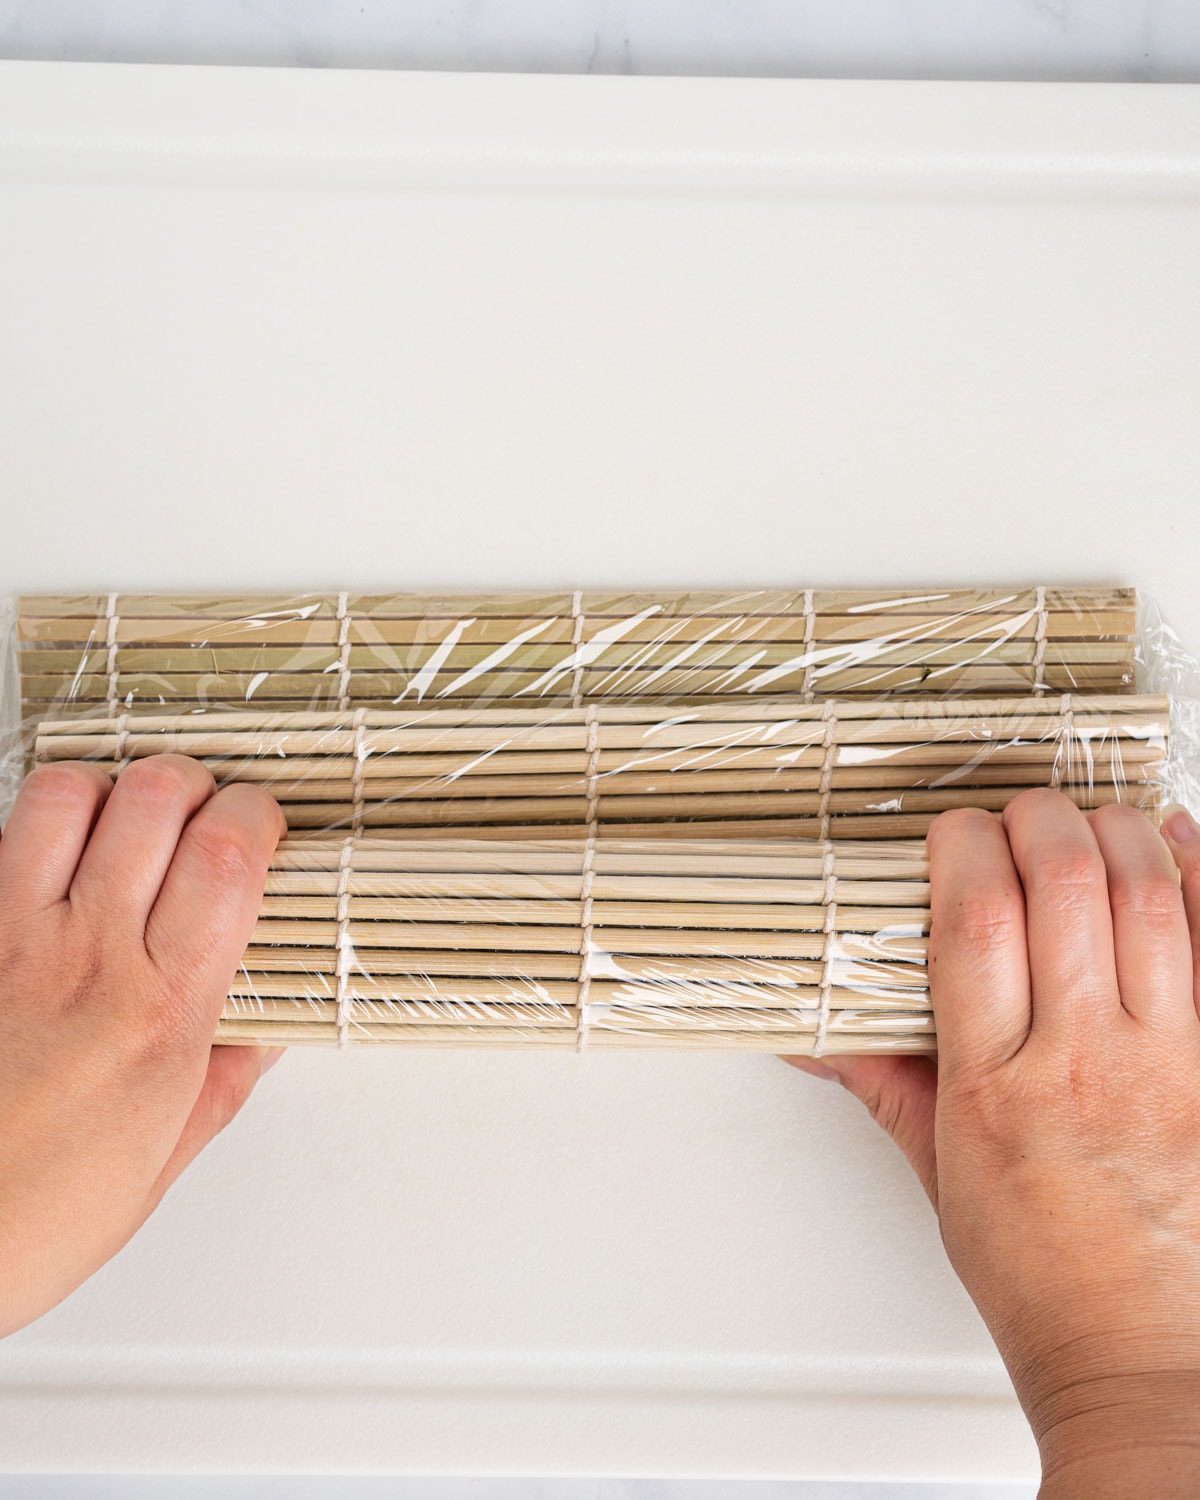
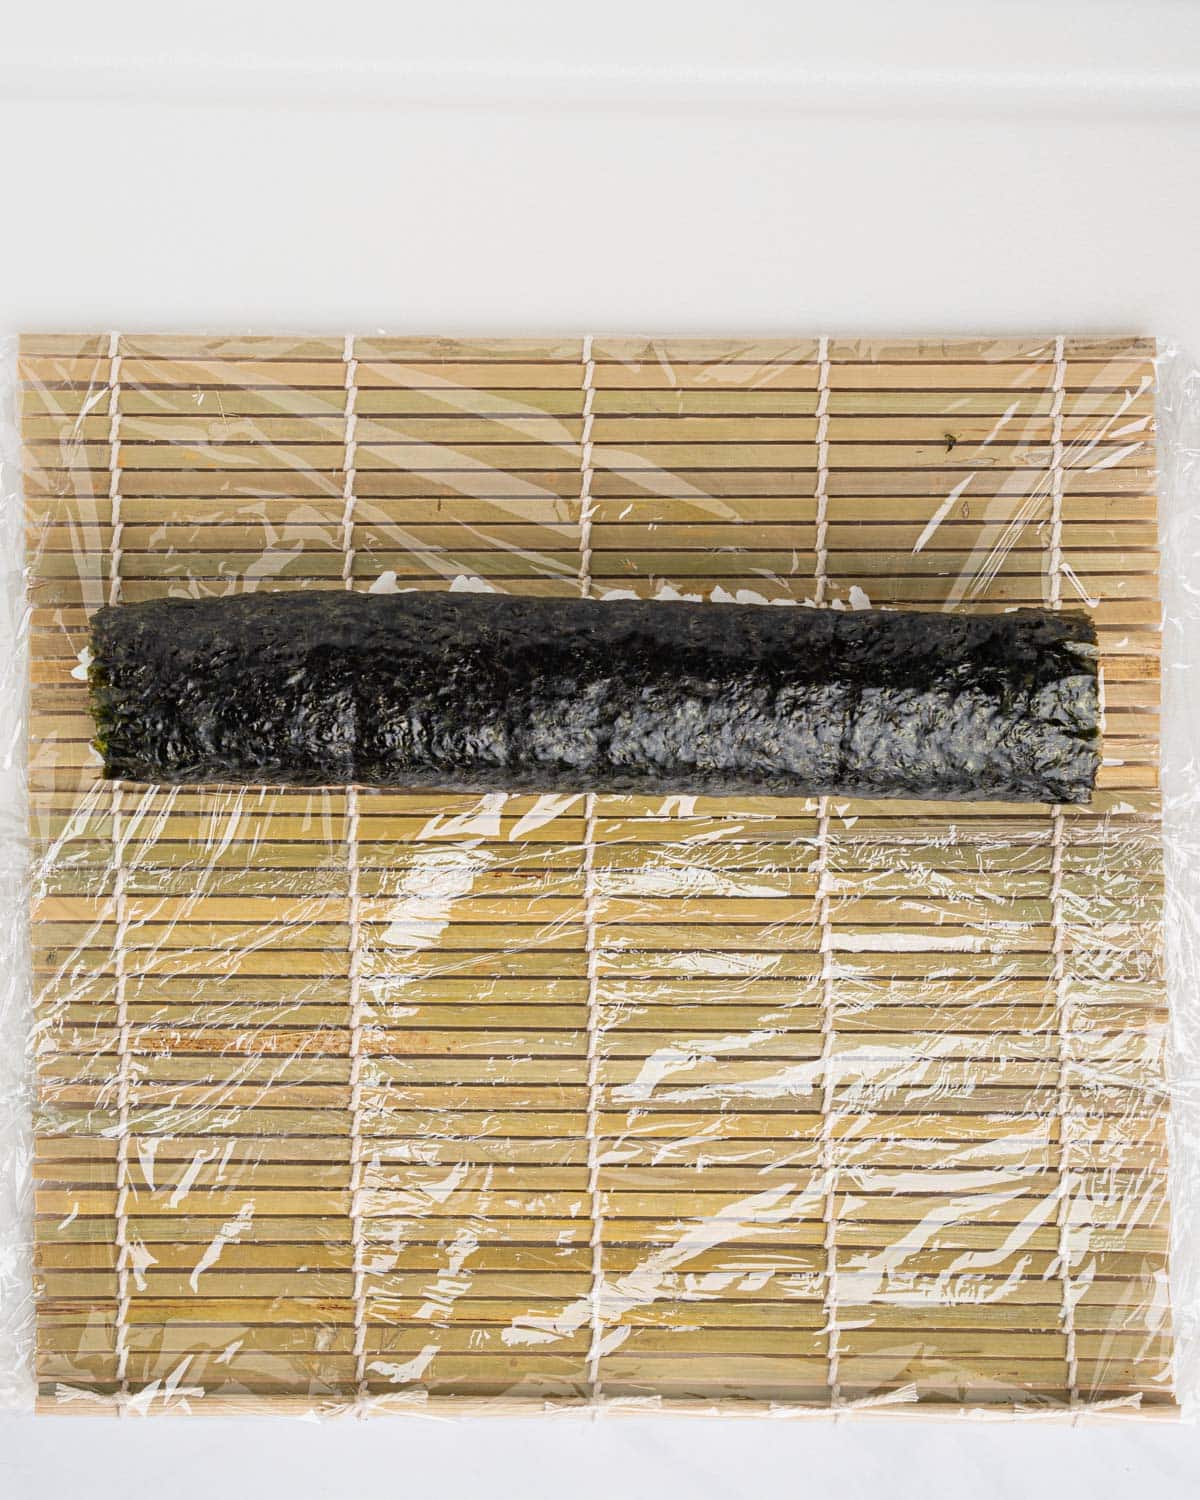
- Roll it up: Lift the bottom edge of the mat and roll it forward while pressing gently but firmly to create a tight log.
- Slice: Use a sharp, dampened knife to slice the roll into 6–8 even pieces.
- Serve: Plate and enjoy with soy sauce, wasabi, and pickled ginger.
Tips for Success
✔️ Keep your hands wet to prevent rice from sticking.
✔️ Use less rice than you think you need. Thin layers work best.
✔️ Tuck and tighten as you roll to avoid loose ends.
✔️ Chill the roll for 5–10 minutes before slicing for cleaner cuts.
Leftovers? Here’s How to Store Them
Wrap it well: If your roll is already sliced, wrap each piece tightly in plastic wrap so the rice doesn’t dry out. Try to keep the wrap in direct contact with the sushi to limit air exposure.
Refrigerate right away: Place the wrapped sushi in an airtight container or a sealed bag, then refrigerate promptly. This helps keep the texture and flavor as fresh as possible.
Don’t freeze it: Freezing isn’t ideal—rice turns grainy and the pickled veggies lose their crunch, so skip it.
Eat it within a day: Sushi is always best fresh. Try to enjoy leftovers the same day for the best taste and texture.
Let it warm up a bit: Take the sushi out of the fridge about 15–20 minutes before eating. Letting it come to room temp brings back some of the flavor and softens the rice.
More Sushi to Try
Love this roll? Try these next:
Sushi Night Just Got Better
Oshinko rolls are proof that sushi doesn’t have to be complicated to be delicious. Whether you’re building a full sushi night or just want something quick and homemade, this is one roll you’ll want to keep in your back pocket.
Tried it? Leave a comment below or tag me if you made your own version—I’d love to see it! And don’t forget to save this recipe for your next sushi night on Pinterest.
RECIPE

Oshinko Roll
Equipment
- plastic wrap
Ingredients
For the Sushi Rice
- 2 cups cooked sushi rice
- 1 tablespoons rice vinegar
- 1 tablespoon sugar
- 1 teaspoon salt
For the Oshinko Roll
- 2 nori sheet cut in half
- 2 takuan (pickled daikon radish), cut into thin strips
- sesame seeds (optional)
Instructions
- Make the sushi rice: While the rice is still warm, gently mix in the rice vinegar, sugar, and salt. Set aside to cool.
- Prep the takuan: Cut the pickled radish into long, thin strips.
- Assemble the roll: Place a halved nori sheet (shiny side down) on a bamboo mat lined with plastic wrap.
- Spread the rice: Wet your hands and evenly press a thin layer of rice over the nori.
- Add the filling: Lay a few strips of takuan across the center.
- Roll it up: Roll tightly using the bamboo mat to help shape it into a firm log.
- Slice: Use a sharp, damp knife to cut into 6–8 pieces, wiping the blade between cuts.
- Serve: Plate with soy sauce, wasabi, and pickled ginger. Sprinkle sesame seeds on top if you’d like.
Notes
- Use plastic wrap over your bamboo mat to keep things clean and easy to roll.
- Wet your hands before handling the rice so it doesn’t stick to everything.
- Sharp knife = clean slices. Dull blades will squish your roll. Wipe between cuts for the best results.
- Takuan tip: The brighter yellow the pickled radish, the more traditional it looks. You can find it at most Asian markets or in the refrigerated section.
- Want it inside-out? Spread rice on the nori and flip it over before adding the takuan for a fun twist.