Homemade Vietnamese Baguette (Banh Mi Bread)

Recipe Updated
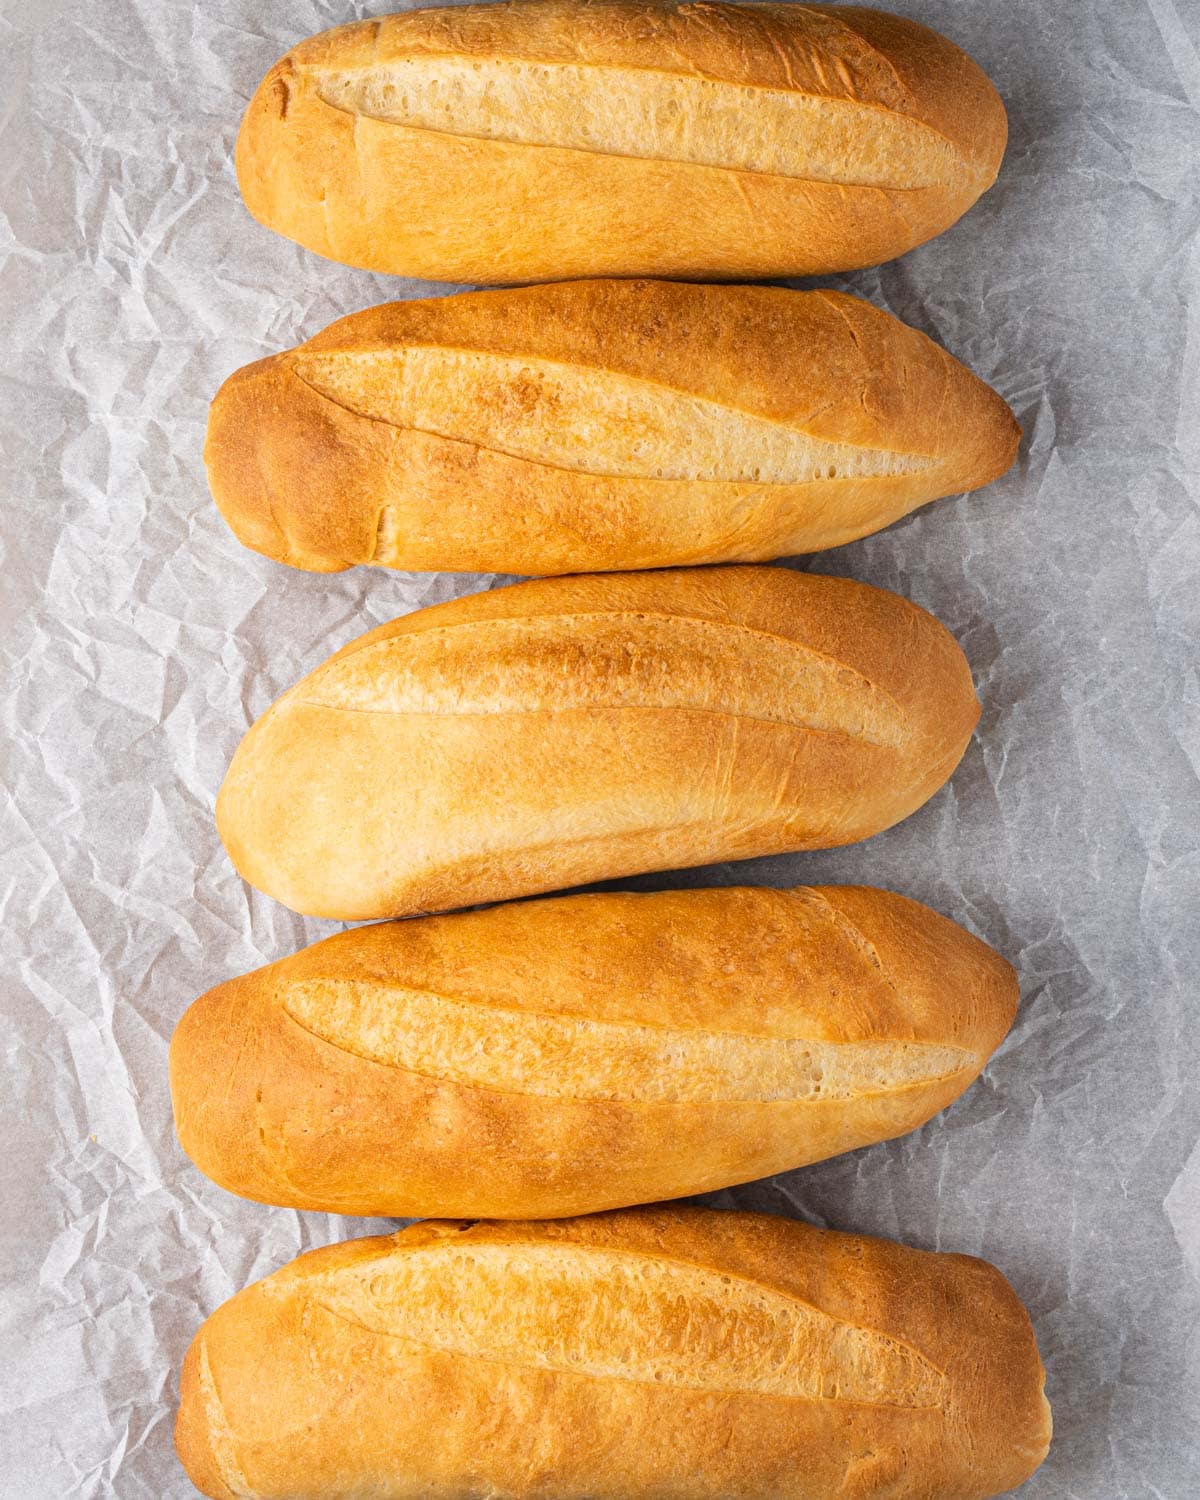
I’ve updated this banh mi bread recipe for a lighter, airier crumb and a thinner, crisper crust, closer to Vietnamese bakery-style baguettes. The original version is included below the updated recipe card.
Vietnamese baguette is the backbone of a good banh mi sandwich. The fillings matter, but the bread is what holds everything together. Light on the inside, crisp on the outside, and delicate enough that it never overpowers what’s inside.
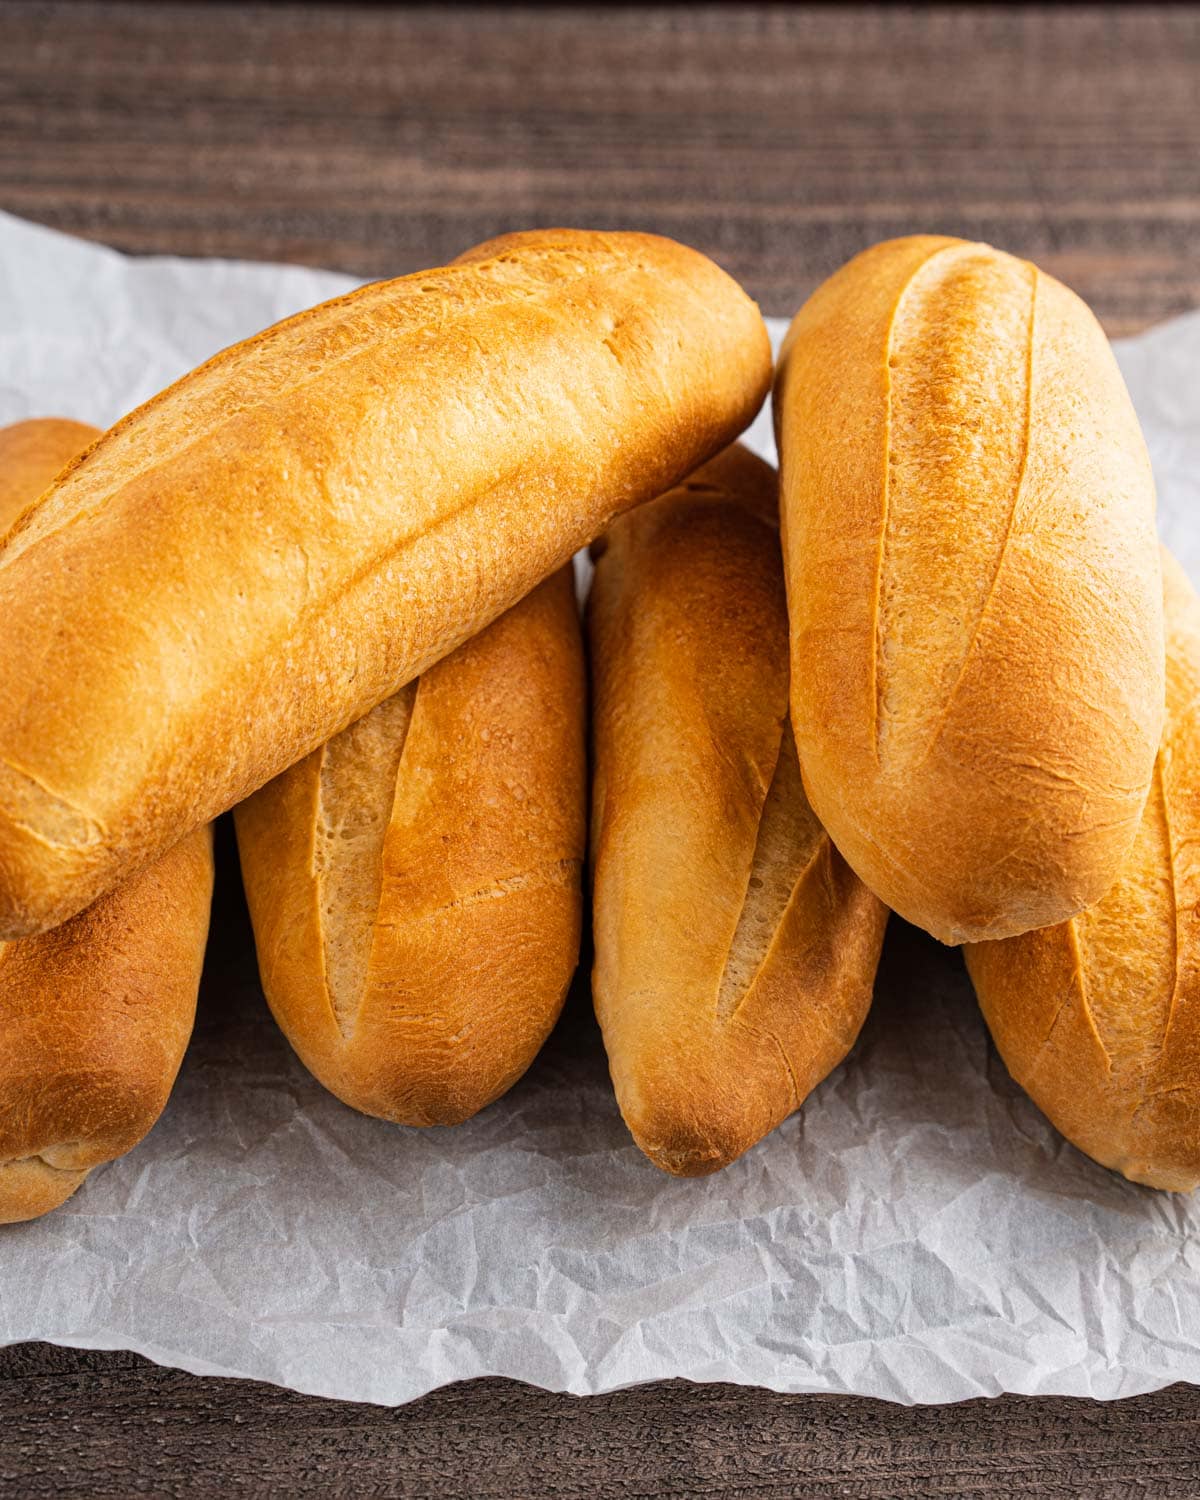
If you’ve made this recipe before, you’ll notice a few updates. There was nothing wrong with the original, it earned plenty of 5-star reviews, but after making this bread countless times and paying closer attention to crumb structure and hydration, I refined the recipe to better reflect the baguettes you’ll find at Vietnamese bakeries. The goal was a lighter interior and a thinner, crisper crust, without adding specialty ingredients or complicated steps.
Making banh mi bread at home is still very simple. You don’t need bread improver, vitamin C powder, or anything hard to find. This updated version relies on higher hydration, gentler mixing, and fermentation timing instead of extra ingredients. The result is a baguette that’s lighter, airier, and closer to bakery-style.
I’ve been making versions of this bread for years, and this updated method is the one I reach for now. It works beautifully for banh mi sandwiches, but it’s just as good torn open and eaten warm with butter, or dipped into coffee or condensed milk the way it’s often enjoyed in Vietnam.
What Makes Vietnamese Baguette Different?
Vietnamese baguette is lighter than a traditional French baguette. The crumb is airy and soft, while the crust is thin and crisp instead of thick and chewy.
This balance is intentional. Banh mi bread is meant to support the fillings, not compete with them. It compresses easily, cracks when you bite into it, and stays light even when loaded with meats, pickles, and sauces.
That’s why it pairs so well with fillings like xiu mai, lemongrass chicken, thit nuong, or pickled carrots and daikon. It also fits naturally alongside other Vietnamese street foods like banh xeo, pate chaud, or banh bot chien.
A Quick Look at the Origins
Banh mi bread has its roots in French colonial influence, when baguettes were introduced to Vietnam. Over time, Vietnamese bakers adapted the bread to local ingredients and preferences.
The result is something distinctly Vietnamese. Lighter, crispier, and better suited to the climate and cuisine. It may look similar to a French baguette, but the eating experience is very different.
Vietnamese vs French Baguette
While they share a shape, the texture sets them apart.
Vietnamese baguettes have a thin, crackly crust and a very open crumb. They are light and easy to bite through.
French baguettes tend to have a thicker crust and a denser, chewier interior. They are hearty and rustic, but not ideal for banh mi-style sandwiches.
Some Vietnamese baguettes include rice flour for added lightness. This version keeps things simple and uses bread flour only, while still achieving the right texture.
Tools That Help
You do not need a professional setup, but a few tools make the process easier and more consistent.
- A digital thermometer helps make sure the water temperature is right for activating the yeast.
- A kitchen scale gives more accurate measurements, which makes a big difference with bread.
- A baguette pan helps the loaves hold their shape and bake evenly.
- A sharp knife or baker’s lame makes it easier to score cleanly and control how the bread opens in the oven.
- A spray bottle is optional and only needed if the dough surface looks too dry before baking. It can help with crust development, but you can skip it if the dough still has moisture or if you prefer a sturdier crust.
Ingredients and Why They Matter
The ingredient list is simpler than before, but each change serves a purpose.
- Instant yeast is used in a smaller amount than the original version. Using less yeast slows fermentation just enough to improve structure and flavor, helping create a lighter, airier crumb instead of a dense interior.
- Water is increased to raise hydration. This is key to creating a more open crumb.
- Sugar is still included to support yeast activity and browning.
- Salt adds flavor and structure.
- Bread flour provides the strength needed to support higher hydration without collapsing.
- Butter is reduced to just a small amount. It adds a touch of richness without tightening the crumb.
Egg is intentionally omitted in this version. Removing it allows the dough to stay more extensible and encourages a lighter, airier interior.
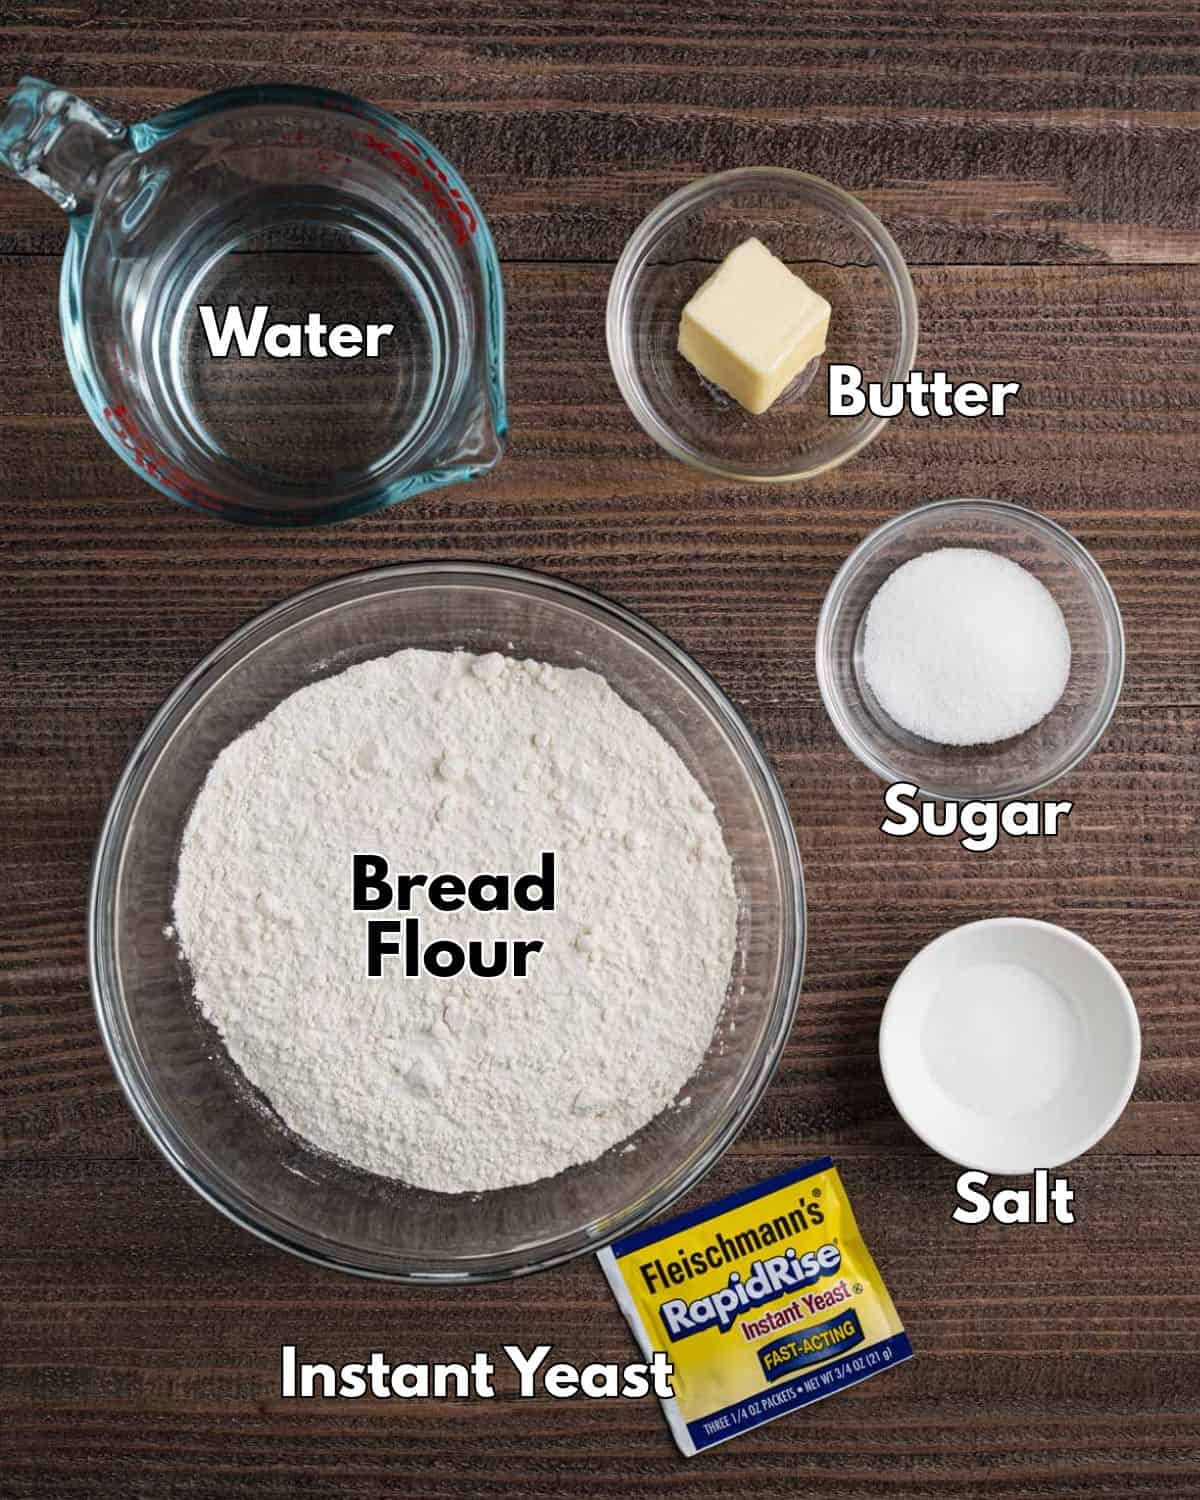
Please scroll ⬇️ to the recipe card for the full ingredient amounts and instructions.
How to Make Vietnamese Baguette (Updated Overview)
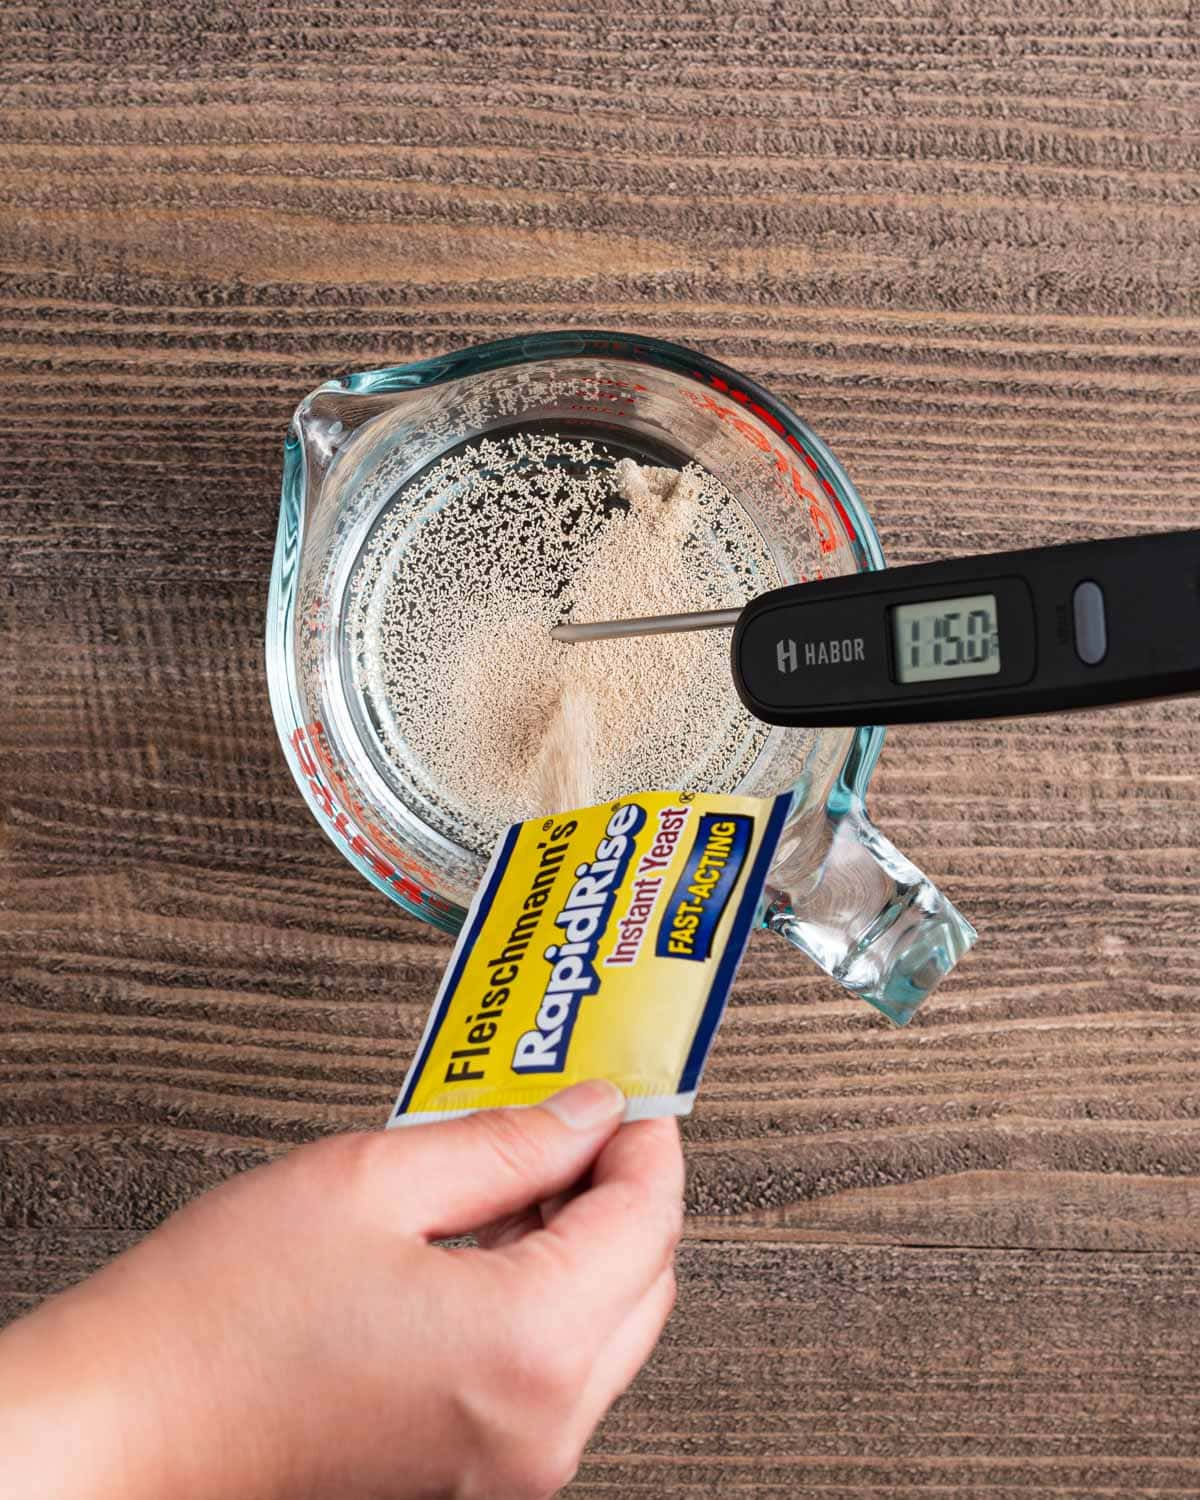
Start by activating the yeast. Warm water, yeast, and a little sugar are mixed together and left to sit briefly until lightly foamy. This step ensures the yeast is active before you move on.
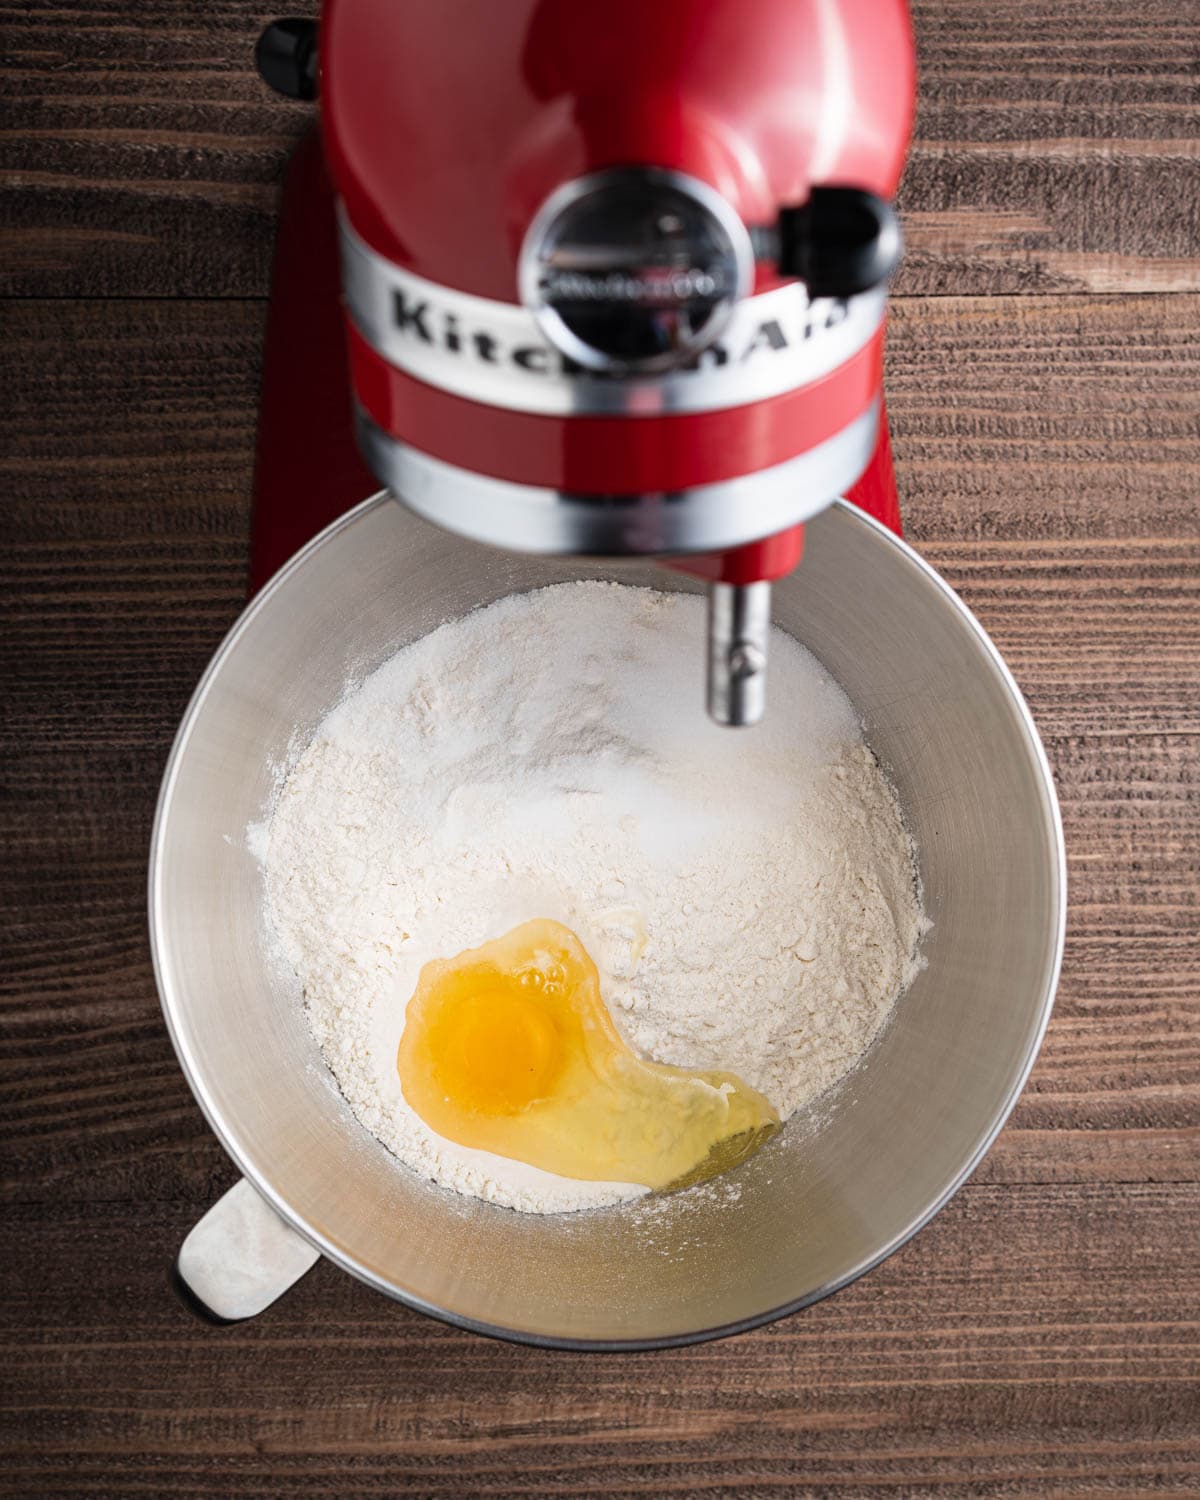
Next, mix the dough. Combine the bread flour and salt, then add the yeast mixture and melted butter. Mix just until the dough comes together, and there’s no dry flour left. At this stage, the dough will look shaggy and sticky—don’t try to smooth it out yet.
Let the dough rest for a short autolyse. This 10-minute pause allows the flour to fully hydrate and start gluten development naturally, which helps create a lighter, airier crumb without overworking the dough. After resting, finish mixing just until the dough is cohesive, stretchy, and slightly tacky.
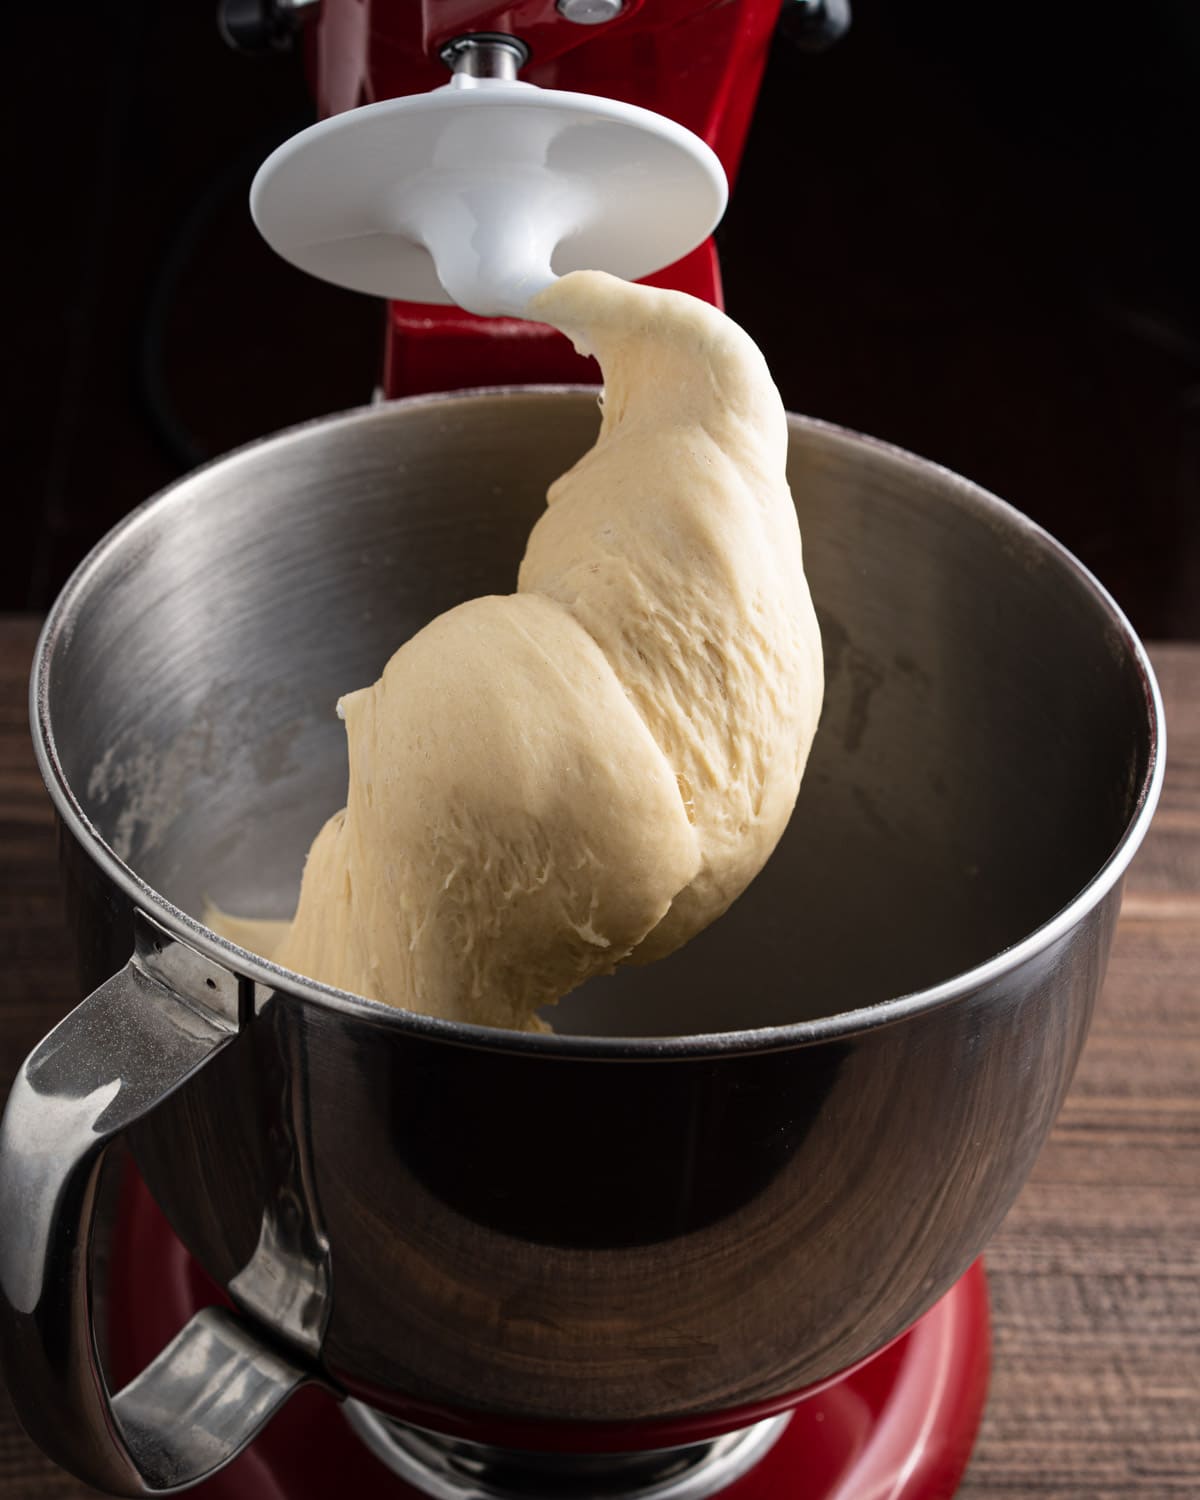
Transfer the dough to a lightly oiled bowl, lightly cover, and let it rise until puffy and gassy. During this first rise, a thin skin will form on the surface of the dough. That’s a good thing—it will eventually become the outer crust of the baguette.
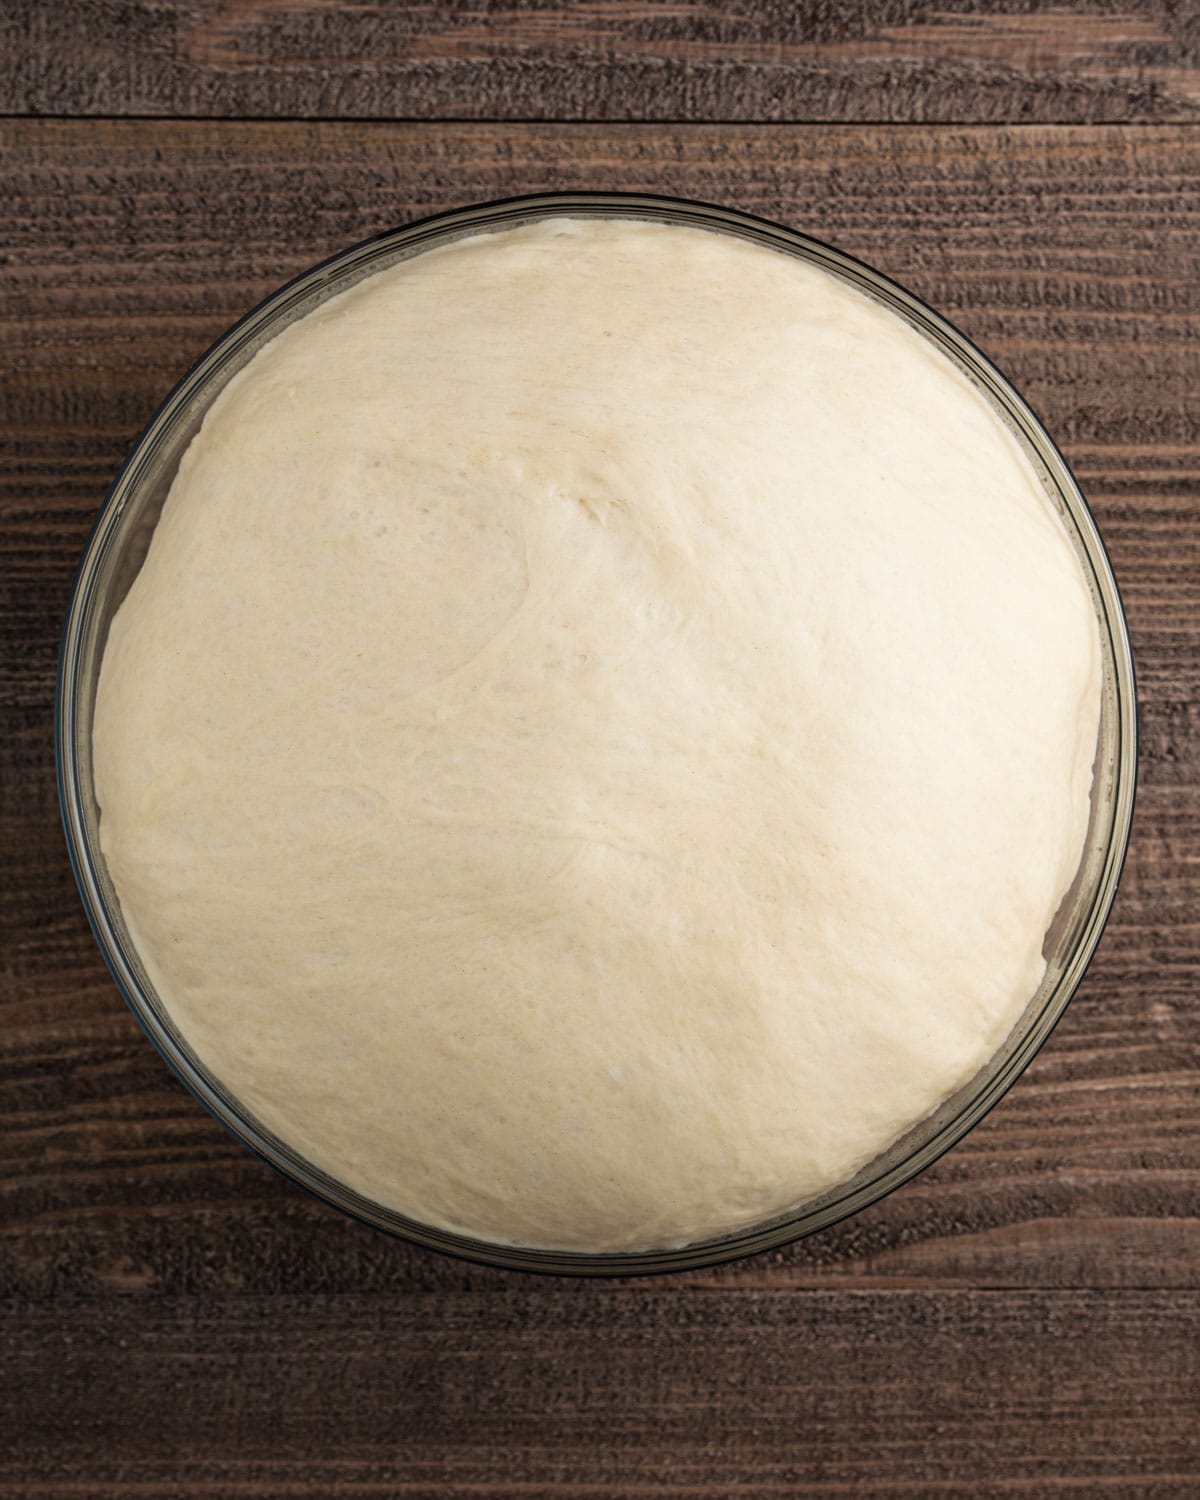
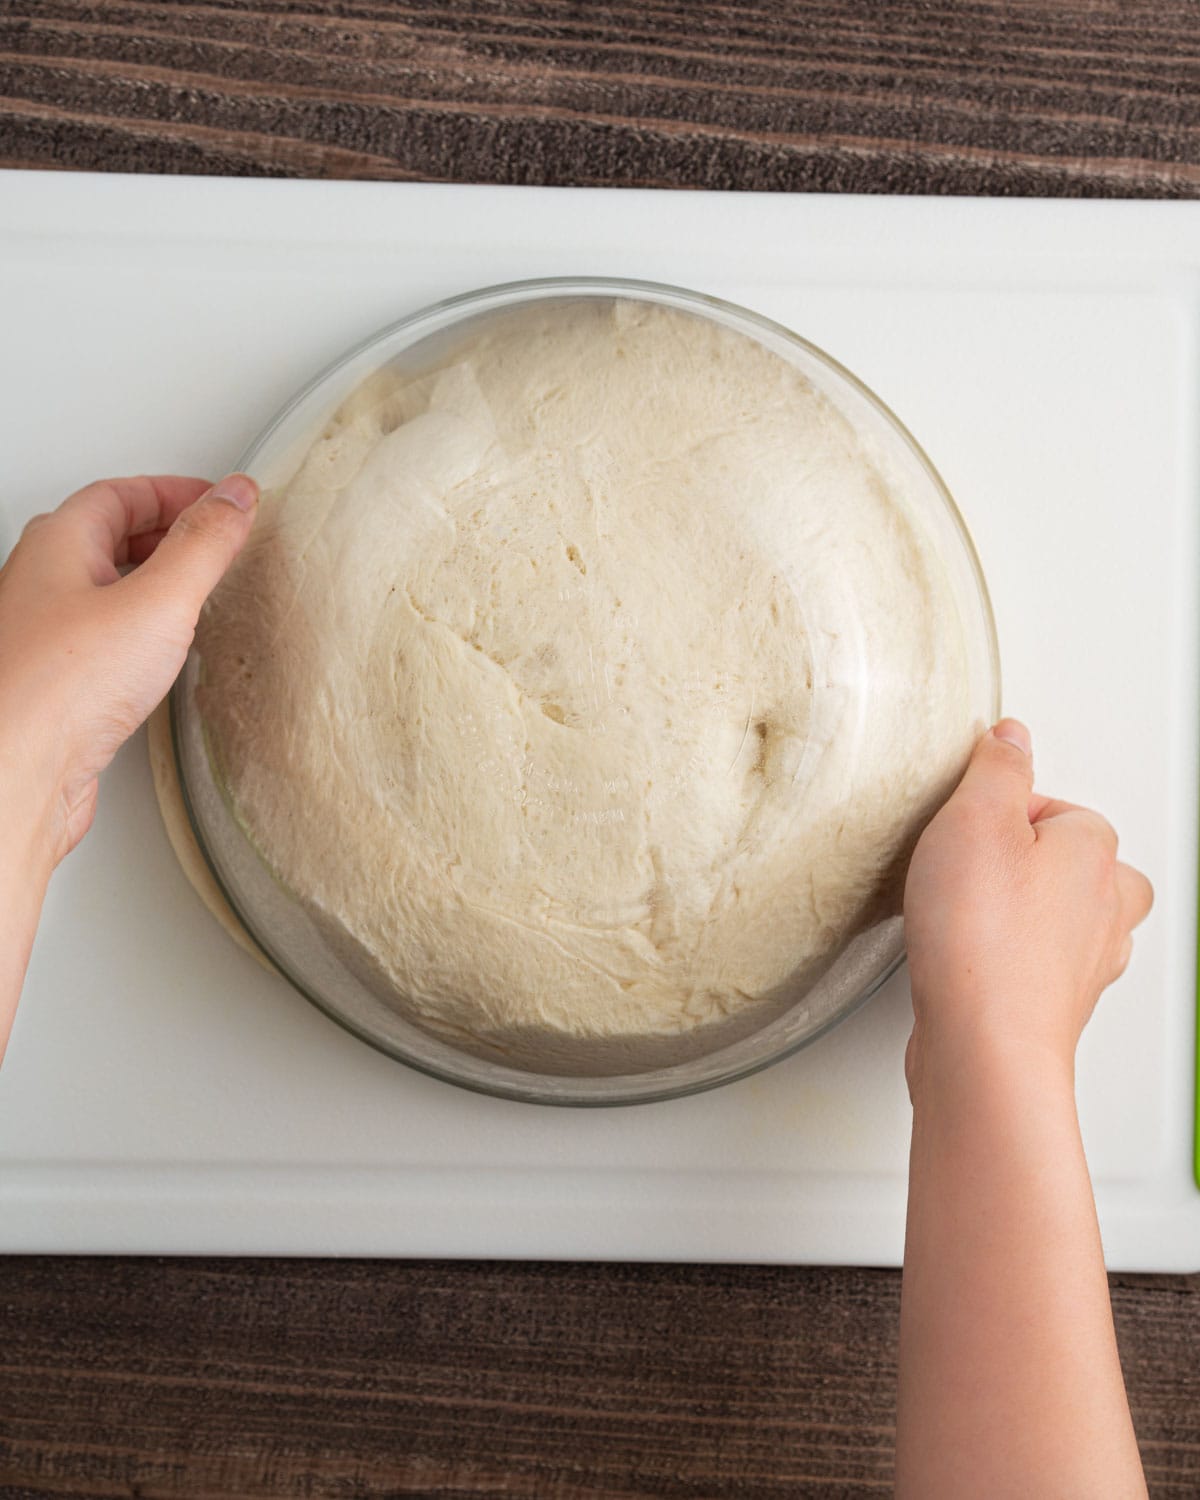
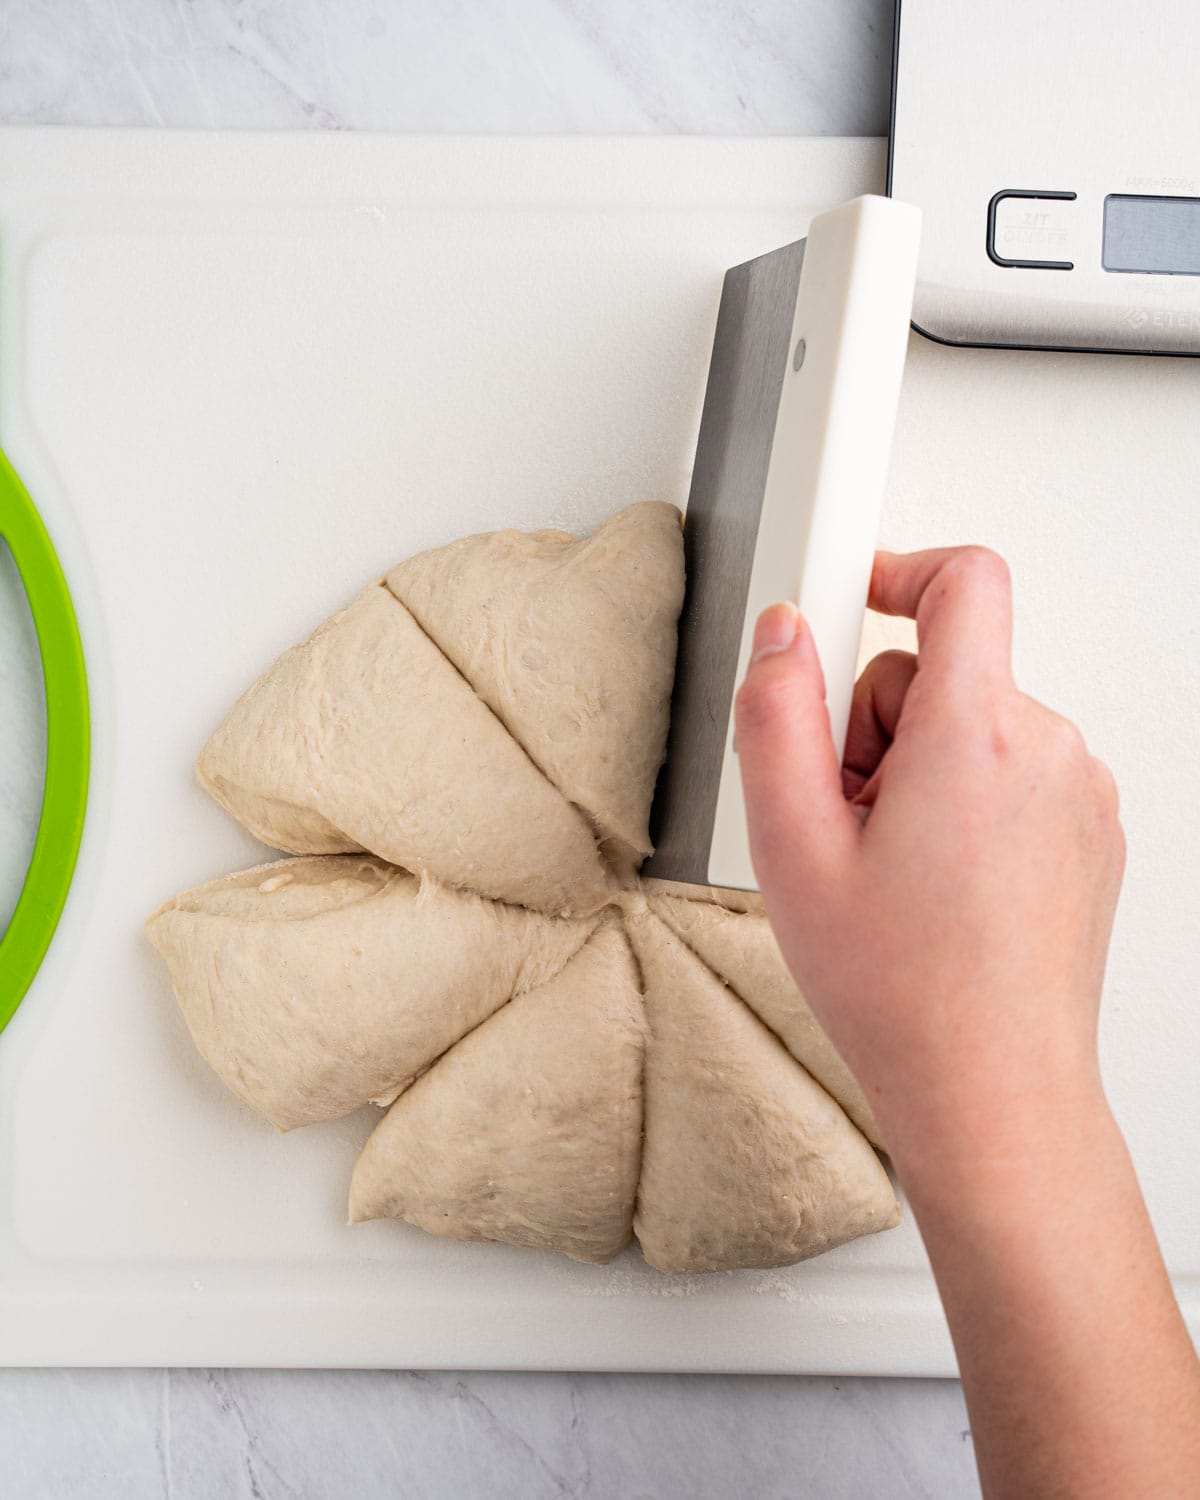
Once risen, turn the dough out skin-side down onto a lightly floured surface and divide it into portions. Gently press each piece to release some of the trapped air, then flatten it into a rough triangle or rectangle. Starting from the narrow end, roll the dough up into a baguette using light, even pressure in the center and tapering the ends slightly, keeping the surface skin on the outside so it becomes the crust.
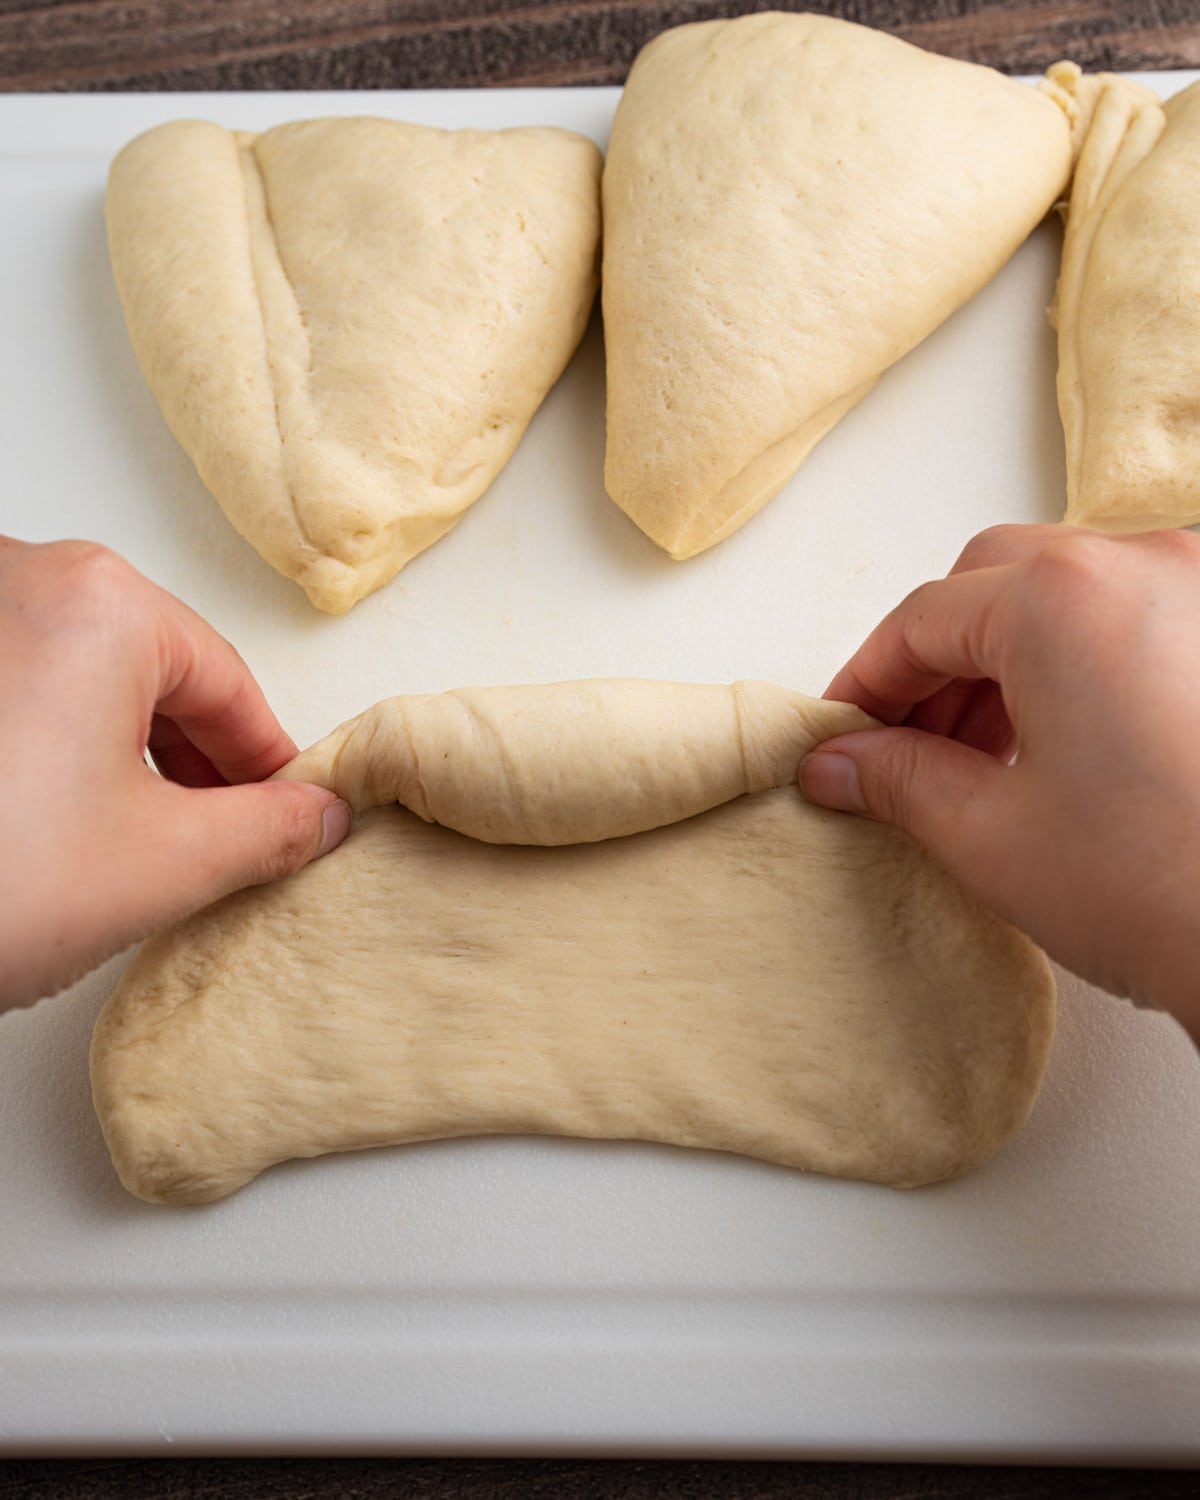
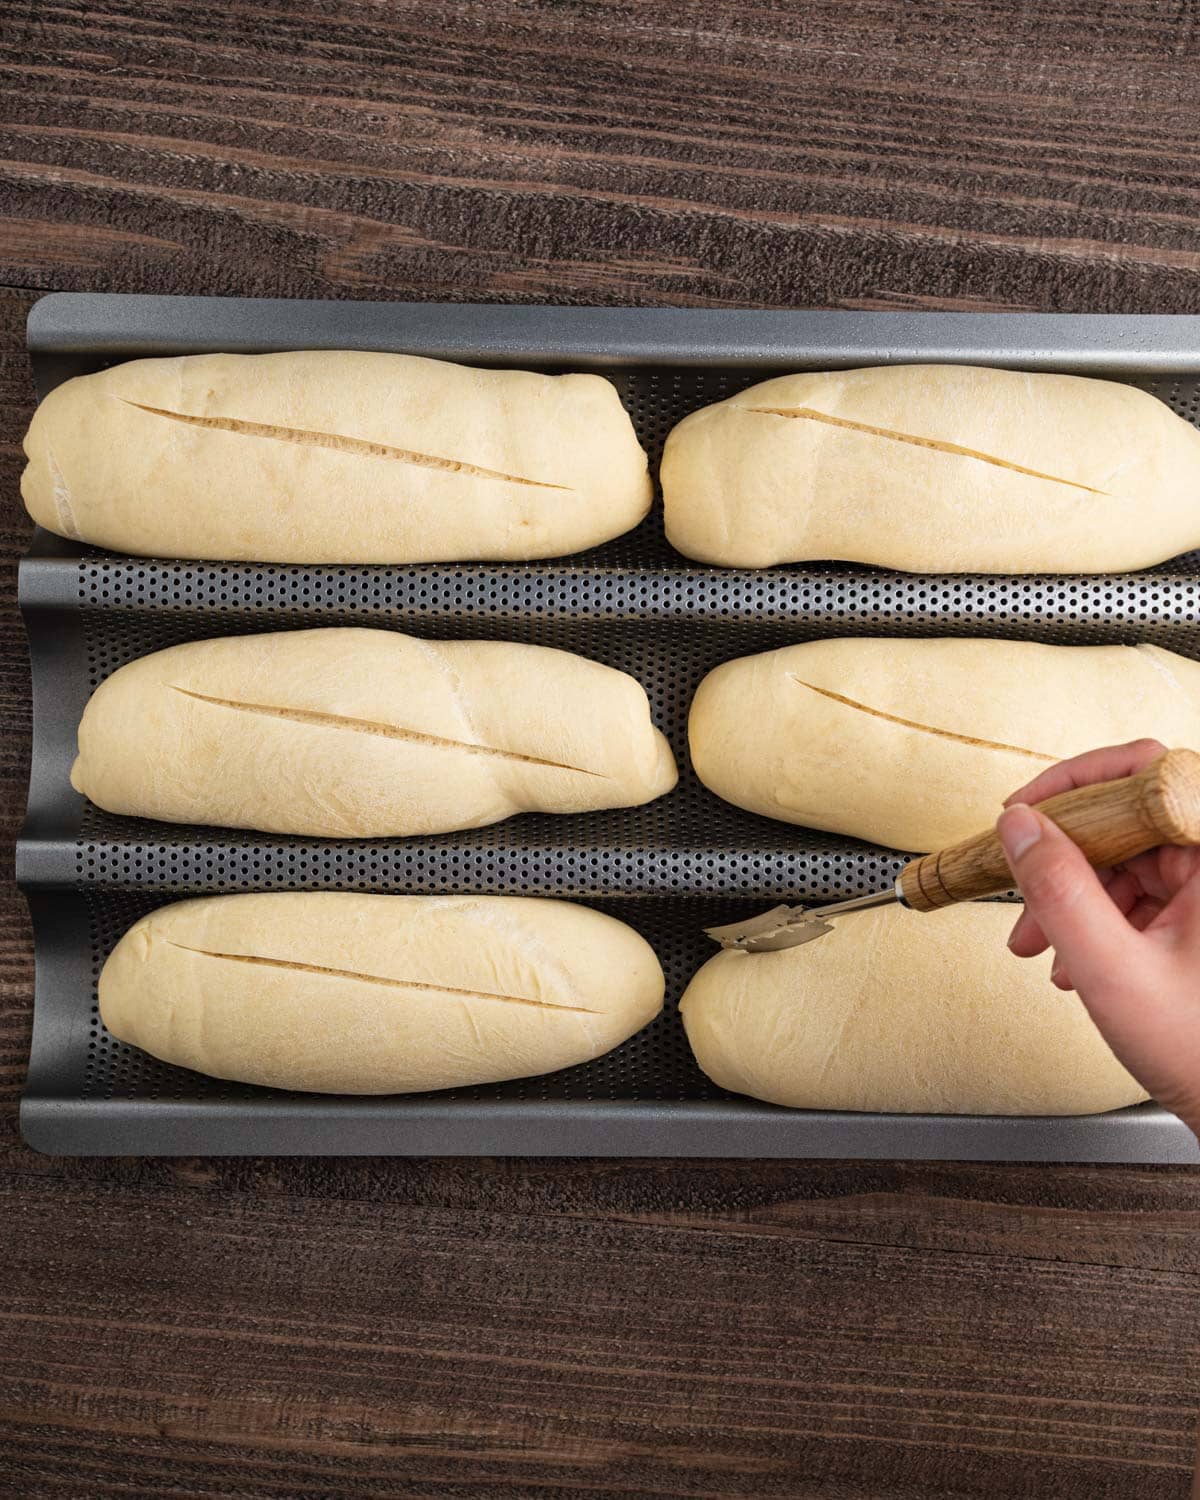
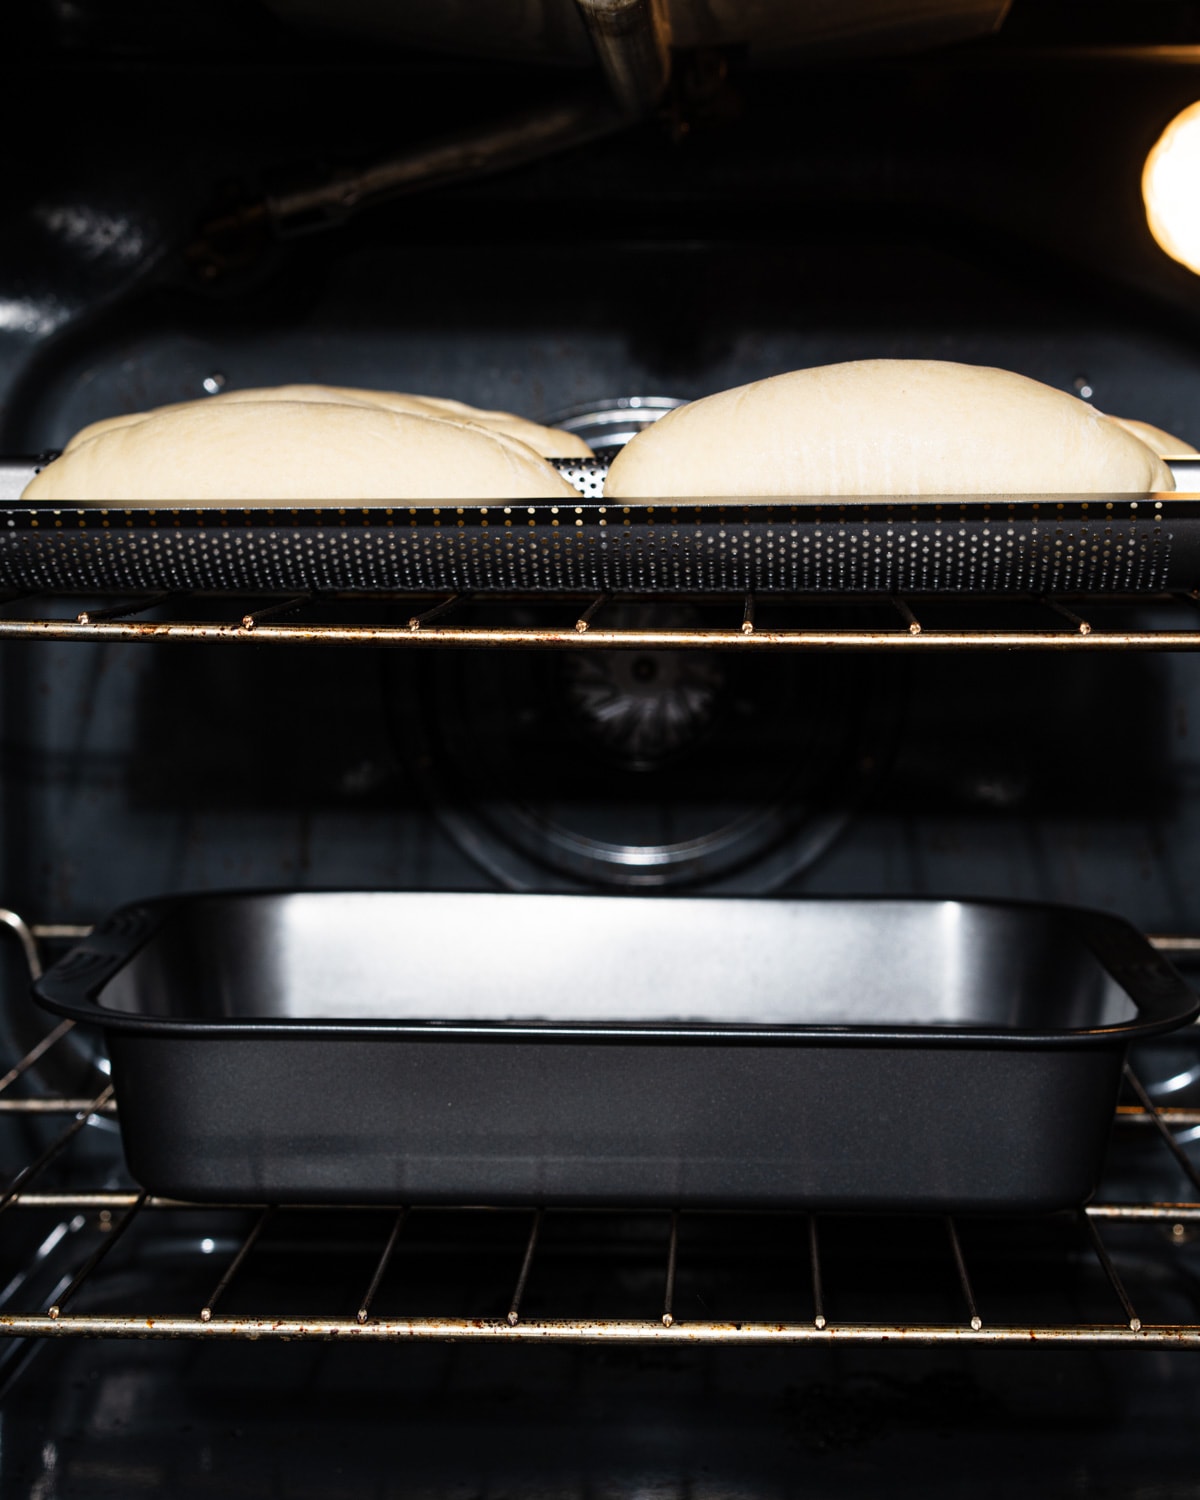
After shaping, place the baguettes on a baguette pan or parchment-lined baking sheet and let them rise uncovered until puffy. While they rise, preheat the oven and create a steamy environment by placing a tray of water on the lower rack. Just before baking, score the loaves. I usually skip misting because I like a slightly sturdier crust, but if you prefer a thinner crust, lightly mist the baguettes 1–2 sprays total, only if the surface looks dry.
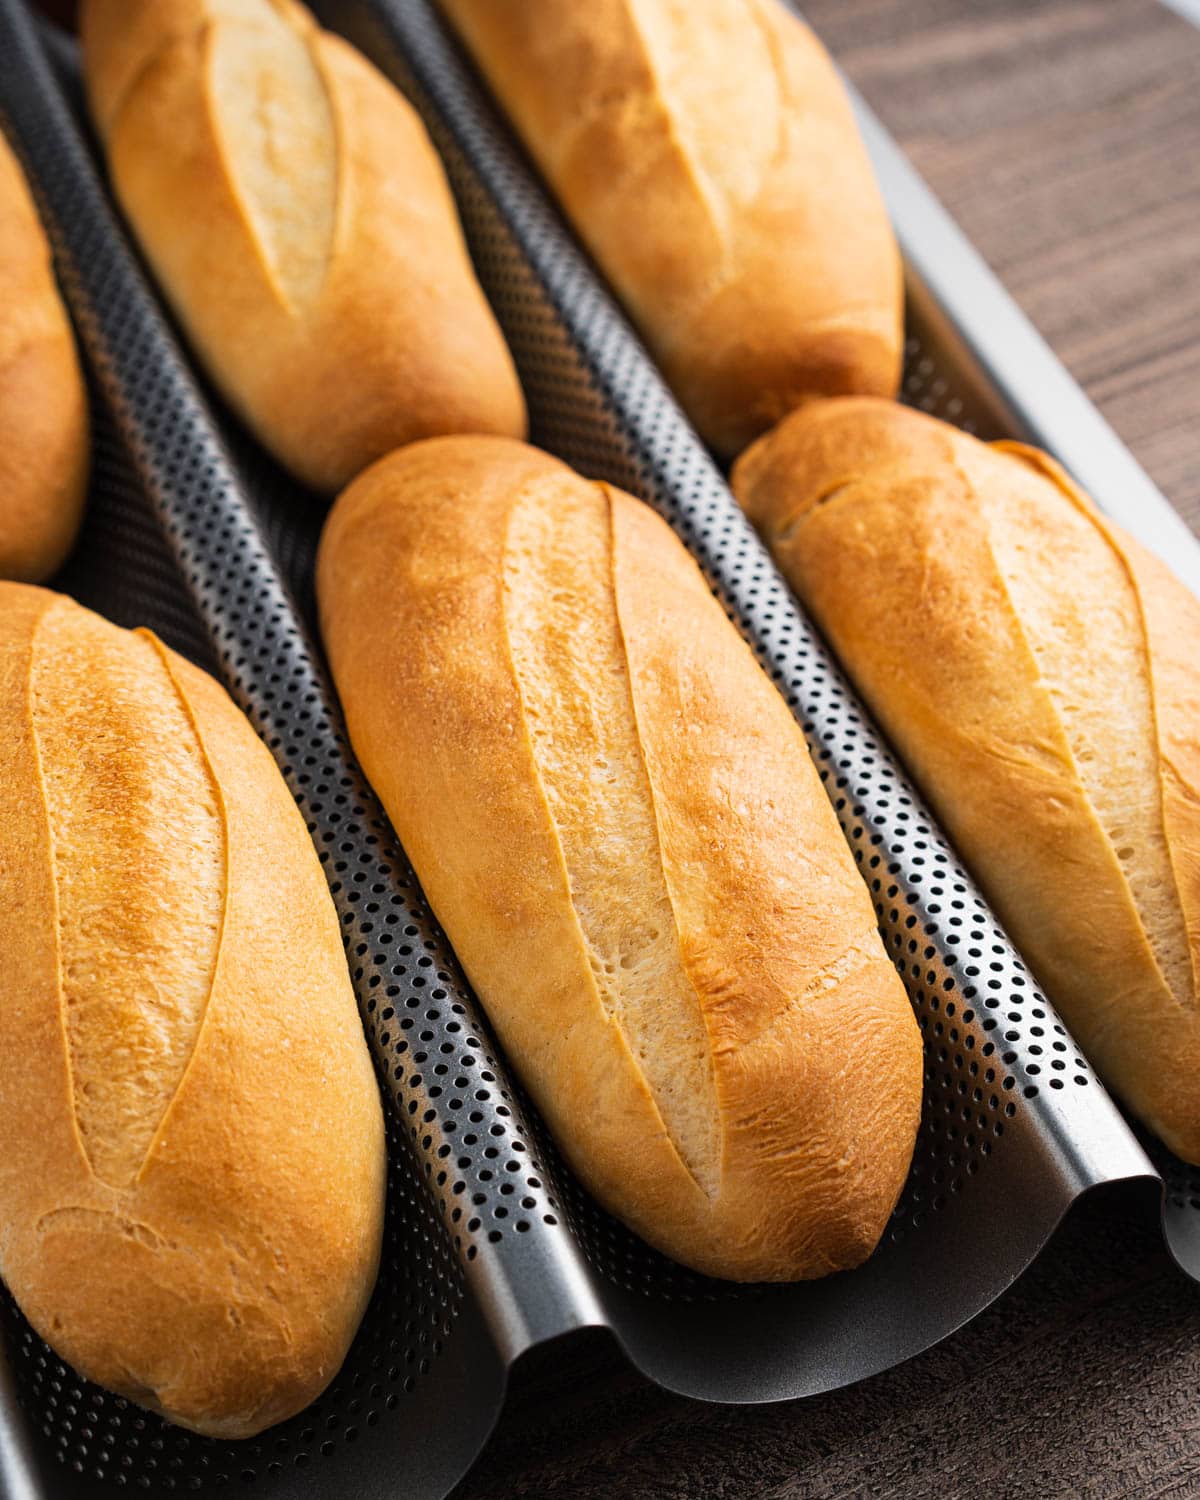
Bake the baguettes hot and fast, removing the steam tray early so the crust can set and crisp. Let them cool briefly before slicing. The crumb will continue to set as they cool, giving you a soft, airy interior with a thin crust.
Full measurements and step-by-step instructions for the updated version are in the recipe card below.
If you’re looking for the original recipe, scroll past the recipe card to find it.
Tips for the Best Homemade Banh Mi Bread
✔️ Measure your ingredients by weight for the best results—especially the flour. If you’re using measuring cups, don’t pack it in. Spoon the flour in and level it off with a knife.
✔️ Use a thermometer to get your water between 100–110°F for activating yeast, and aim for a warm proofing environment (75–85°F). If your kitchen’s chilly, let the dough rise in your (turned-off) oven with the light on.
✔️ This dough will feel softer and stickier than the original version. Resist the urge to add extra flour.
✔️ Steam is still essential. It’s what gives you that thin, crisp crust.
✔️ Don’t skip scoring! It’s not just for looks—it helps control how the bread expands in the oven.
Troubleshooting Banh Mi Bread
If the bread feels dense, it may have been over-mixed or over-proofed.
If the crust isn’t crisp, bake slightly longer. I like toasting the bread again right before eating it.
If the crumb is too tight, try handling the dough more gently during shaping.
Frequently Asked Questions (FAQ)
Yes. After shaping, cover and refrigerate for up to 24 hours. Let the dough sit at room temperature for about 30 minutes before baking.
You can, but the bread will be less airy. Bread flour gives the best texture.
Humidity can soften the crust. Let the bread cool uncovered or reheat briefly in the oven.
No. Traditional banh mi relies on fermentation and technique. You can get excellent results without either.
Yes to both. Freeze baked loaves for up to 2 months and reheat in the oven to restore crispness.
How to Store and Reheat
Banh mi bread is best the day it’s baked, when the crust is crisp, and the inside is light.
For short-term storage, keep it at room temperature for up to 2 days, loosely wrapped or in a paper bag. Avoid sealing it directly in plastic, which can soften the crust.
If you need to refrigerate it, place the bread in a paper bag, then inside a plastic bag, and store for up to 3-5 days. Refrigeration can dry the bread slightly, so reheating is recommended.
To reheat, place the bread in a 350°F oven for 5–7 minutes until warmed through and the crust crisps back up.
For longer storage, wrap tightly and freeze for up to 2 months. Reheat straight from frozen in the oven until crisp and heated through.
Ready to Make Banh Mi Bread?
Making banh mi bread from scratch is one of those baking projects that really pays off. Once you crack into that crisp crust and see the light, airy inside, it’s hard to go back to store-bought.
Whether you’re using it for a classic banh mi sandwich, Vietnamese shrimp toast, or simply enjoying it warm with butter, this bread delivers every time.
If you try this recipe, leave a comment and let me know how it went. If you’ve made both versions, I’d love to hear which one you liked better. And if it’s one you’ll want to make again, save it on Pinterest so it’s easy to come back to later.
RECIPE

Vietnamese Baguette (Banh Mi Baguette)
Ingredients
- 1½ cups (350g) warm water (100℉- 115℉)
- 1½-2 teaspoons (5-6g) instant yeast
- 2 teaspoons (8g) granulated sugar
- 4 cups (530g) bread flour
- 1 teaspoon (6g) salt
- 1 tablespoon unsalted butter melted
Instructions
- Activate the Yeast: In a bowl or measuring cup, combine the warm water, yeast, and sugar. Stir and let sit for 3–5 minutes, until lightly foamy.
- Mix the Dough: In the bowl of a stand mixer (or a large bowl if mixing by hand), combine the bread flour and salt.Add the yeast mixture and melted butter.Mix on low speed just until the dough comes together and no dry flour remains, about 1–2 minutes.The dough will look shaggy and sticky. Do not try to smooth it out.
- Rest the Dough: Cover the bowl and let the dough rest for 10 minutes.This rest allows the flour to fully hydrate and begins gluten development naturally, which helps create a more open crumb without over-mixing.
- Finish Mixing: After resting, mix on low to medium speed for 4–5 minutes, just until the dough becomes cohesive and stretchy.The dough should be soft, elastic, and slightly tacky.
- First Rise: Lightly oil a large bowl and transfer the dough into it. Cover and let rise in a warm spot for 1½ hours, until visibly puffy, gassy, and jiggly.
- Divide and Shape: After the first rise, the dough will have formed a thin, slightly dry skin on the surface. Turn the dough out onto a lightly floured surface skin-side down, keeping that surface intact.Divide the dough into 6 equal pieces (about 145g each).Flatten each piece into a rough triangle, keeping the surface skin on the outside. Roll into a baguette using light pressure in the middle and tapering the ends. That surface skin will become the outer crust of the bread.
- Second Rise (Shorter Proof): Place the shaped dough onto a baguette pan.Let rise for 35-40 minutes, uncovered, until puffy.When gently pressed, the dough should spring back slowly.
- Prepare the Oven: Preheat the oven to 450°F.Place a metal baking tray or sheet pan on the lower rack and carefully add hot water. Let the tray preheat with the oven so the oven is steamy when the baguettes go in.Score each baguette at a 45° angle using a sharp knife or baker’s lame.
- Bake with Steam: Transfer the baguettes to the oven. Lightly mist the baguettes 1–2 sprays total only if the surface looks dry. If the dough still looks moist after the second rise, skip the spray step. Excess surface moisture can prevent the crust from setting and crisping properly.Bake for 16–18 minutes, until deeply golden and crisp.After the first 2–3 minutes, carefully remove the steam tray to allow the crust to dry and crisp.
- Cool: Let the baguettes cool for at least 10 minutes before slicing. The crumb will continue to set as they cool.
Notes
- Measure your ingredients by weight for the best results, especially the flour. If you’re using measuring cups, don’t pack it in. Spoon the flour in and level it off with a knife.
- Use a thermometer to get your water between 100–110°F for activating yeast, and aim for a warm proofing environment (75–85°F). If your kitchen’s chilly, let the dough rise in your (turned-off) oven with the light on.
- Don’t skip scoring! It’s not just for looks; it helps control how the bread expands in the oven.
- Storage & Reheating: The crust will naturally soften as the bread cools. To crisp it back up, reheat the baguette in a 350°F oven for 5–6 minutes. If not eating right away, store the bread in a paper bag placed inside a plastic bag and keep it in the refrigerator.
Nutrition
Looking for the Original Recipe?
If you’ve made this banh mi bread before and prefer the original version with egg and a shorter rise time, I’ve kept it below. The updated recipe above is the one I currently use and recommend, but both versions work depending on the texture you’re after.
- 1 cup + 2 tablespoons water (warm to 100℉- 115℉)
- 1 (7 g or ¼ oz) packet instant yeast (about 2 teaspoons)
- 2 teaspoons (8 grams) granulated sugar
- 4 cups (500 grams) bread flour
- 2 teaspoons (10 grams) salt
- 2 tablespoons unsalted butter, melted
- 1 large egg (room temperature)
- Prep Your Ingredients: Bring the egg to room temperature. Weigh your flour for accuracy, or gently spoon it into a measuring cup and level off the excess.
- Make the Starter: In a microwave-safe bowl, heat 1 cup + 2 tablespoons of water for 30–35 seconds, until it reaches 100–115°F. Stir in 1 packet (7g or ¼ oz) of instant yeast and 2 teaspoons (8g) of sugar. Mix well and set aside for a few minutes until foamy.
- Mix the Dough
- Using a Stand Mixer: Attach the dough hook. In the mixer bowl, combine 4 cups (500g) bread flour, 2 teaspoons (10g) salt, 2 tablespoons unsalted butter, and 1 room-temperature egg. Mix on low speed (1–2) until just combined. Add the yeast mixture and continue mixing on medium speed (3) for 10 minutes, until the dough is smooth and elastic.
- Mixing by Hand: In a large bowl, mix the flour, salt, butter, and egg. Add the yeast mixture. The dough will be sticky—knead on a lightly floured surface for 10–12 minutes until smooth and elastic.
- First Rise: Lightly oil a large bowl and place the dough inside. Cover with plastic wrap or a clean kitchen towel and let it rise in a warm spot for 1 hour, or until doubled in size.
- Shape the Dough: Divide the dough into 6 equal pieces (about 135g each). Gently flatten each piece into a triangle using your hands or a rolling pin. Pinch the two corners, then roll into a baguette shape, tapering the ends slightly. Avoid pressing the center—this keeps the structure light and airy.
- Second Rise: Transfer the shaped dough onto a baguette pan, placing 2 baguettes per slot with about 1 inch of space between them. Using a baker’s lame or sharp knife, score each loaf at a 45° angle. Let rise uncovered in a warm place for 45 minutes, or until puffy and doubled in size.
- Preheat the Oven: Preheat to 425°F. Position one rack ⅓ from the top and another about 4 inches below it. Fill a tray or cookie sheet with water and place it on the lower rack to create steam.
- Get Ready to Bake: Just before baking, spritz each baguette with water (about 4 sprays per loaf) using a food-grade spray bottle. Place the baguette pan on the top rack, with the steam tray directly below.
- Bake the Banh Mi: Bake for a total of 15-18 minutes. After 4 minutes, open the oven briefly and lightly mist the baguettes again. Remove the steam tray about 10 minutes before the end to help the crust crisp up.
- Cool and Enjoy! Let the baguettes cool slightly before slicing. Enjoy them warm, fresh out of the oven, with your favorite bánh mì fillings or simply with a pat of butter.
New Recipe Vs. Old Recipe
- Added more water to create a lighter, airier crumb
- Used less yeast so the dough ferments more slowly
- Removed the egg so the crumb stays light and open, not fluffy like sandwich bread
- Mixed the dough more gently to keep it from tightening up
- Let the dough rest briefly to help gluten develop on its own
- Gave the dough more time to rise for a deeper flavor
- Shortened the final rise to keep bigger air pockets (too much final rise will cause it to deflate)
- Baked it hotter with steam for a thinner, crispier crust
Thank you for the recipe. I am a semi confident baker but my buns came out right shape but wrong texture – dense and chewy, closer to French loaf vs the characteristic airy and crisp structure I expected from indulging in too many banh mi buns.
Had to go back to check if recipe was for authentic buns or adaptation and looking at the pictures again I feel like I must have missed something on my side – will try again soon to see if I can get something closer.
Hi Nikita, thank you so much for the feedback. I’m sorry they didn’t turn out the way you were hoping, especially when you were aiming for that light, airy texture.
A few things that might help troubleshoot for next time: it sounds like the dough may have needed a longer proof. If your kitchen is on the cooler side, the dough can take more time to fully rise, and under-proofed dough can bake up dense and chewy. You’re looking for it to feel noticeably lighter and puffier before baking. Also, being careful not to add too much extra flour during shaping can help keep the crumb airy.
I really appreciate you giving it another try, and I’d love to hear how it goes next time. Don’t hesitate to reach out if you want to walk through it step by step.
i just tried this recipe today its great!!! i made a mini version [splitting the dough into a dozen] and the regular size! I didn’t have to bake mine the full 22 mins, more like 15 ish but i think my oven runs a bit more hot! It’s really nice and fluffy plus crispy! I think im gonna add another tsp of salt for my taste but overall its a great recipe!!! my only “complaint” is my bread sticks to the tray for some reason and really hard to remove- i even tried greasing it for my second batch but still had that issue, any tips would be great! again, love love love this recipe!
Hi Victoria! I’m so happy you loved it and that you tried both the mini and regular sizes! And I’m with you on the salt. I personally like it a little saltier too (my original recipe had 3 teaspoons of salt), but a few readers found it too salty, so I scaled it back. Feel free to adjust it to your taste.
Sorry you ran into the issue of the bread sticking to the pan, I know how frustrating that can be. I didn’t personally have problems with that, so I haven’t had to test these myself, but this is what I’d try. Don’t line the entire tray with parchment since the steam needs to reach the bread while it bakes. Instead, you can cut small pieces of parchment just for the sticky spots or individual baguette areas. You could also lightly dust the bottoms with a little extra flour to see if that helps. And definitely let the bread cool for a few minutes before removing it. It releases much more easily once it’s set. Let me know if you retry it again with any of these methods!
Thanks so much for sharing your experience and tips. I really appreciate it!
I dusted my baguette pan with some rice flour & had no problems! I also tried this with a foil that I shaped into a baguette pan & it worked as well.
Hi Tiffany! That’s really good to know, thank you for sharing what worked for you! That’s helpful for anyone else running into sticking issues.
Hi. I would like to ask.aside from bread flour.whats the best substitution that i can use?thank you❤️
Hi! Great question. If you don’t have bread flour, all purpose flour works well and is the best substitute. The texture will be slightly less chewy, but it will still turn out really good.
This recipe is so good. I’ve doubled it twice to make it. I just doubled all the ingredients. I do use a scale to weigh ingredients.
My family likes it so much. I did buy a special pan to bake it. I have used King Arthur Sir Lancelot flour with very high gluten and I’ve used their Special patent flour that is a bit less gluten. Both turned out great. My 12 year old daughter helped me roll them this time.
Yay, I love hearing this! Doubling the recipe is such a great idea, especially with how quickly these disappear. I haven’t had a chance to test doubling the recipe myself, so I really appreciate you letting me know it worked for you. Love that you tried different flours too. Was there one that you liked better?
My first attempt at making banh mi and I actually nailed it!!! Thanks for sharing your recipe! My oven was definitely stronger so I had to take it out like 6-7 min earlier. I was also able to do the dough in my bread machine!
That’s amazing! Nailing banh mi bread on your very first try is such an accomplishment (it definitely took me a few tries to get there!). Ovens can vary so much, so you did the perfect thing by checking early. Thanks for sharing your tip about the bread machine, I know other readers will find it super helpful too!
When you make larger batches (x2 or x3) your ingredients dont all increase x2 or x3.
Great question! I actually haven’t tested doubling or tripling the recipe yet, so I can’t say for sure how it would turn out. In most cases, you can multiply all the ingredients evenly (except for the salt), but sometimes larger batches need a little extra proofing time or bake time can vary. If you try it, I’d love to hear how it works out for you!
I’m thinking of trying this and wondered which ingredient brings in the small amount of trans fat? And if it can be avoided. Thank you in advance, Darla
Hi Darla! Great question. None of the ingredients listed should naturally contain trans fat, especially if you’re using real butter. Sometimes nutrition calculators can show trace amounts due to rounding or default database entries. To be safe, you can always double-check your butter label to make sure it doesn’t include any partially hydrogenated oils (that’s where trans fats usually sneak in). But with these ingredients, you’re in the clear for a trans-fat-free loaf! Let me know if you give it a try!
The pictures look amazing and I’d like to try this recipe, but since this recipe doesn’t use rice flour isn’t this French baguettes than rather Vietnamese baguettes?
Great question! You’re right. Some Vietnamese baguettes do use rice flour for a lighter texture. But many homemade versions just use all-purpose or bread flour, like this one. What really makes it work for banh mi is the light, crisp crust and soft interior. The steam from spraying water and using a tray of water helps create that texture. So it’s not exactly a traditional French baguette, but it still works great for banh mi. Let me know how it goes if you try it!
I made these today for crawfish poboys. They turned out great with a perfect flavor. I just bought a new stove and checked the oven temperature, but mine were done in 14 minutes. I will make these again for sure.
That sounds amazing, crawfish poboys with homemade baguettes?! I’m so glad they turned out great for you! Thanks for the tip on the bake time too, every oven’s a little different. Can’t wait for you to make them again!
Worked very well for me. I’m in Phuket, Thailand, and used an electric fan oven at 205C for 22 minutes. Proving temperature isn’t a problem here, with daytime temperatures around the high 20’sC. I have some decent pork tenderloin in my freezer, so am going to give a go instead of pork shoulder as a filling (I use pork shoulder for Korean bulgogi). I’ve made the pickled carrot and daikon before, using it with Asian pulled pork in bao buns.
That sounds awesome! Thanks for sharing your experience all the way from Phuket! So glad the recipe worked well for you. Pork tenderloin sounds delicious. Definitely leaner, but still flavorful, especially with all the banh mi fixings.
I must say, I very rarely bake and so am quite inexperienced but these came out fantastic, which is a sign of a solid recipe. Mine came out a little darker than intended so next time I’ll take one or two mins off the cooking time but I know it’s just because my oven runs a little hot. My husband was very impressed by the flavor and texture, especially for it being my first try. Crust came out perfectly thin and crispy. He said it was so good he could eat a whole bun plain with just a bit of butter! Looking forward to making banh mi sandwiches tomorrow with all the fixings! Thank you!
I’m so happy to hear they turned out well, especially for one of your first baking adventures! That’s such a win! Every oven runs a little differently, so taking a few minutes off the bake time next time sounds like a great call (plus, you can always toast them again before serving). And I love that your husband enjoyed them too, what an awesome compliment! Can’t wait for you to enjoy those banh mi sandwiches, everything’s better with fresh, homemade buns! I’m sure they’ll be delicious!
What a great recipe. I baked once yesterday and one more time tonight. The baguettes came out so perfect. Thank you so much for sharing the recipe.
That’s fantastic! I’m so glad the recipe worked out for you — twice in a row! Freshly baked baguettes are the best. Thank you for sharing your success!
Can I use a convection oven or a gas oven? Will I need to change anything to accommodate?
This recipe was specifically tested using a gas oven, so the results are optimized for that setup. While I haven’t tested it in a convection oven, it should work with some adjustments. Convection ovens typically bake more evenly and efficiently, so you may need to lower the temperature by about 25°F (15°C) and keep an eye on the baking time, as it could be shorter. I’d love to hear how it turns out if you give it a try!
This turned out really well! I didn’t quite get that crispy-thin shattering crust I’m after, but the thinness of the crust was perfect. Followed the recipe exactly, so it’s probably due to my oven, but I’m happy to finally settle on one great recipe to work with. The scaling conversion in the recipe is off so I’ll have to do some calculations to reduce the number of baguettes. Thank you!!
Instead of making 6 individual baguettes, I split the dough in half and made two. Recipe was easy to follow and so far, this recipe is the best one I’ve tried for baguettes for my banh-mi’s. Thank you!
Thank you for sharing your experience! So glad it worked out!
Hey there! I just came across your post on Vietnamese baguettes, and I have to say, it’s fantastic! Your description of the crispy yet fluffy baguette filled with flavorful meats and fresh veggies transported me right to the streets of Vietnam. I appreciate how you highlighted the perfect balance of textures and the vibrant taste combinations. Your attention to detail really shines through, and it’s evident that you have a deep appreciation for this culinary gem. Keep up the great work, and I can’t wait to read more of your delicious adventures!
Can’t beat homemade baguettes and now I have the Vietnamese version. So fluffy and delicious.
I love a good sandwich and you can’t beat a great tasting baguette.
I love that this was a complete guide for everyone who wants a Bahn Mi Bread! Thanks for sharing!!
came out excellent and so tasty. I am so happy that we can now enjoy homemade baguette and don’t have to get it from the store anymore.