Easy Kimchi Recipe


Homemade kimchi might sound intimidating at first, but I promise—it’s way easier than you think. If you’ve ever picked up a jar at the store and wished it had more crunch, more flavor, or just cost less, this recipe is for you. With just a little prep (and some waiting for fermentation to do its thing), you’ll have a big batch of fresh, tangy kimchi ready to eat for weeks.

This version is straightforward and flexible, so you can prep it while cooking dinner, and let time do the rest.
Why You’ll Love This Kimchi Recipe
- Simple ingredients – Everything can be found at your local Asian grocery store or online.
- Big batch = less work later – One afternoon of prep gives you weeks of ready-to-eat kimchi.
- Kid- and parent-friendly flavor – You control the spice and salt, so it can be as mild or bold as you like.
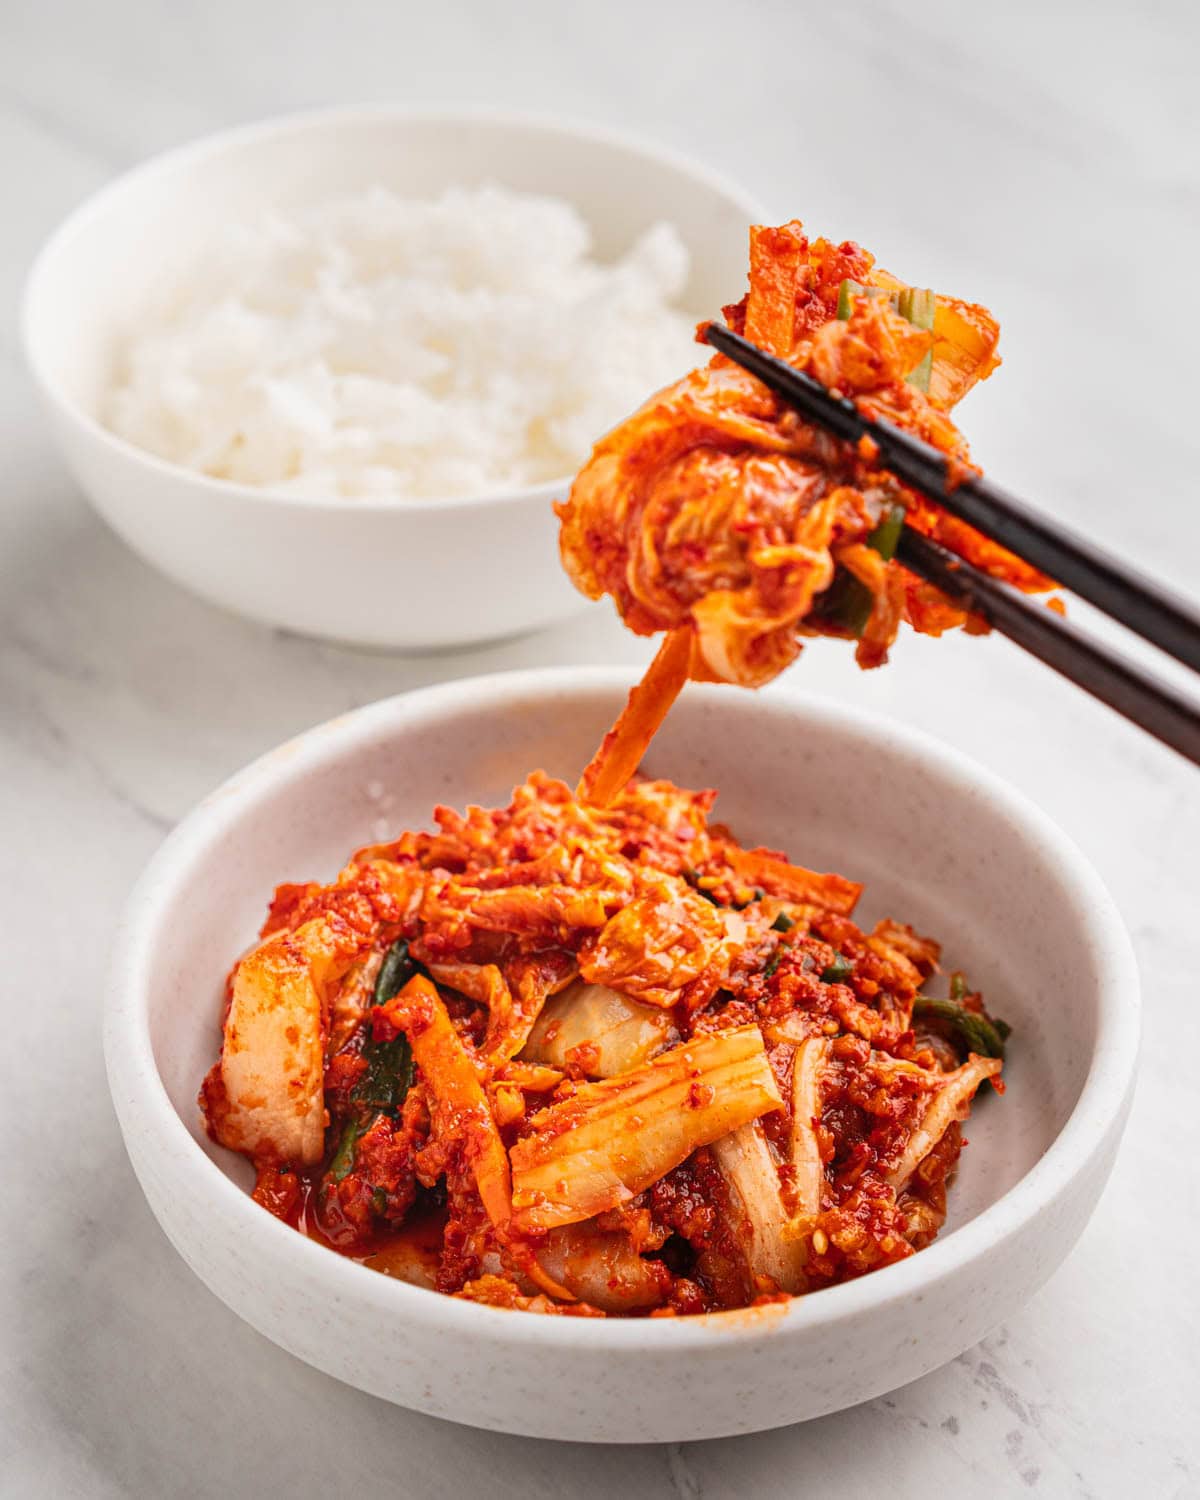
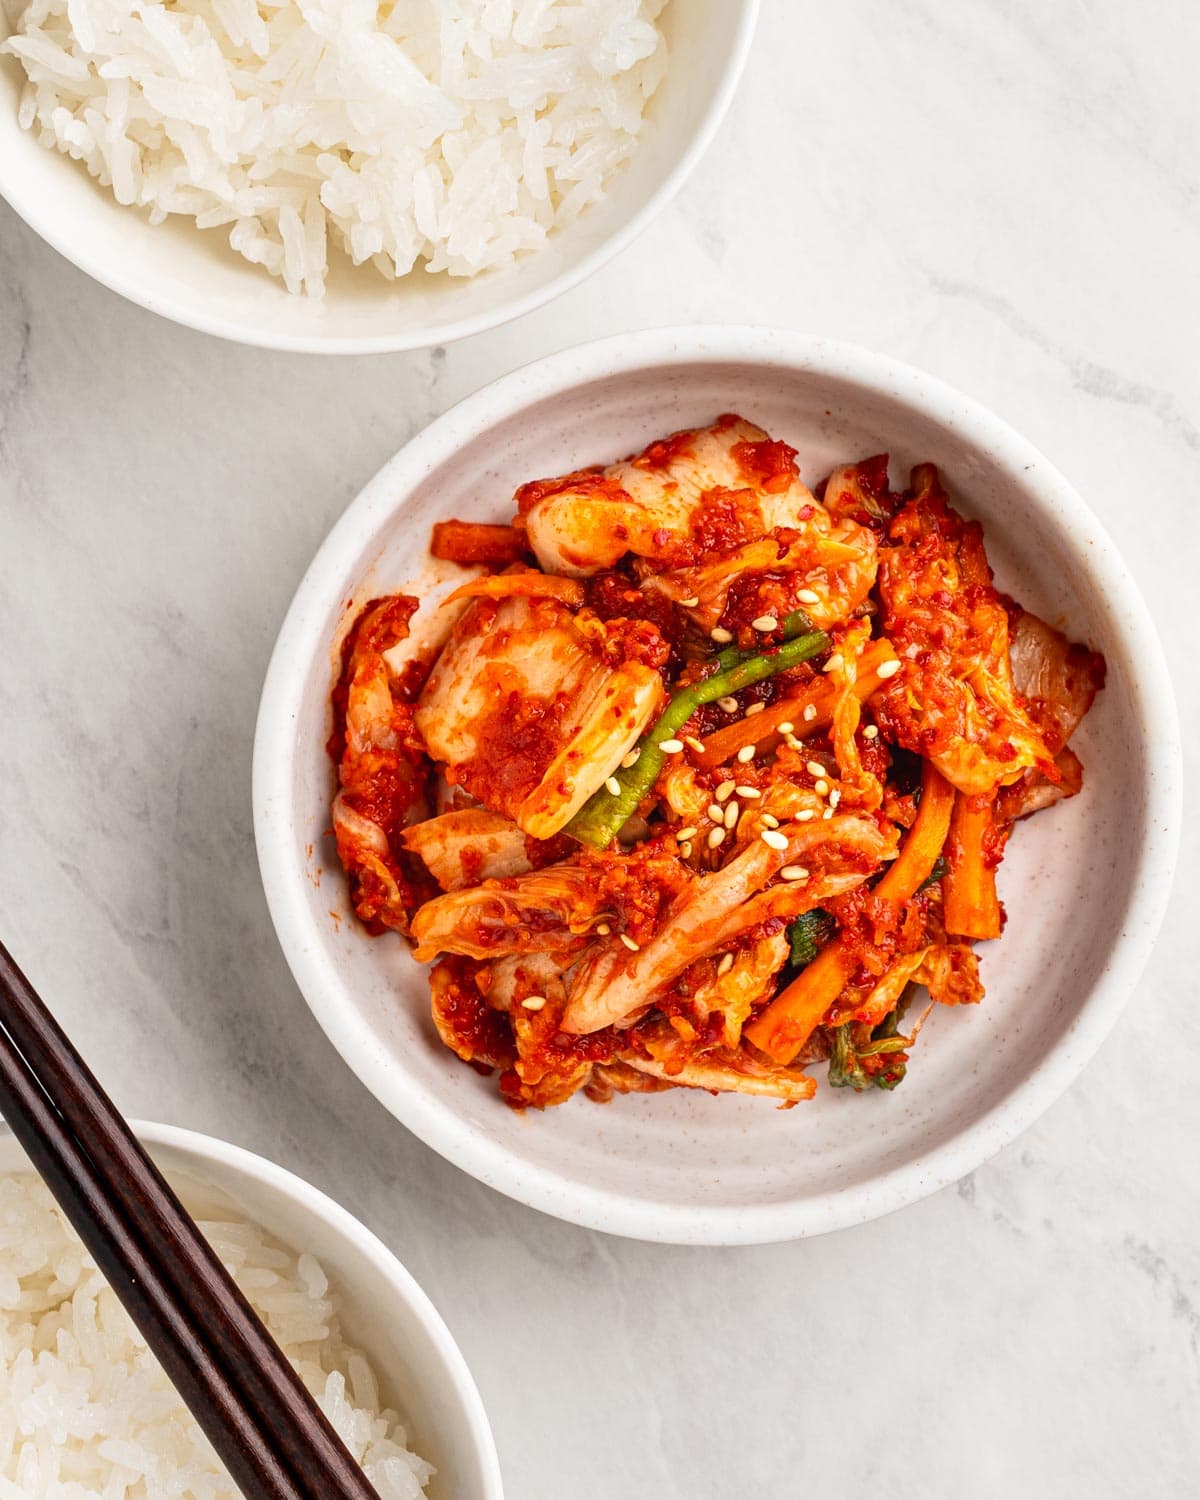
- Versatile – Serve it with rice, add to soups, toss into fried rice, or use as a topping for noodles.
What is Kimchi?
Kimchi is a traditional Korean side dish made from napa cabbage, radish, and vegetables fermented in a savory chili paste. It’s crunchy, tangy, spicy, and loaded with probiotics. Think of it as the ultimate flavor booster. You can eat it on its own, or use it to instantly make simple meals exciting.
Key Ingredients You’ll Need
Here’s what makes this recipe work (full ingredients and directions in the recipe card below):
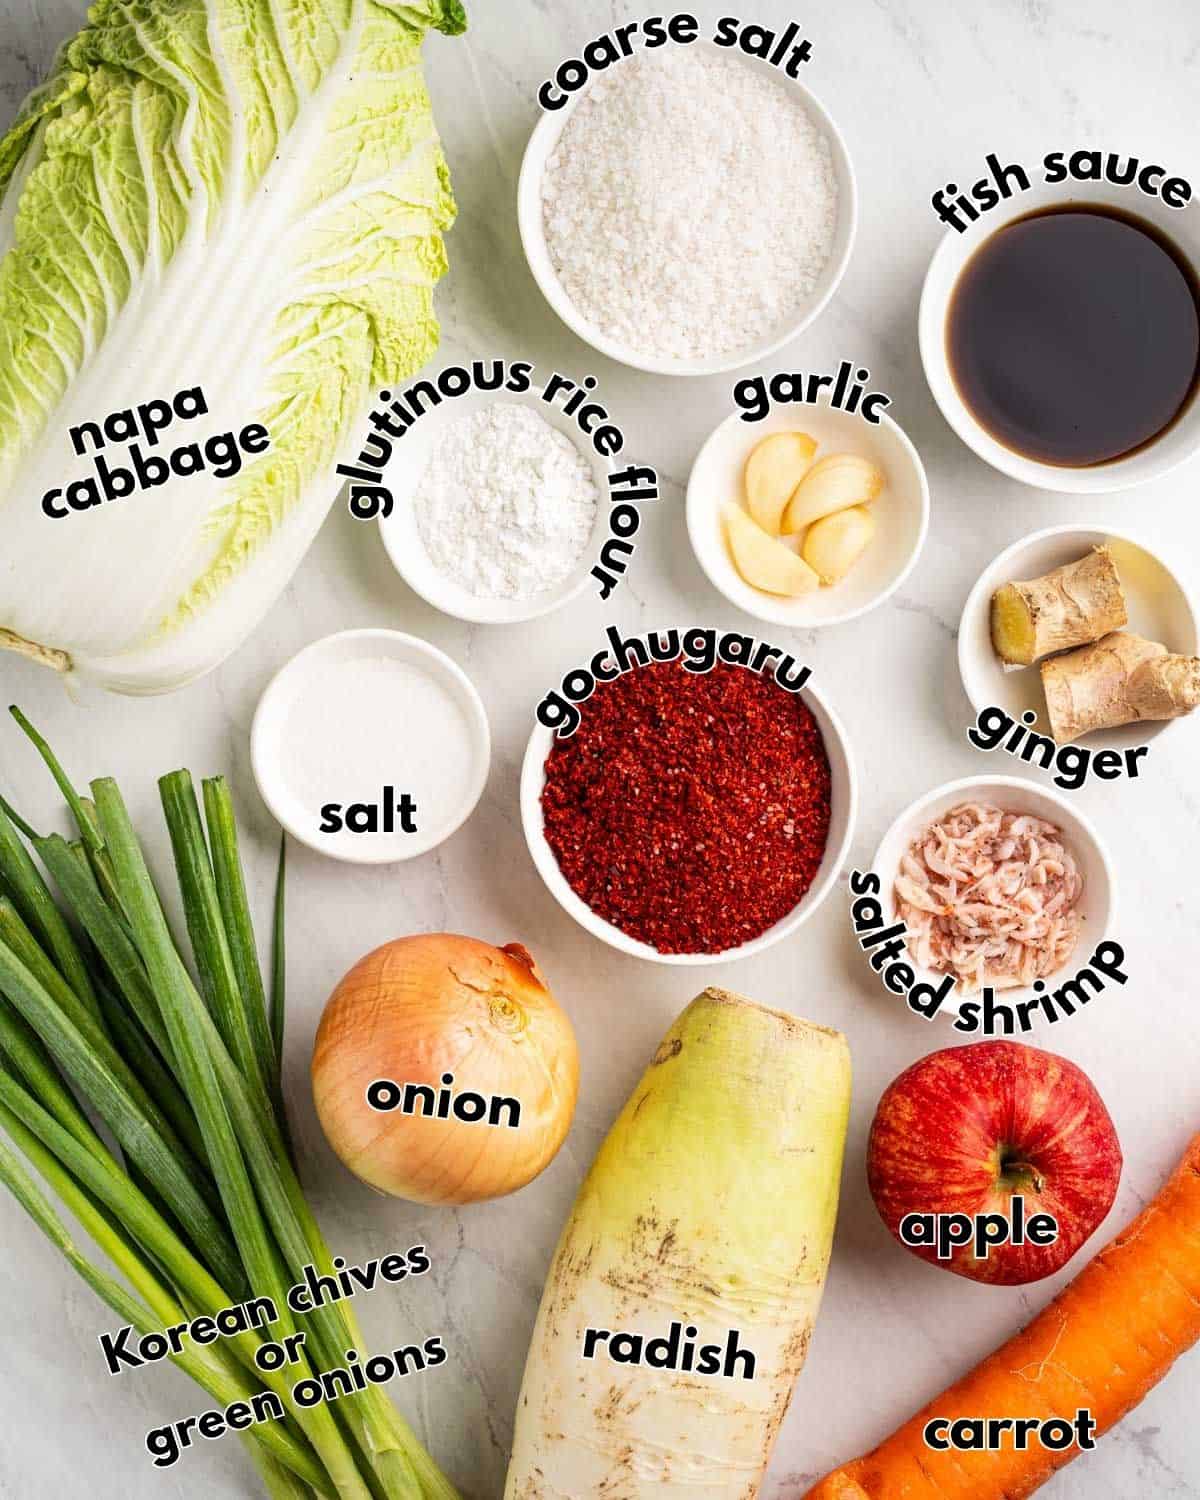
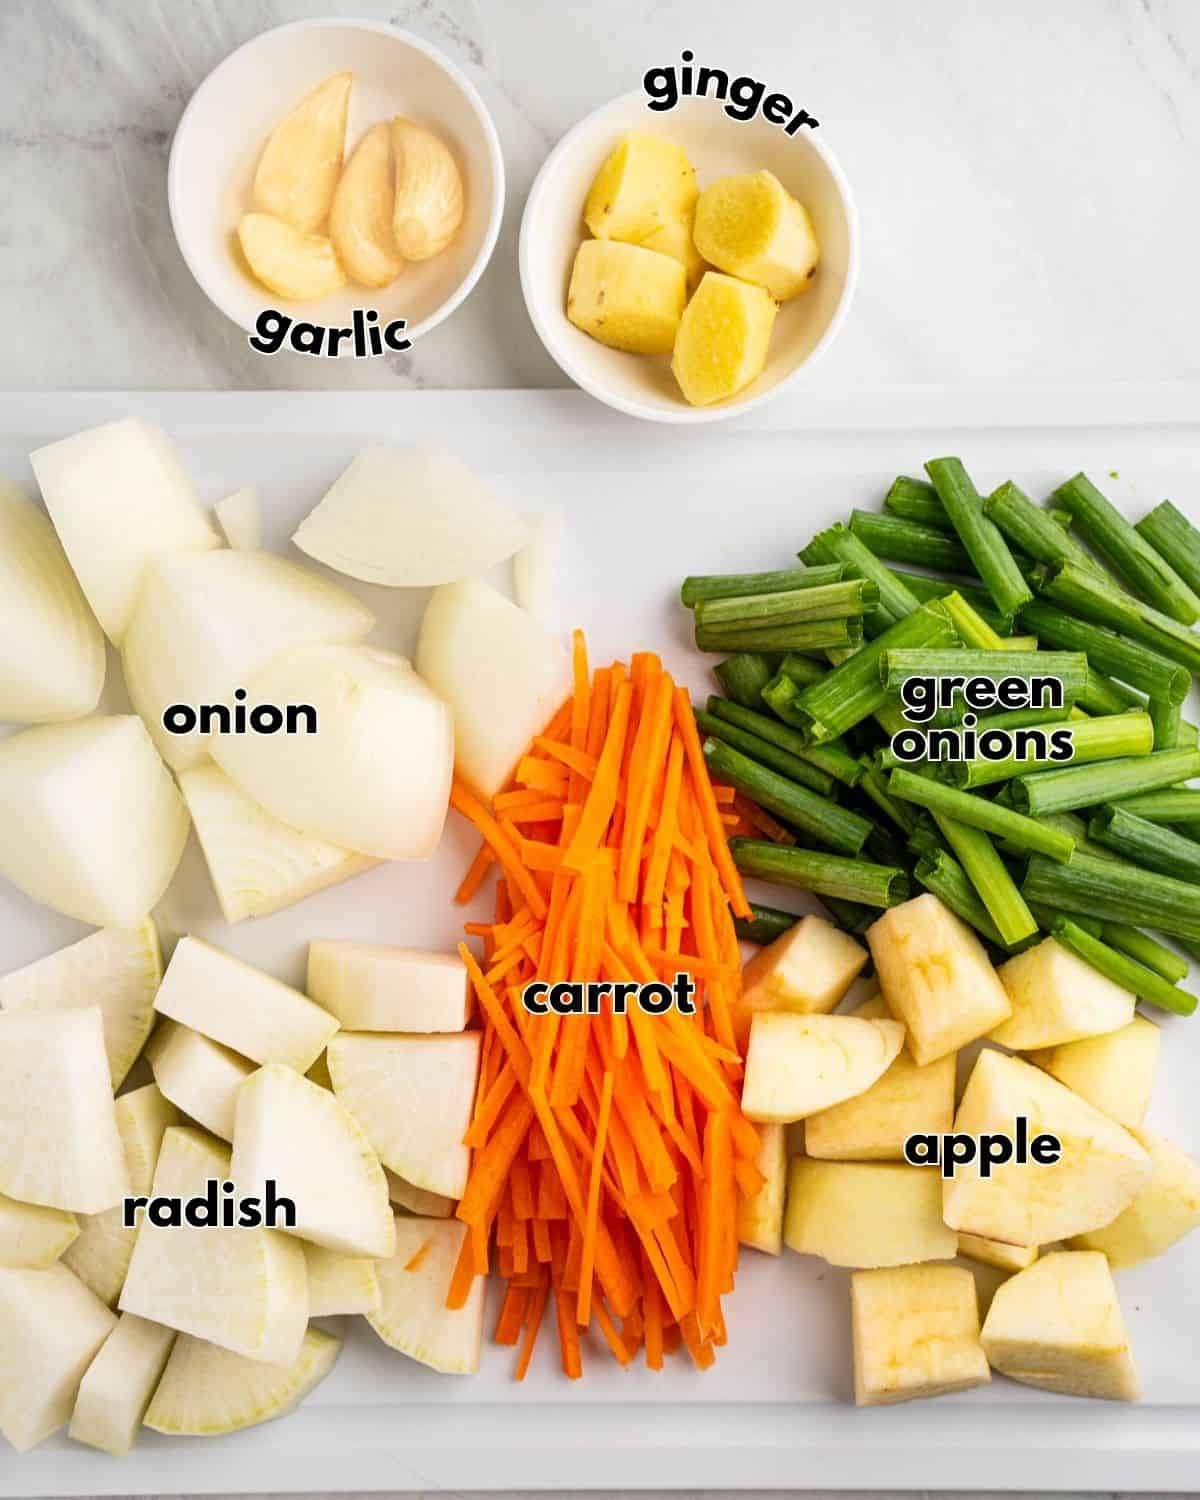
- Napa cabbage – The base of kimchi. Make sure to soak it well in salted water to soften the leaves.
- Korean coarse salt (cheonil yeom) – Different from table salt; it draws out water without breaking down the cabbage too much.
- Gochugaru (Korean chili flakes) – Gives kimchi its signature color and spice. Adjust the amount for kids or if you want a milder flavor.
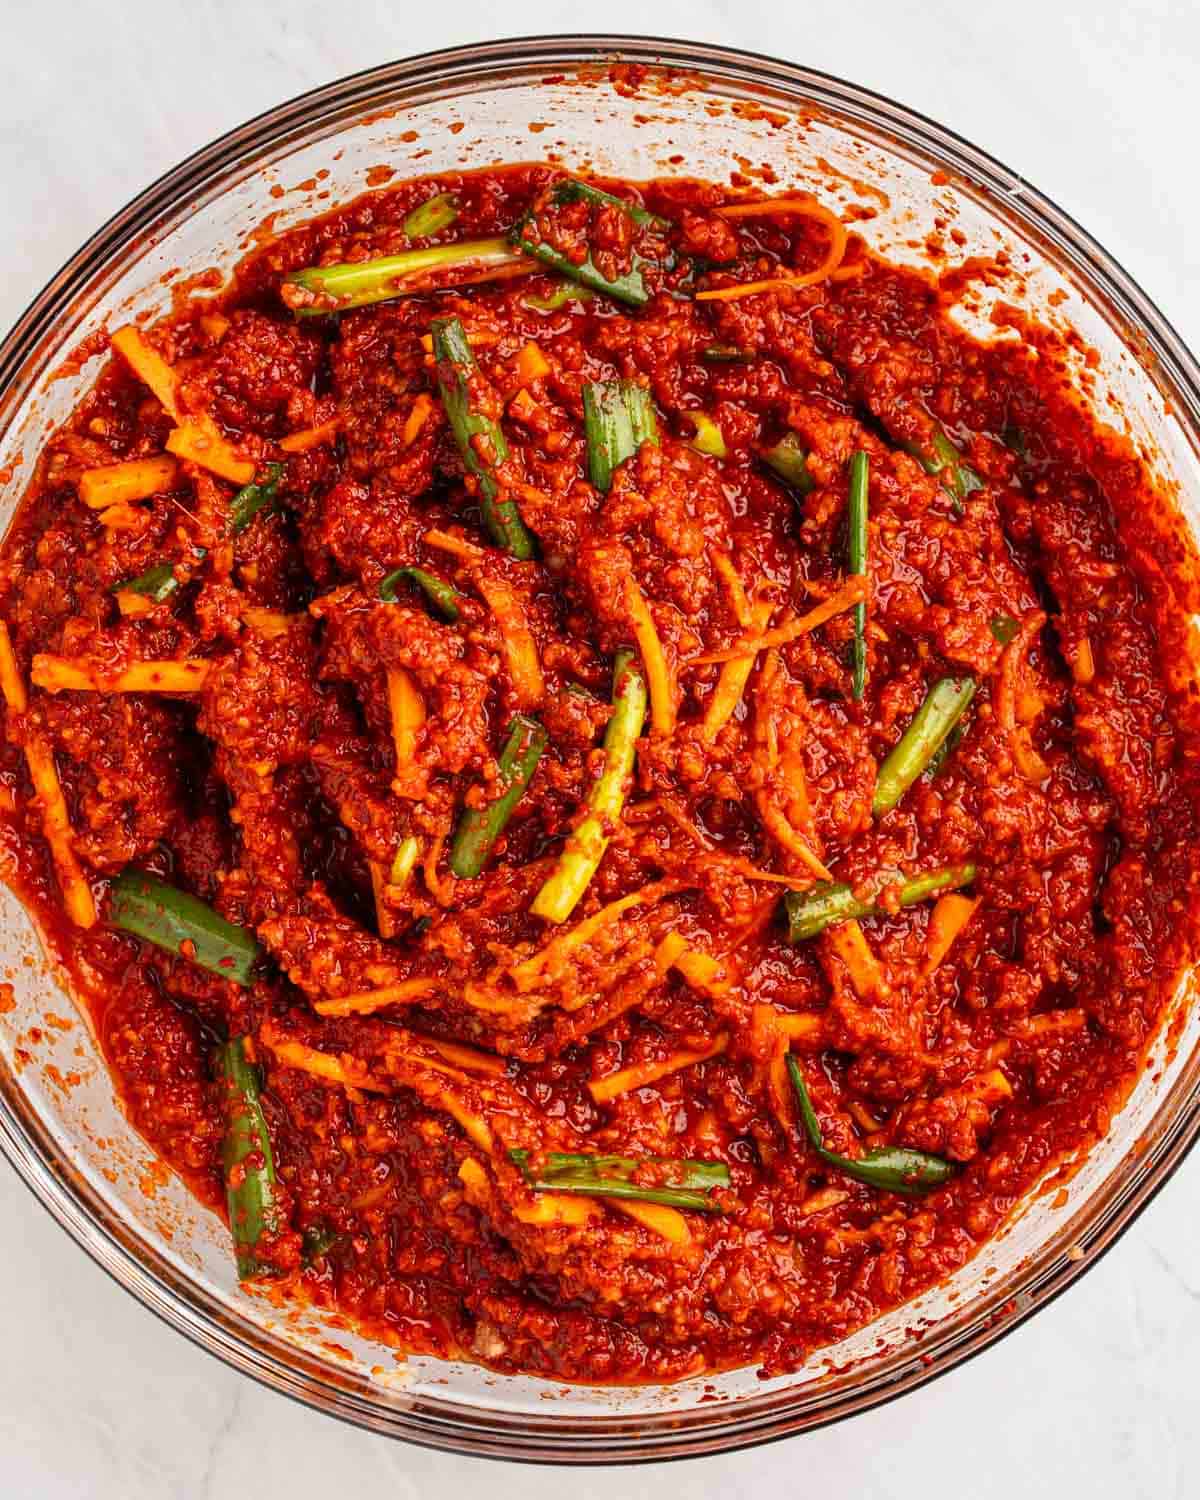
- Radish + carrots – These add crunch and freshness to the kimchi. For the radish, blend half of it into the seasoning paste for added depth of flavor. Carrots are cut into matchsticks to give extra crunch.
- Glutinous rice flour paste – Helps bind the seasoning so it clings to every leaf.
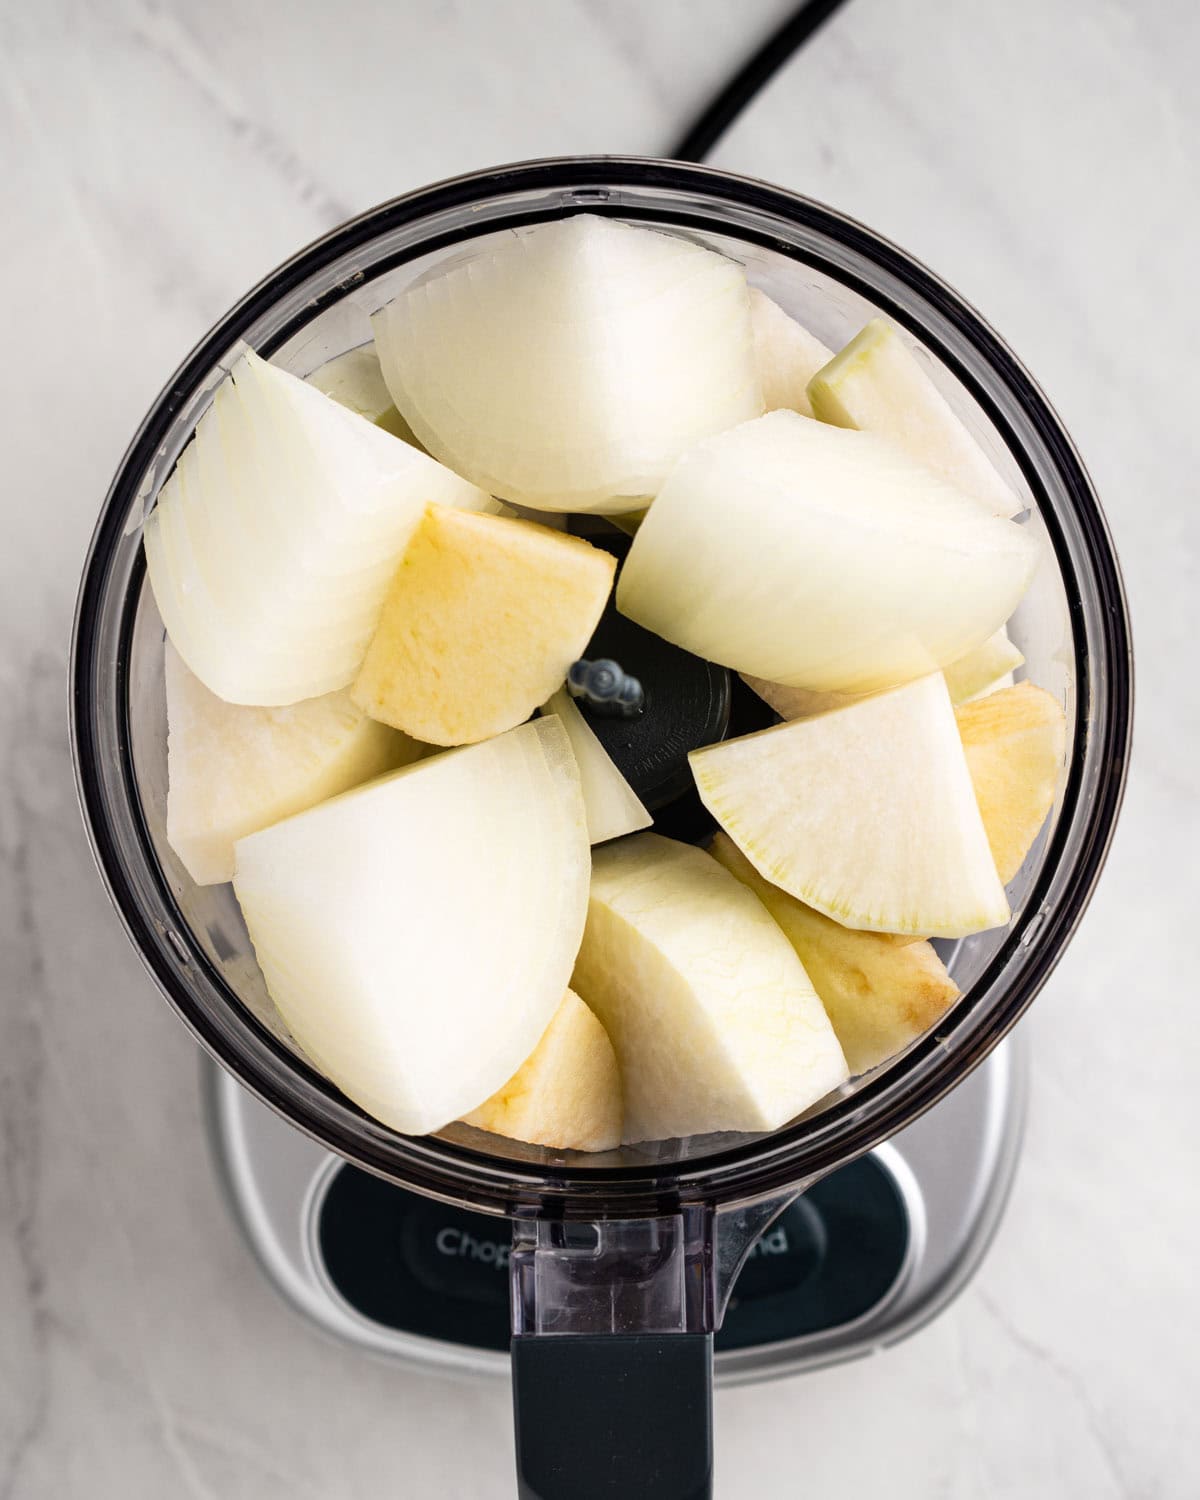
- Garlic, ginger, onion, apple/pear – Aromatic and slightly sweet, balancing the spice.
- Fish sauce & fermented salted shrimp (saeujeot) – Brings deep umami flavor. (Don’t worry—once fermented, it doesn’t taste fishy.)
- Korean chives or green onions – A fresh finishing touch.
Please scroll ⬇️ to the recipe card for the full ingredient amounts and instructions.
How to Make Kimchi (Step-by-Step)
For a list of ingredients and more detailed instructions, please scroll to the recipe card.
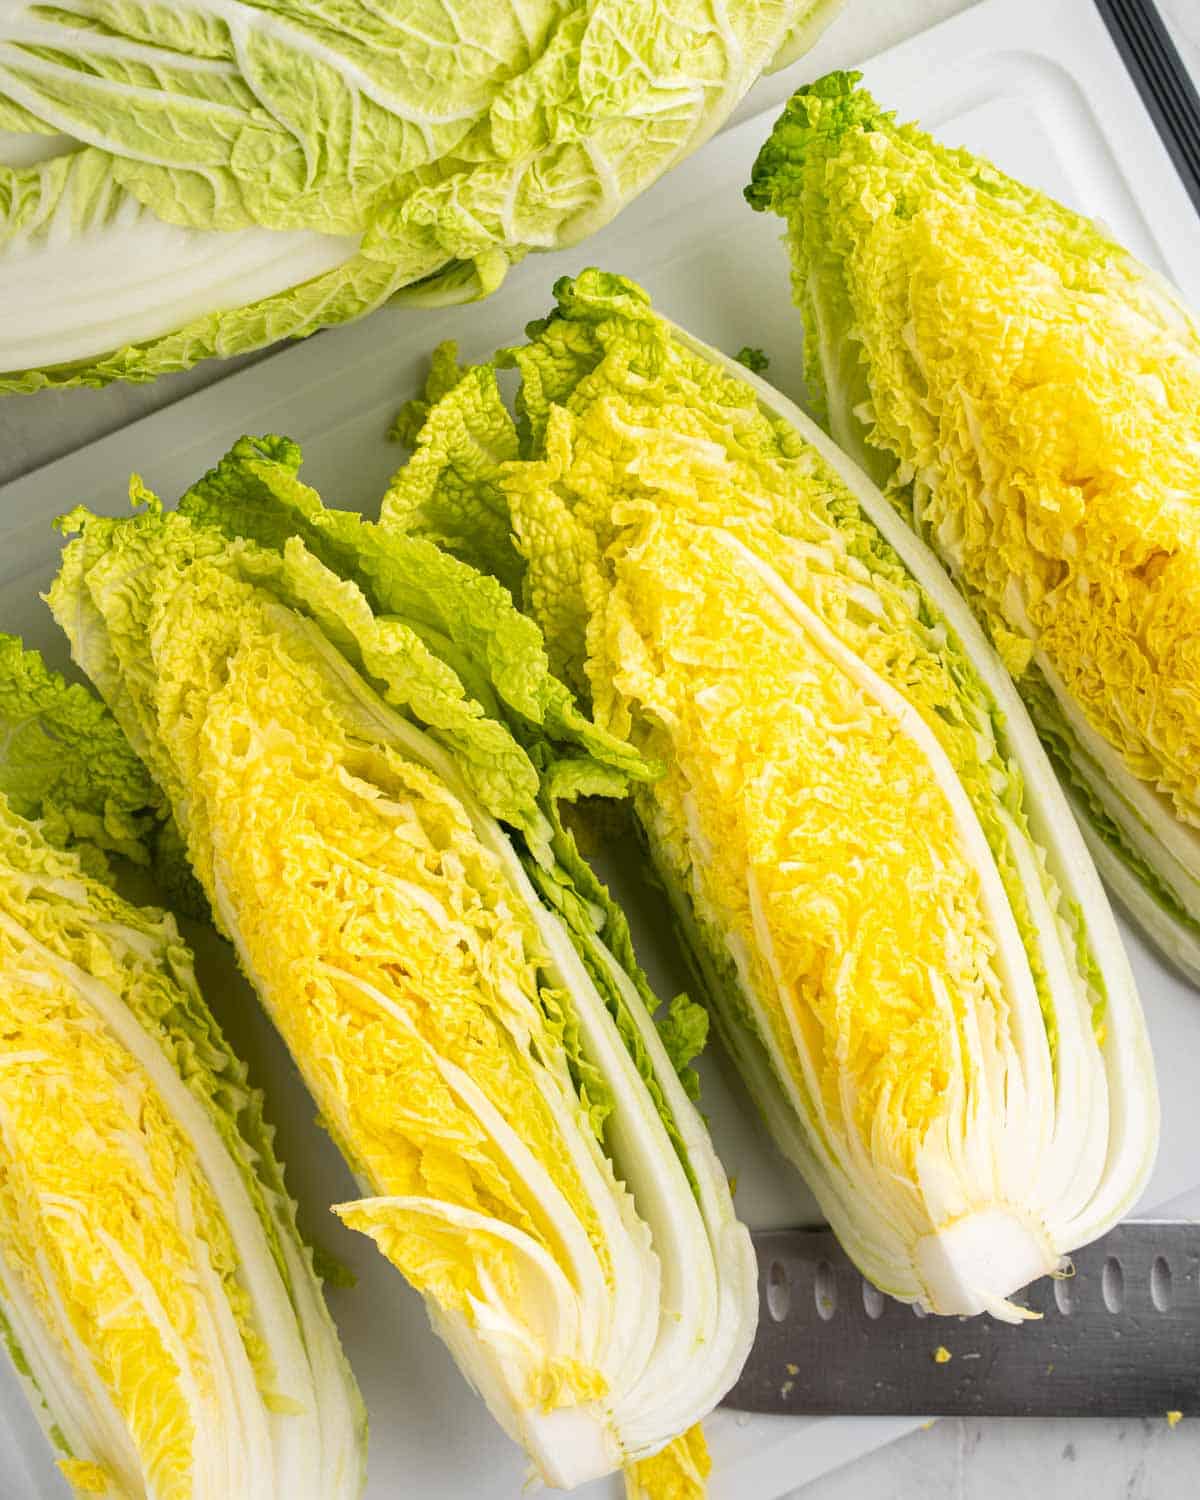
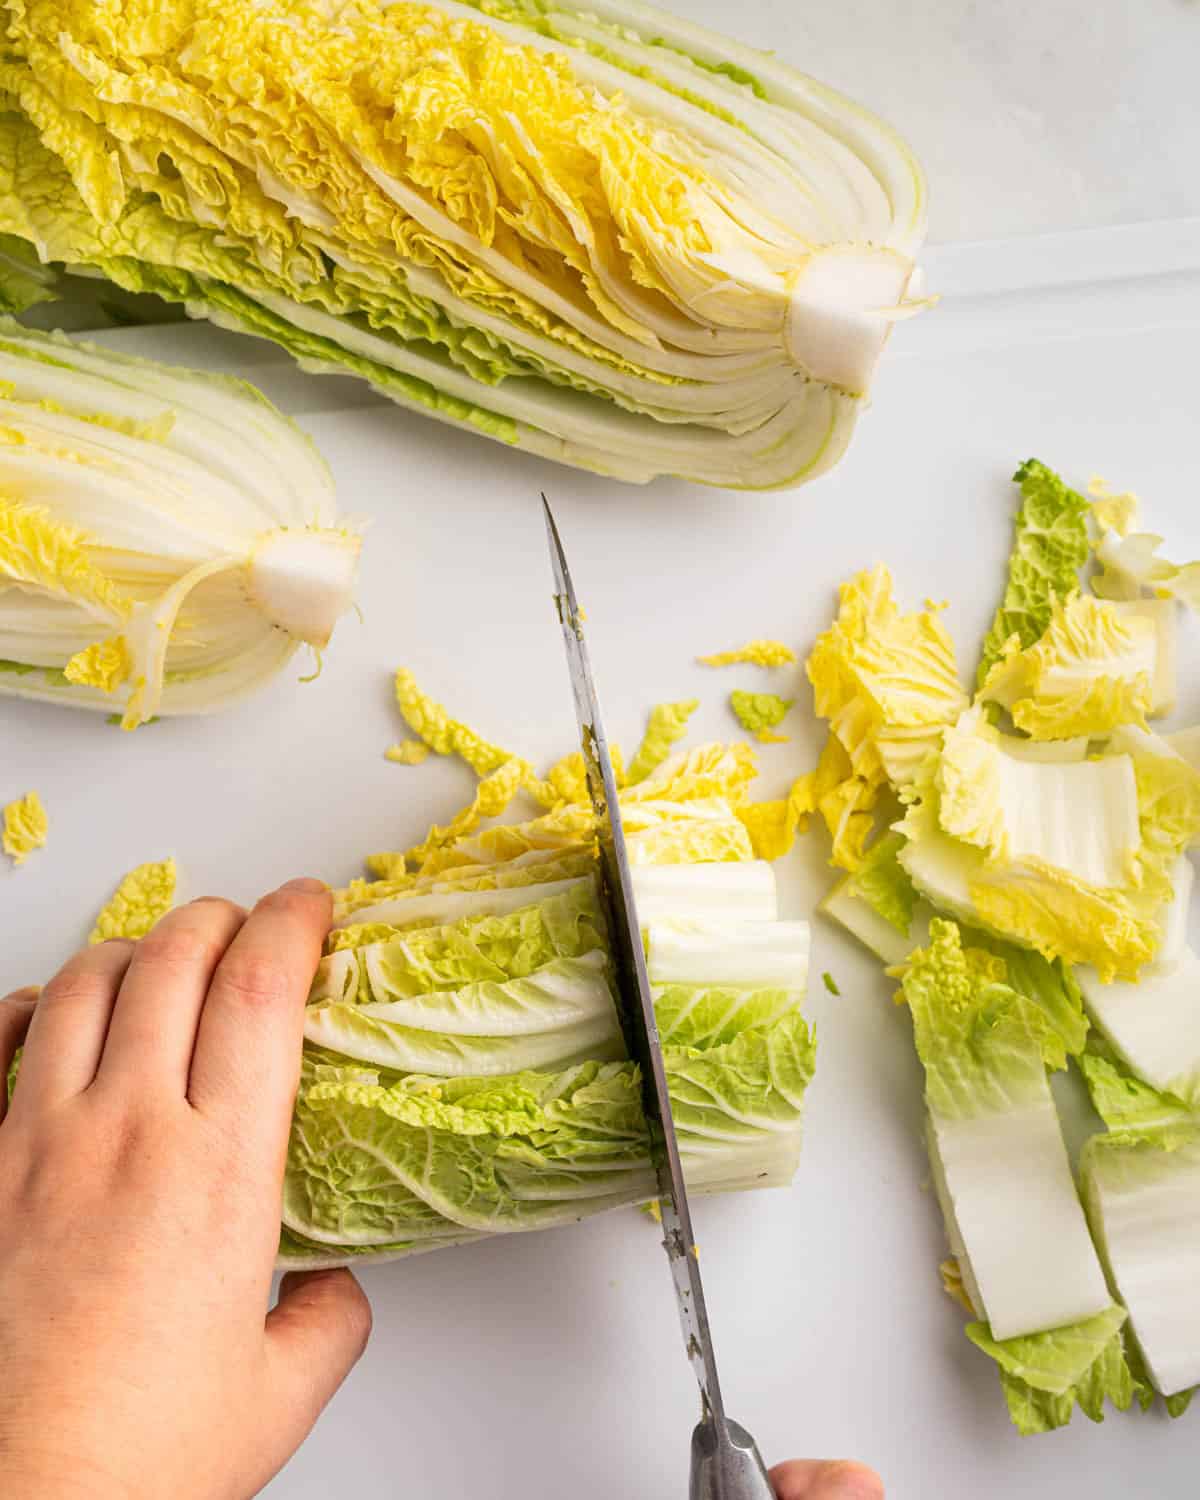
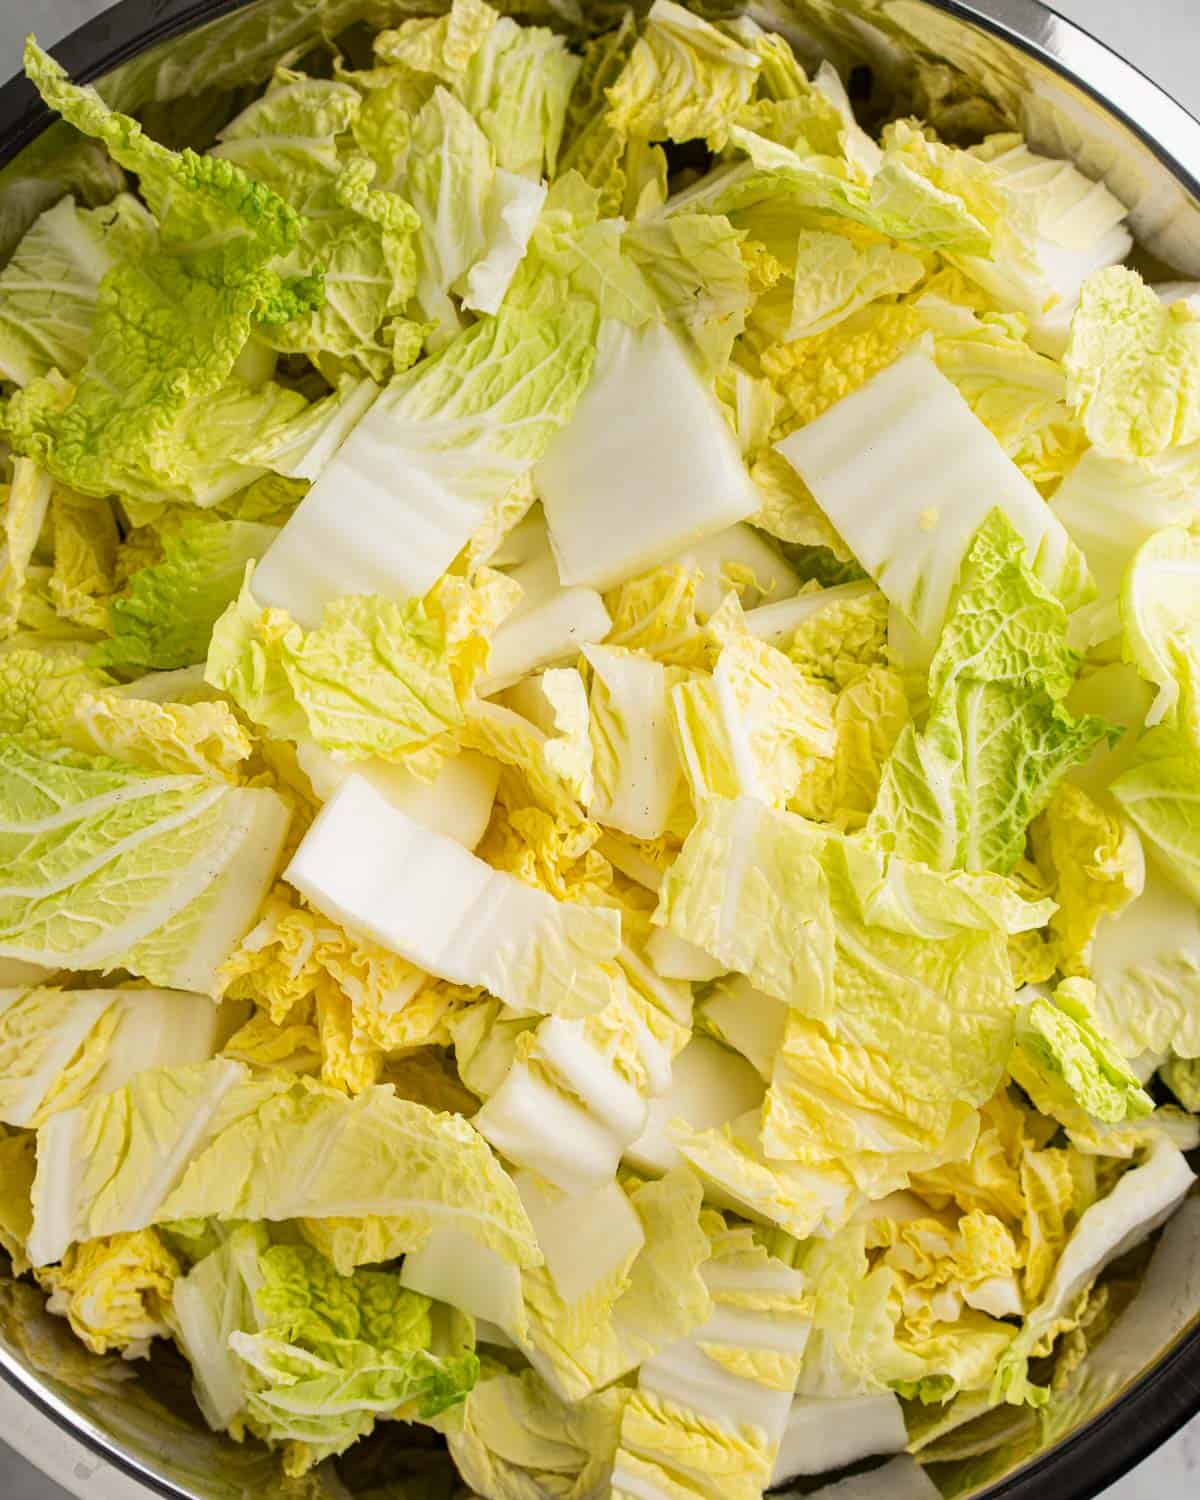
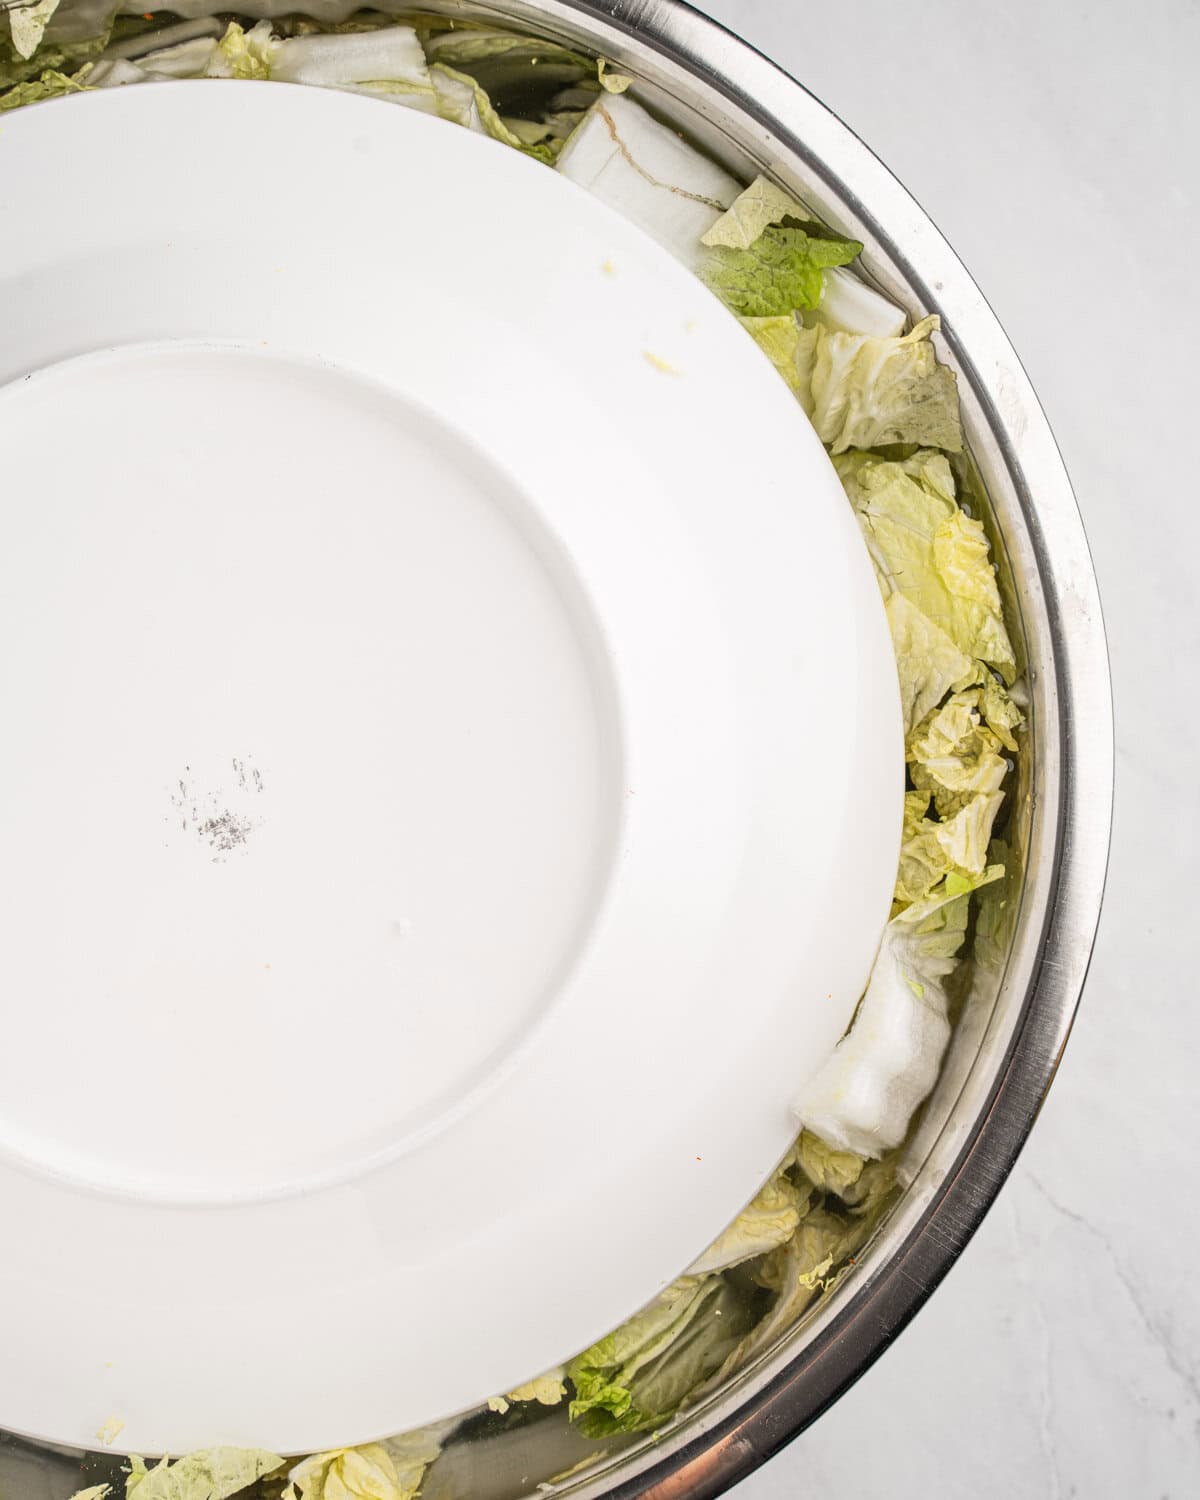
- Soak the cabbage – Cut the napa cabbage into pieces, then submerge it in a salt-water brine for 6–8 hours (or overnight) until the leaves are softened. Rinse thoroughly several times with cold water to remove excess salt, then drain well. Gently squeeze out any remaining water from the leaves and spread the cabbage out to dry before seasoning.
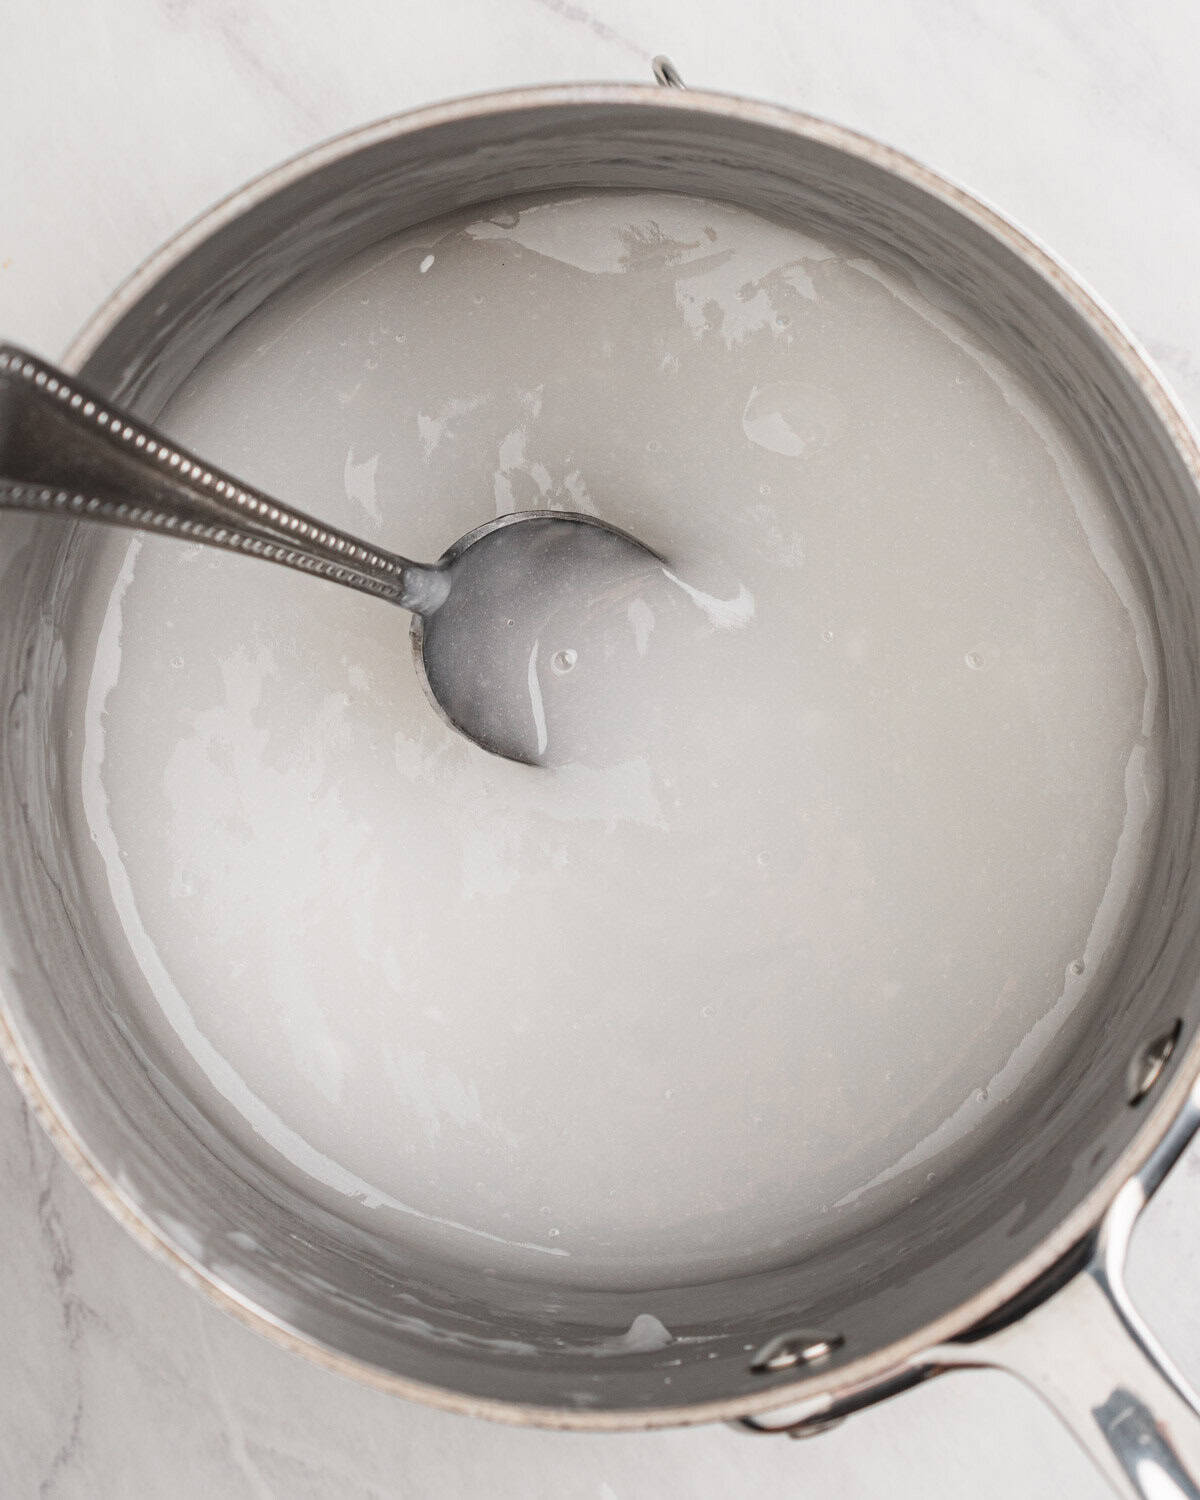
- Make the rice paste – Cook sweet rice flour with water until thick, then cool.
- Blend the seasoning paste – In a blender, combine rice paste, gochugaru, fish sauce, fermented shrimp, garlic, ginger, onion, radish, apple/pear, sugar, and salt. Blend until smooth.
- Add the veggies – Stir in carrots, and chives (or green onions) so they’re coated with the seasoning paste.
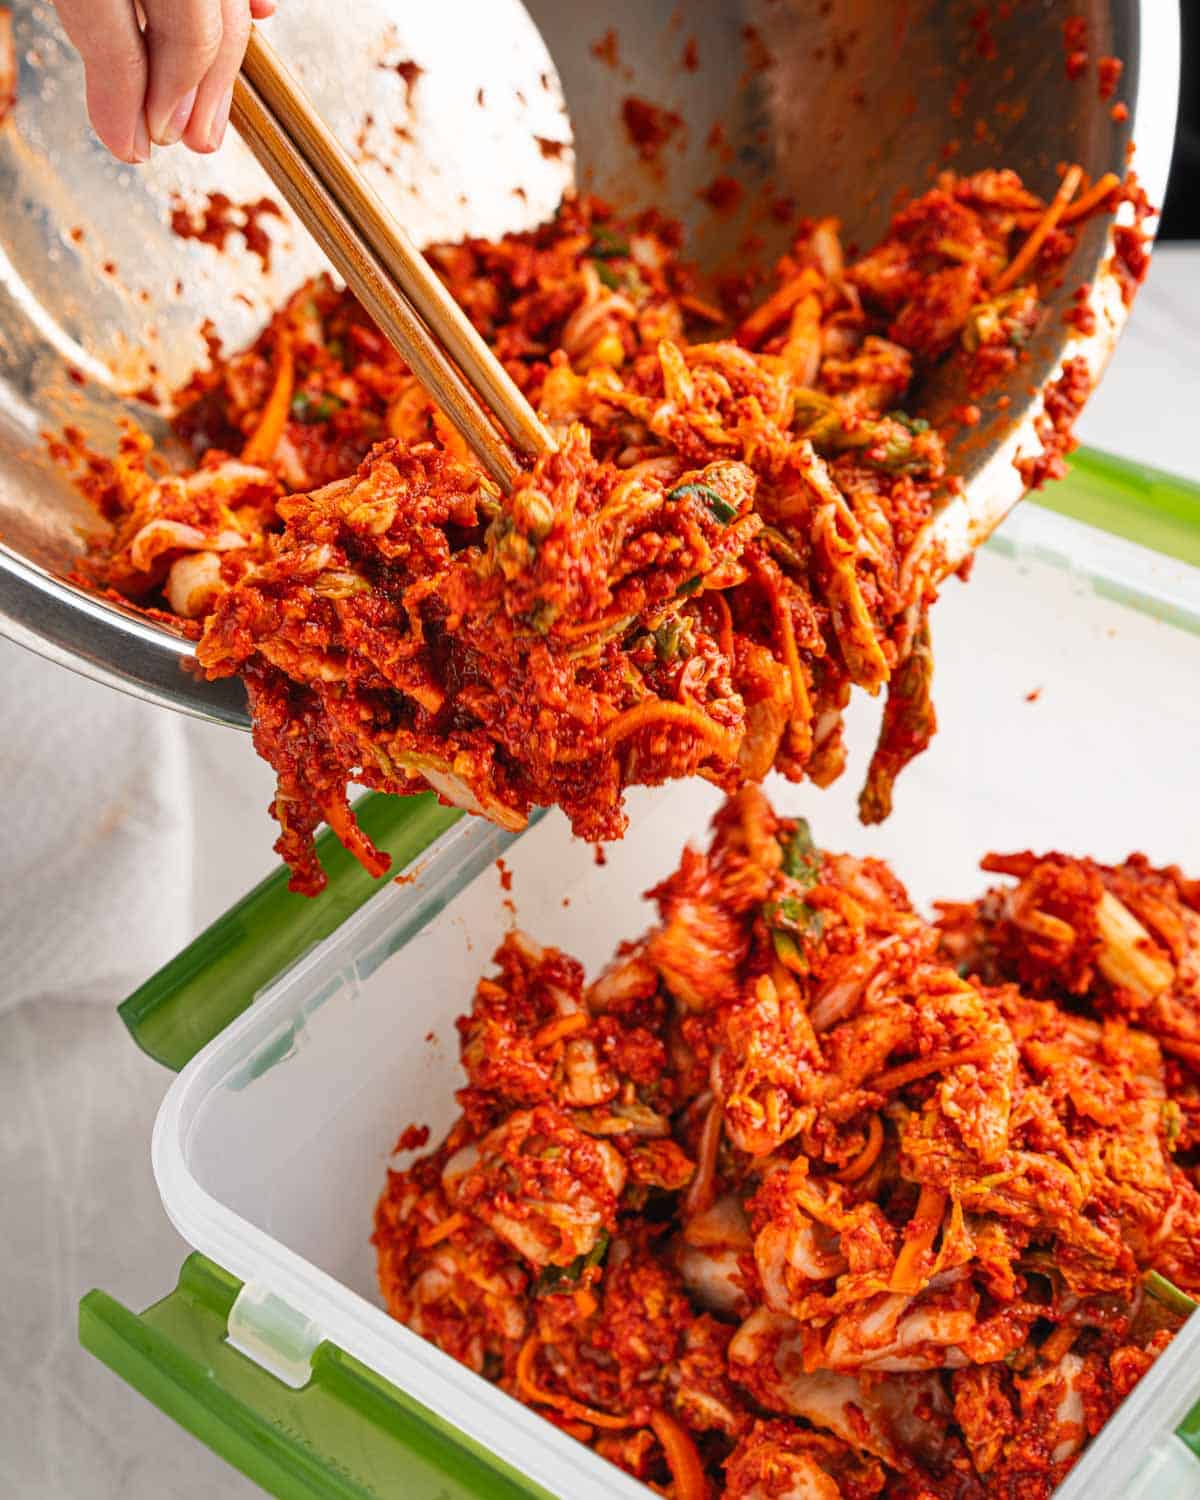
- Massage into cabbage – Wearing gloves, rub the paste onto each cabbage piece so everything is coated.
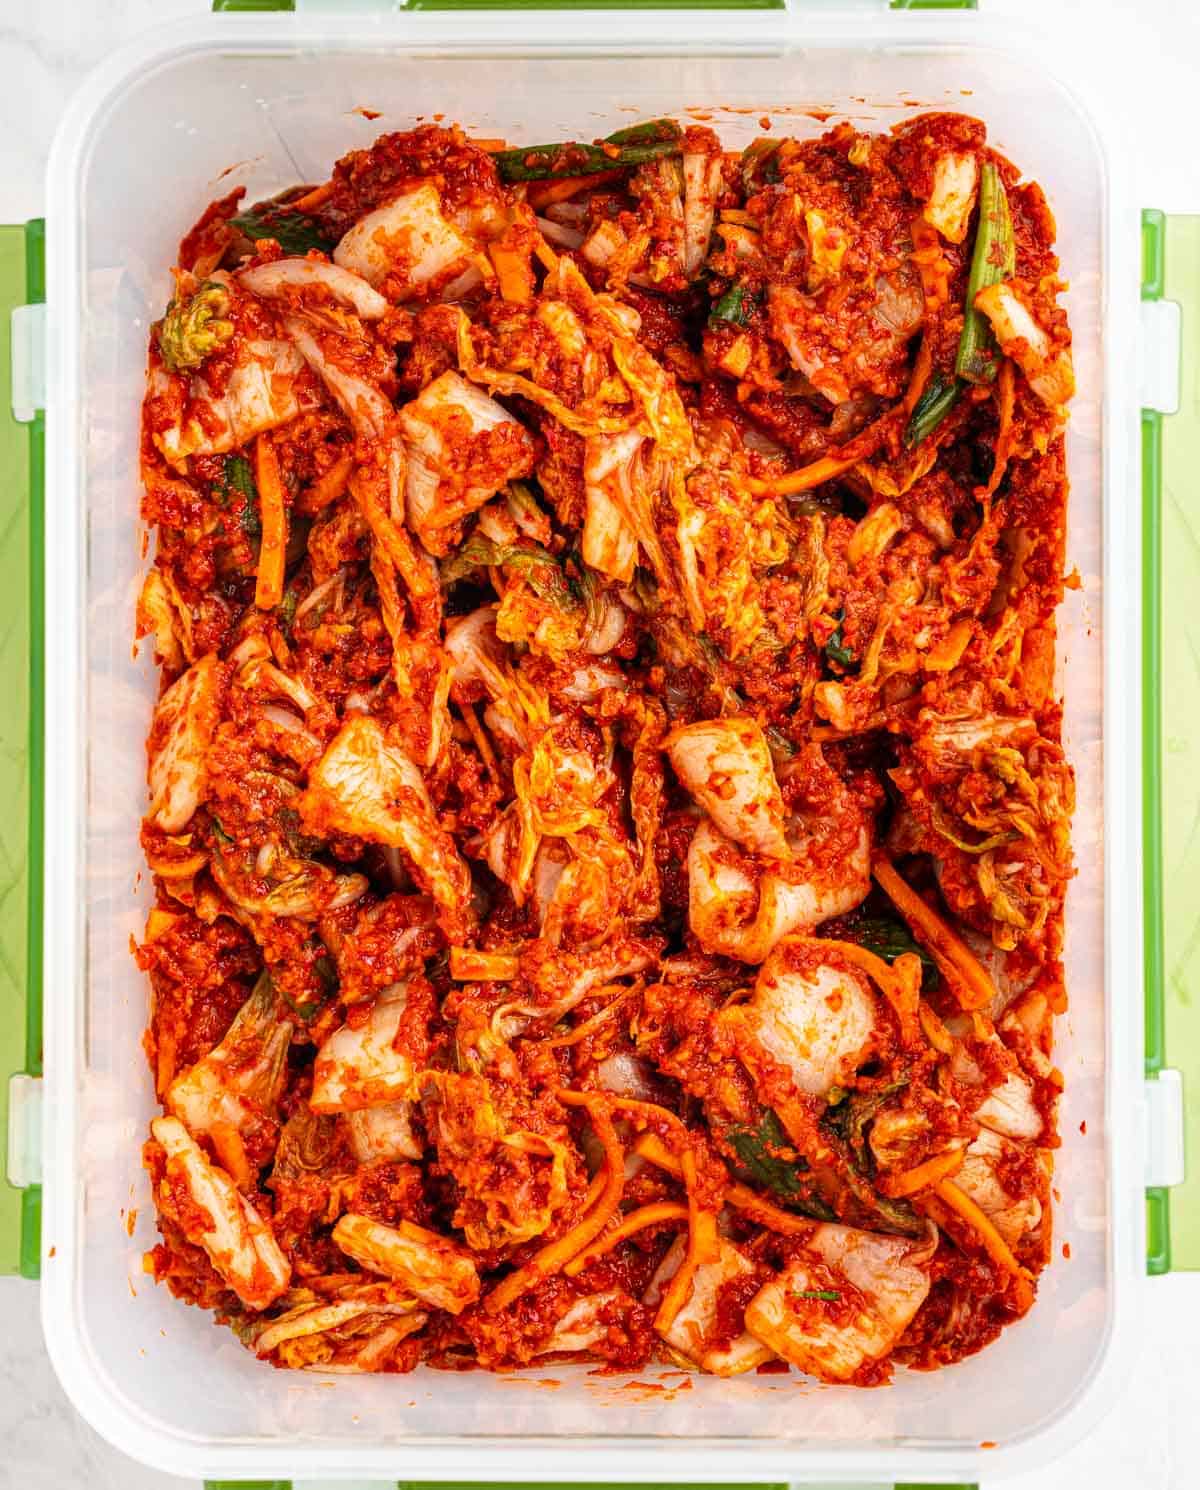
- Pack into a large storage container or jars – Press the mixture into a clean container, leaving space at the top.
- Ferment – Leave the container at room temperature for 1–2 days, until you see bubbles and smell tangy fermentation. Then refrigerate.
Tips for Success
✔️ Make it mild: Use less gochugaru if you want a kid-friendly version. You can always add more spice later.
✔️ Use gloves: The chili paste can stain your hands (and it’s not fun if you rub your eyes).
✔️ Batch it: Double the recipe if you have the fridge space—kimchi lasts for months.
✔️ Don’t worry if it bubbles: That’s the good bacteria at work.
How to Store Kimchi
After packing the kimchi, leave the container at room temperature for 1–2 days to start the fermentation process. Once it begins to bubble and develop a tangy aroma, move it to the fridge.
If you know you won’t be eating it right away, you can skip the room-temperature step and ferment it slowly in the fridge from the start; it’ll just take longer to develop flavor.
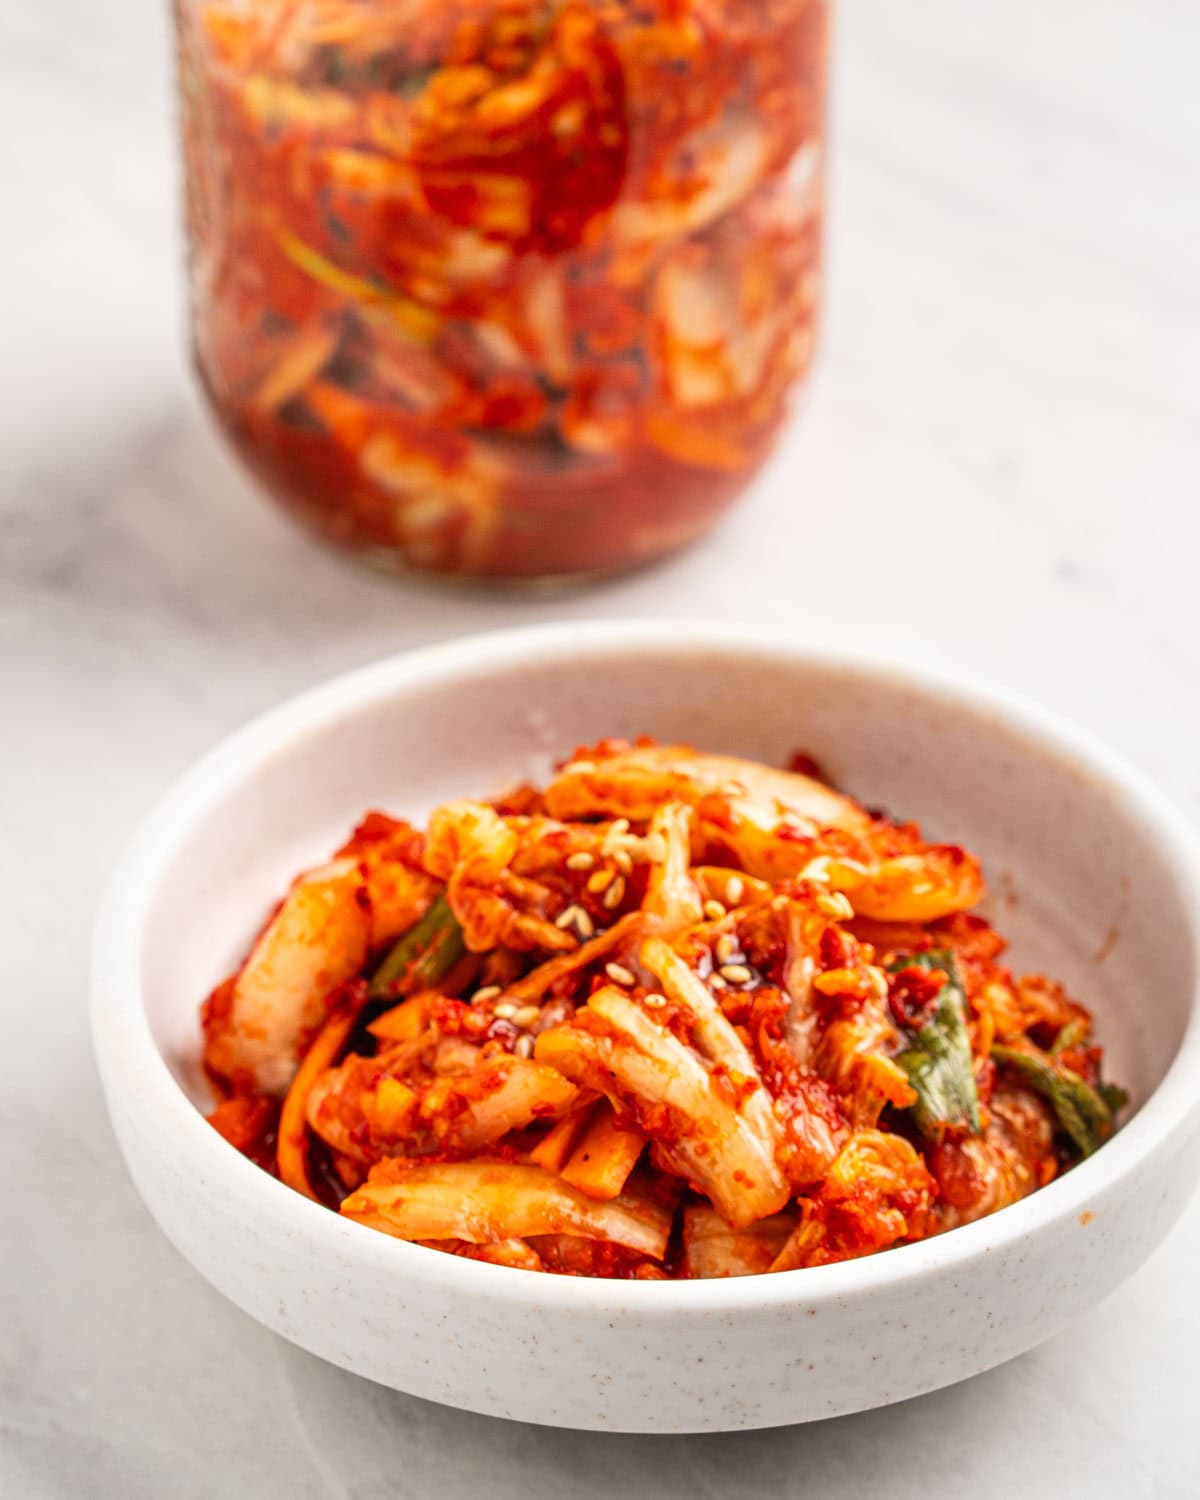
Fridge: Store kimchi in airtight jars for up to 3 months. The flavor will deepen and become more sour over time.
Too tangy? Don’t toss it! Over-fermented kimchi is perfect for cooked dishes like kimchi fried rice, kimchi jjigae (stew), or even a kimchi grilled cheese.
Homemade Kimchi, Your Way
Making kimchi at home is not just doable; it’s rewarding. You’ll get crunchy, flavorful kimchi without the additives or price tag of store-bought, and you can tweak it exactly to your family’s taste. It’s one of those “do the work once, enjoy it for weeks” recipes that saves time later.
RECIPE

Homemade Kimchi Recipe
Ingredients
- 2 napa cabbages
- 16 cups water (to soak)
- 1 cups korean coarse salt (for salting cabbage)
Kimchi Seasoning
- 2 tablespoons glutinous rice flour (sweet rice flour)
- 1½ cups water
- 1½ cups gochugaru (Korean coarse chili flakes)
- 1 tablespoon salt (use less or omit if you prefer a milder flavor)
- 4 tablespoons fish sauce
- 2 tablespoons salted shrimp (saeujeot)
- 4 cloves garlic
- 1-2 inch piece of ginger
- 1 large yellow onion, quartered
- 1 Korean radish or daikon radish, peeled and cubed
- 1 apple or pear, peeled and cubed
- 2 tablespoons sugar
- 2 carrots, cut into matchsticks
- 1 bunch Korean chives (or substitute with green onions), cut into 2-inch pieces
Instructions
Prep the Cabbage
- Cut the napa cabbage lengthwise into quarters. Remove the core and cut each quarter into 1-inch pieces.
- Dissolve 1 cup Korean coarse salt into 16 cups water (or enough to cover the cabbage). Soak cabbage in the brine, making sure each leaf gets salted. Weigh down with a plate if needed.
- Soak for 6–8 hours (or overnight), turning occasionally. Rinse 2–3 times with cold water, drain well, and squeeze handfuls of cabbage gently to remove excess water.
Make the Rice Paste
- In a saucepan, whisk 2 tablespoons glutinous rice flour with 1½ cups water. Cook over medium heat, stirring constantly, until it thickens into a smooth paste. Remove from heat and let cool completely.
Make the Kimchi Seasoning
- In a blender or food processor, combine the cooled rice paste, gochugaru, fish sauce, fermented shrimp, garlic, ginger, onion, radish, apple/pear, sugar, and 1 tablespoon salt. Blend until a thick red paste forms.
- Transfer to a bowl and stir in carrots, and chives (or green onions).
Mix with the Cabbage
- Wearing gloves, gently rub the seasoning paste into each cabbage leaf, making sure everything is well coated.
- Pack the kimchi tightly into clean jars or containers, pressing down to remove air pockets. Leave 1–2 inches of space at the top.
Ferment
- Leave the jars at room temperature for 1–2 days (depending on how warm your kitchen is), until you start to see bubbles and smell tangy fermentation.
- Transfer to the fridge, where it will continue to develop flavor. Kimchi is best after at least a week and keeps for months.
Notes
- Fermentation time: Shorter fermentation = fresher, crunchier kimchi. Longer fermentation = stronger, tangier flavor.
- Spice level: Adjust the gochugaru to taste. 1½ cups is classic, but you can use less if you want it milder.
- Storage: Kimchi can last for months in the fridge and will only get more flavorful.