Homemade Vietnamese Baguette (Banh Mi Bread)

This homemade Vietnamese baguette has the light, airy inside and thin, crisp crust you want for banh mi. The texture is soft enough for all of the fillings, but still sturdy enough to hold everything together.

The dough is kneaded until smooth and elastic, shaped into small baguettes, then baked with steam to help the loaves rise and develop that thin crust. The crust will naturally soften as the bread cools, but a few minutes back in the oven will crisp it right up again.
Use these baguettes for Banh Mi Thit Nuong, Xiu Mai, or any of your favorite banh mi fillings. Leftover bread also works really well for Vietnamese Shrimp Toast.
What Makes Vietnamese Baguette Different?
Vietnamese baguettes are lighter and softer than a traditional French baguette. The inside is airy, and the crust is thinner instead of thick and chewy.
That texture works especially well for banh mi because the bread doesn’t overpower the fillings. You still get a little crunch from the crust, but the baguette compresses easily when you take a bite.
Banh mi bread has roots in the French baguette, which was introduced to Vietnam during the French colonial period. Over time, Vietnamese bakers adapted the bread into the lighter baguette commonly used for banh mi today.
Tools That Help
You don’t need a lot of special equipment, but a few tools make the process easier and more consistent.
- A digital thermometer helps you check the water temperature before adding the yeast.
- A kitchen scale is the most accurate way to measure flour, especially for bread.
- A baguette pan helps the dough hold its shape as it proofs and bakes.
- A sharp knife or baker’s lame makes it easier to score the baguettes cleanly.
- A food-grade spray bottle is useful for misting the bread before and during baking.
What Matters Most for This Dough
Bread flour: Bread flour has more protein than all-purpose flour, which helps create enough structure for a light, airy loaf. For the most consistent results, I recommend weighing it instead of measuring by volume.
Egg: The egg helps give the bread a softer, lighter crumb and also makes the dough easier to work with. Egg yolks contain lecithin, a natural emulsifier that can help with dough structure and gas retention, so it has some of the same benefits you get from a dough improver without being the same thing as a commercial bread improver. Bring the egg to room temperature before mixing it into the dough.
Yeast: I use instant yeast, but I still mix it with the warm water and sugar first so I can make sure it’s active before adding it to the dough.
Water temperature: Aim for about 100–115°F. Water that’s too hot can damage the yeast, and very cool water will slow down the rise.
Steam: Steam helps the baguettes expand during the first part of baking and gives the bread a thinner crust. The water tray and misting step are both important here.
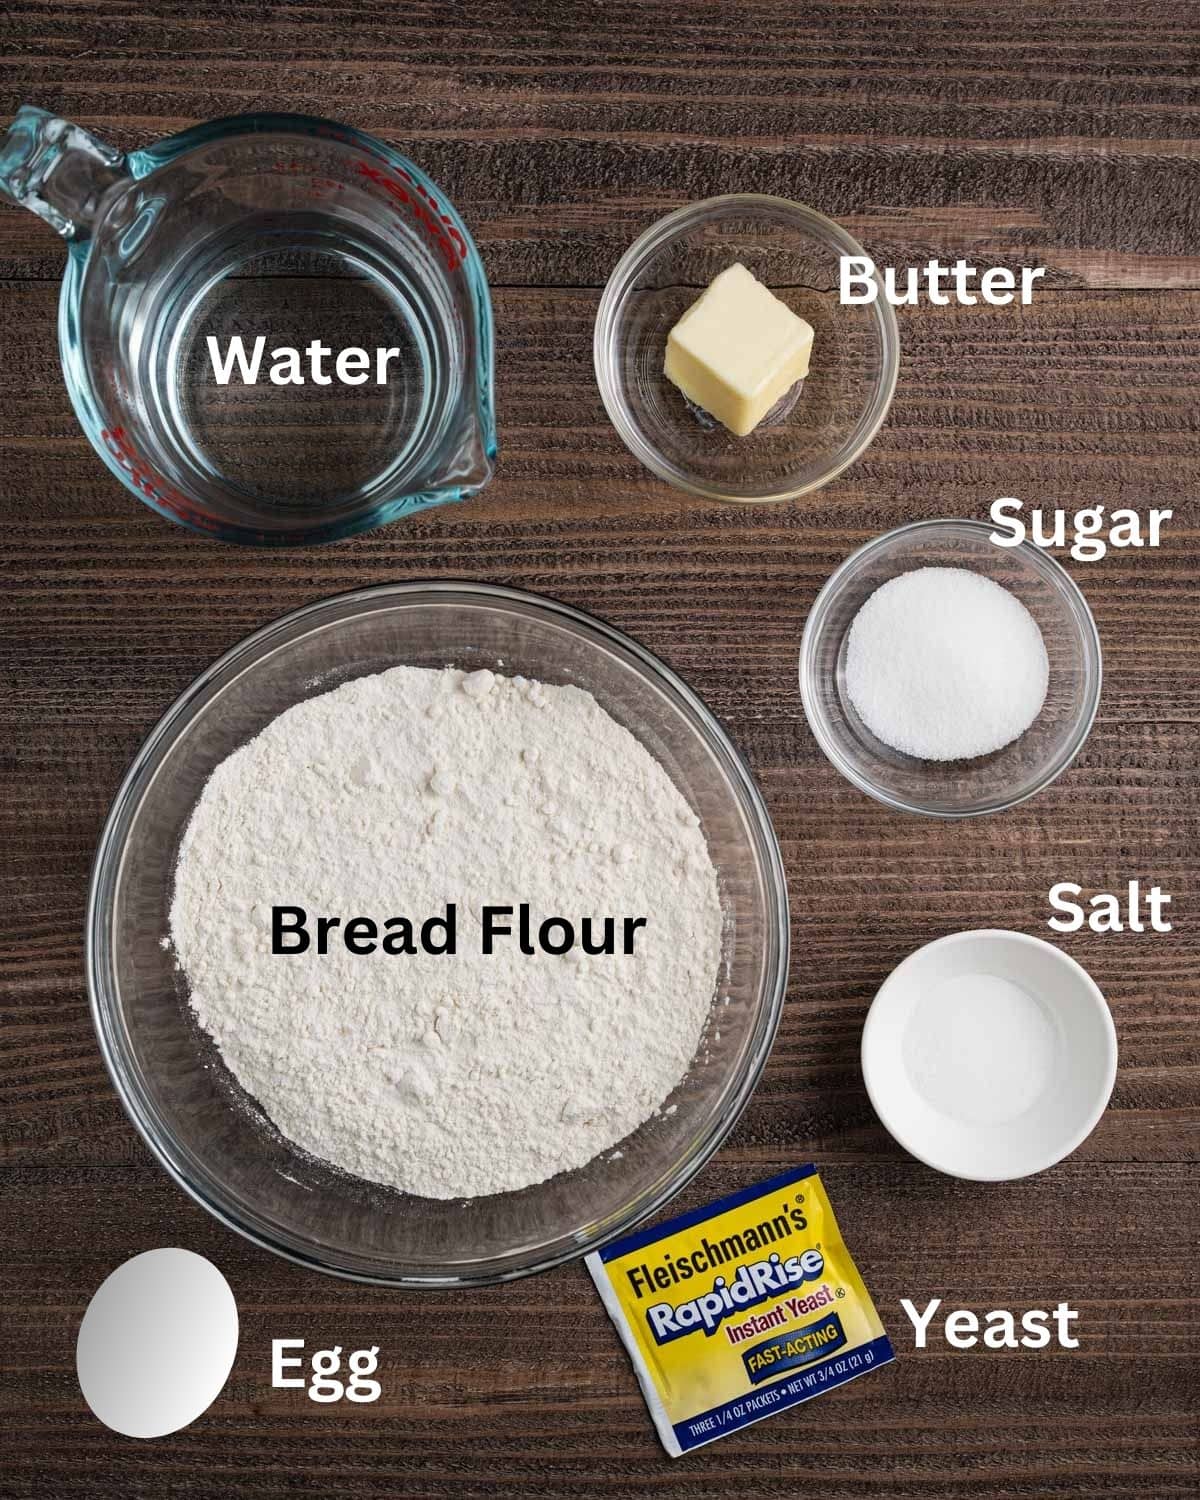
Please scroll ⬇️ to the recipe card for the full ingredient amounts and instructions.
How to Make Vietnamese Baguette
Start by bringing the egg to room temperature and measuring your flour. I recommend using a kitchen scale if you have one because even a little too much flour can make bread heavier.
Warm the water to about 100–115°F, then stir in the yeast and sugar. Let it sit for a few minutes. You should see some foam forming on top, which tells you the yeast is active.

Add the bread flour, salt, melted butter, and egg to the bowl of a stand mixer. Mix briefly, then pour in the yeast mixture. Knead with the dough hook for about 10 minutes, until the dough looks smooth and elastic.


The dough may feel a little sticky at first. Try not to add extra flour unless you really need it. As the dough kneads and the gluten develops, it should become smoother and easier to handle.
Transfer the dough to a lightly oiled bowl, cover it, and let it rise in a warm place for about 1 hour, or until it has doubled in size.


Once the dough has risen, divide it into 6 equal pieces. I like to weigh them so the baguettes bake at about the same rate.
Gently flatten or roll each piece of dough into a triangle, with the pointed end facing you. Starting at the point, roll the dough toward the wide edge. As you roll, gently hold the two outer corners of the wide edge and pull them slightly outward to help lengthen the baguette. Keep rolling until the pointed end reaches the base of the triangle, then gently roll the loaf back and forth to smooth the seam and taper the ends.


Place the shaped baguettes on a baguette pan, leaving a little space between them. Score each one at a 45-degree angle, then let them rise uncovered for about 45 minutes, or until they look noticeably puffy.

Toward the end of the second rise, preheat the oven to 425°F. Place a pan of water on a lower rack to create steam.
Just before baking, lightly mist each baguette with water. Bake on the upper rack for 15–18 minutes. After about 4 minutes, open the oven briefly and mist the baguettes again.
Remove the water tray about 10 minutes before the bread is finished so the crust has time to dry and crisp.
Let the baguettes cool slightly before slicing. The crust will be crisp when they first come out of the oven, then soften as the bread cools.


Tips for Light, Airy Banh Mi Bread
✔️ Measure the flour by weight if you can. Too much flour is one of the easiest ways to end up with dense bread. If you’re using measuring cups, spoon the flour into the cup and level it instead of scooping directly from the bag.
✔️ Make sure the yeast is active. After a few minutes in the warm water and sugar, you should see some foam on top. If nothing happens, your yeast may no longer be active.
✔️ Give the dough enough time to rise. The exact time can change depending on the temperature of your kitchen. Look at the dough instead of relying only on the clock. The first rise should roughly double in size, and the shaped baguettes should look noticeably puffy before baking.
✔️ Don’t add too much extra flour. The dough can feel sticky early on, but it becomes smoother as it kneads.
✔️ Be gentle when shaping. You don’t need to press every bit of air out of the dough. Gentle shaping helps keep the inside lighter.
✔️ Don’t skip the steam. The water tray and light misting help the baguettes expand and develop a thinner crust.
✔️ Score the baguettes before baking. This gives the dough a controlled place to expand in the oven instead of splitting wherever it wants.

Why Did My Banh Mi Bread Turn Out Dense?
Dense bread can happen for a few different reasons.
First, check your flour measurement. Adding too much flour makes the dough heavier and can limit how much it rises.
It can also happen if the dough didn’t proof long enough. Your kitchen temperature makes a big difference, so the dough may need more than the suggested time if your house is cool.
Make sure your yeast is active too. You should see some foam after mixing it with the warm water and sugar.
Finally, try not to handle the dough too aggressively when shaping. You want to keep some of the air that developed during the first rise.
Why Are My Baguettes Small or Flat?
The shaped baguettes should look noticeably puffier before they go into the oven. They may not always double exactly, but they shouldn’t still look tight or dense.
If they haven’t risen much after 45 minutes, give them more time. Proofing can take longer in a cooler kitchen.
A baguette pan also helps. It supports the dough during the second rise and baking so the baguettes rise upward instead of spreading out.
Why Isn’t My Crust Crispy?
The crust should be crisp when the bread first comes out of the oven, but it will naturally soften as the baguette sits.
If the crust never gets crisp, make sure you’re using steam at the beginning of baking and removing the water tray toward the end. The baguettes also need enough time in the oven to develop some color.
If the bread has already cooled and the crust is soft, put it back in a 350°F oven for about 5–6 minutes. It crisps back up really well.
Can I Use All-Purpose Flour?
You can, but I prefer bread flour for this recipe.
Bread flour has more protein, which gives the dough more structure and helps create a lighter texture. All-purpose flour may give you a slightly softer, less airy loaf.
Can I Make the Dough Ahead?
Yes. If you want to make the dough ahead, refrigerate it after kneading and before the first rise.
Cover the dough tightly and refrigerate it overnight. The next day, let it sit at room temperature until it becomes puffy, then continue with shaping, the second rise, and baking.
I haven’t tested freezing the raw dough, so I recommend freezing the baked baguettes instead.
How to Store and Reheat Banh Mi Bread
Banh mi bread is best the day it’s baked, especially if you want the crust crisp.
The crust will naturally soften as the baguettes cool. That’s normal for homemade bread and doesn’t mean anything went wrong.
If you’re serving the bread later, reheat it in a 350°F oven for about 5–6 minutes. The outside will crisp back up and the inside will warm through.
For short-term storage, keep the bread at room temperature for up to 2 days. If you need to keep it longer, freeze the cooled baguettes in an airtight freezer bag or wrap them well and freeze for up to 2 months.
You can reheat the baguettes straight from frozen in the oven until warmed through and crisp again.
For a classic sandwich, fill the bread with grilled pork, cucumber, cilantro, mayonnaise, and Pickled Carrots and Daikon. You can also use Vietnamese Lemongrass Chicken for another easy filling.
If you make this Vietnamese Baguette, I’d love to hear how it turned out! Leave a comment and rating below.
RECIPE

Vietnamese Baguette (Banh Mi Baguette)
Equipment
- Stand mixer with dough hook
- Baker's lame or sharp knife
- Food-grade spray bottle
Ingredients
- 1 cup + 2 tablespoons warm water (100℉- 115℉)
- 1 packet instant yeast, 7g or ¼ ounce, about 2 teaspoons
- 2 teaspoons (8g) granulated sugar
- 4 cups (500g) bread flour
- 2 teaspoons (10g) salt
- 2 tablespoons unsalted butter, melted
- 1 large egg, room temperature
Instructions
- Prep the ingredients. Bring the egg to room temperature. Weigh the flour for the most accurate measurement. If using measuring cups, spoon the flour into the cup and level off the excess.
- Activate the yeast. Warm 1 cup + 2 tablespoons water to 100–115°F. Stir in the yeast and sugar, then let the mixture sit for a few minutes until foamy.
- Mix and knead the dough. Add the bread flour, salt, melted butter, and room-temperature egg to the bowl of a stand mixer fitted with the dough hook. Mix on low speed until just combined.Pour in the yeast mixture and continue mixing on medium speed for about 10 minutes, until the dough is smooth and elastic.If mixing by hand, combine the flour, salt, butter, and egg in a large bowl. Add the yeast mixture, then knead on a lightly floured surface for about 10–12 minutes, until smooth and elastic.
- First rise. Lightly oil a large bowl and place the dough inside. Cover with plastic wrap or a clean kitchen towel and let it rise in a warm place for about 1 hour, or until doubled in size.
- Divide and shape. Divide the dough into 6 equal pieces, about 135 g each.Gently flatten each piece into a triangle with the pointed end facing you. Starting at the point, roll the dough toward the wide edge. Hold the two outer corners of the wide edge and gently pull them outward as you roll to help lengthen the loaf. Continue rolling until the point reaches the base, then gently roll the shaped dough back and forth to smooth the seam and taper the ends.
- Second rise. Place the shaped dough on a baguette pan, leaving about 1 inch between the loaves.Score each baguette at a 45-degree angle with a baker’s lame or sharp knife.Let the baguettes rise uncovered in a warm place for about 45 minutes, or until noticeably puffy.
- Prepare the oven. Preheat the oven to 425°F. Position one rack about one-third from the top of the oven and another rack about 4 inches below it.Place a metal baking tray on the lower rack and carefully add water to create steam.
- Mist and bake. Just before baking, lightly mist each baguette with water, about 4 sprays per loaf.Place the baguette pan on the upper rack with the water tray underneath.Bake for 15–18 minutes total. After about 4 minutes, briefly open the oven and lightly mist the baguettes again.Remove the steam tray about 10 minutes before the bread is finished baking so the crust has time to crisp.
- Cool. Remove the baguettes from the oven and let them cool slightly before slicing.
Notes
- Weigh the flour for the most consistent results.
- Use room-temperature egg.
- Keep the water around 100–115°F when activating the yeast.
- The dough may feel slightly sticky at first. Avoid adding unnecessary flour.
- Proofing time can vary depending on room temperature. Look for the dough to double during the first rise and become noticeably puffy during the second.
- A baguette pan helps the loaves keep their shape and rise upward.
- Steam is important for a thinner crust.
- The crust will naturally soften as the baguettes cool. Reheat at 350°F for about 5–6 minutes to crisp it again.
- I recommend freezing baked baguettes instead of raw dough.






I am going to make these. But before I do, can you help me know which oven setting i should use? Fan Forced or Convection or other….
Thanks for the detailed recipe and tips👍
Hi, Genni! I use the regular bake setting without the fan for this recipe. Fan-forced and convection settings circulate hot air, so if you use either one, reduce the temperature by about 25°F (15°C) and check the bread a few minutes early. Let me know how it turns out!
Where did new recipe go??
I loved it..
I’m glad you enjoyed that version! I recently switched the main recipe back, but here is the version you were looking for:
Ingredients
1½ cups (350 g) warm water, 100–115°F
1½–2 teaspoons (5–6 g) instant yeast
2 teaspoons (8 g) granulated sugar
4 cups (530 g) bread flour
1 teaspoon (6 g) salt
1 tablespoon unsalted butter, melted
Instructions
Mix the warm water, yeast, and sugar and let it sit for 3–5 minutes, until lightly foamy.
Combine the bread flour and salt. Add the yeast mixture and melted butter, then mix on low for 1–2 minutes, just until no dry flour remains. The dough will look shaggy and sticky.
Cover and let the dough rest for 10 minutes.
Mix again on low to medium speed for 3–4 minutes, just until the dough is cohesive, stretchy, soft, and slightly tacky. You don’t need to mix it until completely smooth.
Transfer the dough to a lightly oiled bowl, cover, and let it rise in a warm place for about 2 hours, until puffy, gassy, and jiggly. It does not need to fully double.
Divide the dough into 6 equal pieces, about 145 g each. Gently shape each piece into a baguette, trying not to press out all of the air.
Place the shaped baguettes on a baguette pan or parchment-lined baking sheet and let them rise uncovered for 35–40 minutes, until puffy. The dough should spring back slowly when gently pressed.
Preheat the oven to 450°F with a metal tray on the lower rack. Add hot water to the tray to create steam. Score each baguette at a 45° angle.
Bake for 16–18 minutes. Lightly mist the baguettes only if the surface looks dry. Remove the steam tray after the first 2–3 minutes so the crust can dry and crisp.
Let the baguettes cool for at least 10 minutes before slicing.
Ok- so I’ve made the original recipe before and it was phenomenal! I made the updated one today, I over proofed it (2hrs) and it turned out dense. Luckily it was early enough in the day I could restart and they were still not as fluffy and amazing.
Will try the original recipe again and then re-comment. Regardless the recipe is amazing!
Thank you for the feedback! I’ve heard the same from a few other readers, and after retesting both versions myself, I agree that the original recipe is more reliable. I’m going to be reverting the recipe back to the original version. I really appreciate you taking the time to make both and share how they turned out. Thank you!
Came out nice light and airy. I used it for Philly Cheese steak. Great recipe
Hi Cheryl, I’m happy you liked it! Using the bread for Philly cheesesteaks sounds delicious. Thanks for coming back to leave a review!
Can I make dough ahead and freeze or refrigerate until the day I want to bake it? What stage do I refrigerate or freeze the dough? Thanks
Hi Danny! You can refrigerate the dough immediately after kneading, before the first rise. Cover it tightly and refrigerate overnight, then let it sit at room temperature until it becomes puffy before shaping, proofing, and baking. I haven’t tested freezing the raw dough, so I recommend freezing the baked bread instead.
I’ve tried several recipes, and this one is the best. It really tastes like Vietnamese bánh mì. Thanks for sharing!
Hi, Ha! I’m so happy you liked it! It means a lot to hear that it’s similar to Vietnamese banh mi. Thanks for trying the recipe and coming back to leave a review!
Hi! I am super jazzed to try this! Finding proper Vietnamese baguette is the *one* thing standing in my way of banh mi at home. Before I attempt this though, is a baguette pan absolutely necessary? I would only be using it for banh mi sandwiches as I do not fancy traditional French baguette much.
Hi Jordan! Yes, I do think the baguette pan is necessary. It helps the dough hold its shape while proofing and baking. Without it, the dough will spread more and won’t rise the same way. The good news is that baguette pans are pretty inexpensive, and they’re definitely worth having if you think you’ll be making banh mi again.
These look delicious, so airy and crispy, just what I was looking for, I can’t wait to try this recipe.
Do you think they would turn out the same if I shaped them in a round shape? I make bread rolls for my husband to take for his lunch for work and thought he would enjoy these, but he likes round bread rolls.
Hi Maree! Thank you! I haven’t tested shaping them into rolls, but I think it should work. The texture may be slightly different since the shape affects how the bread rises and bakes, but I would still expect a light, airy roll with a nice crust. You may need to adjust the baking time a bit depending on the size of the rolls. If you give it a try, I’d love to hear how they turn out!
When they proof in the baking tray, they aren’t proofing into double the size. Does that mean I need to wait longer? They turn out thinner and small like a baguette.
Hi Jon! They don’t always fully double during the second proof, but they should look noticeably puffier and feel lighter. If they still look small and tight, I’d let them proof a bit longer. It can take more time depending on your room temperature.
A couple things to check:
– If your kitchen is cooler, they may just need extra time
– Make sure the first rise was fully done. The dough should be puffy and airy before shaping
– Make sure your yeast is active. It should get a little foamy when you first mix it
– Try not to overwork the dough when shaping so you keep those air bubbles
If they’re coming out thin, it usually means they were slightly underproofed. Give them a little more time next round and you should see a big difference!
Is it ok to remove the steam tray 2-3 minutes after putting the dough in the oven? Won’t the bread structure collapse?
Hi Eka! No, the bread shouldn’t collapse. By that point, the heat has already started setting the structure of the dough, and the steam has done its job of helping with oven spring and keeping the crust soft during the initial rise in the oven.
The reason I remove the steam tray after 2–3 minutes is to let the oven dry out so the crust can crisp up properly. If the steam stays in too long, the crust can end up softer and less crisp. Every oven is a little different, but I haven’t had issues with the bread collapsing using this method.
Thank you for explaining. I baked it with sourdough levain and use 5% coarse whole wheat. It is delicious. The crust came out soft but I will try it again. Overall, delicious bread. Thank you for sharing the recipe with detailed instructions. I wish I could share photo of my chicken lemon grass bahn mi here.
That sounds amazing! A chicken lemongrass banh mi on homemade sourdough bread sounds delicious!
The crust does tend to soften as the bread cools, even with my version. If I want that crispy crust back, I usually just pop it back into the oven for a few minutes and it crisps right up again. Thanks again for trying the recipe and sharing your results!
Do you use RapidRise and Instant yeast interchangeably? I have had things wildly over proof with the RapidRise, and I believe the instructions on the packet say to skip the first rise. Maybe you just watch the first rise really carefully? Thanks!!
Hi, Rachel! For this recipe, I use rapid rise/instant yeast interchangeably, and it’s been tested with two proof times. I still do both rises because that second proof is what helps give the bread its light, airy texture.
That said, proofing time can really vary depending on your kitchen temperature and even the brand of yeast. If your dough tends to overproof with RapidRise, I would definitely watch the dough more than the clock and go by how it looks. Once it’s visibly puffy and has roughly doubled, it’s ready for the next step. If your kitchen runs warm, the first rise may be quicker than what’s written. Hope that helps!
I don’t see any kneading in the method.
Do you just mix the ingredients, prove. Shape , bake?
Hi Donald! The full step-by-step is in the recipe card below the post if you want more detail. There isn’t a long traditional kneading step in this recipe. Instead, you mix the dough until it just comes together, let it rest for 10 minutes (this helps the gluten start developing), then mix again for about 4–5 minutes until it’s smooth, stretchy, and slightly tacky. After that, it goes through the first rise, shaping, a second rise, then baking with steam.
This bread is delicious with cold cuts. Turned out perfect the first time!
Hi Erica! That makes me so happy to hear. Glad the recipe worked out for you the first time!